-da0801079a650a2e.jpeg)
17 Year Anniversary Quotes: 110+ Funny, Romantic & Furniture Wishes (2026)
Mar, 12 2026
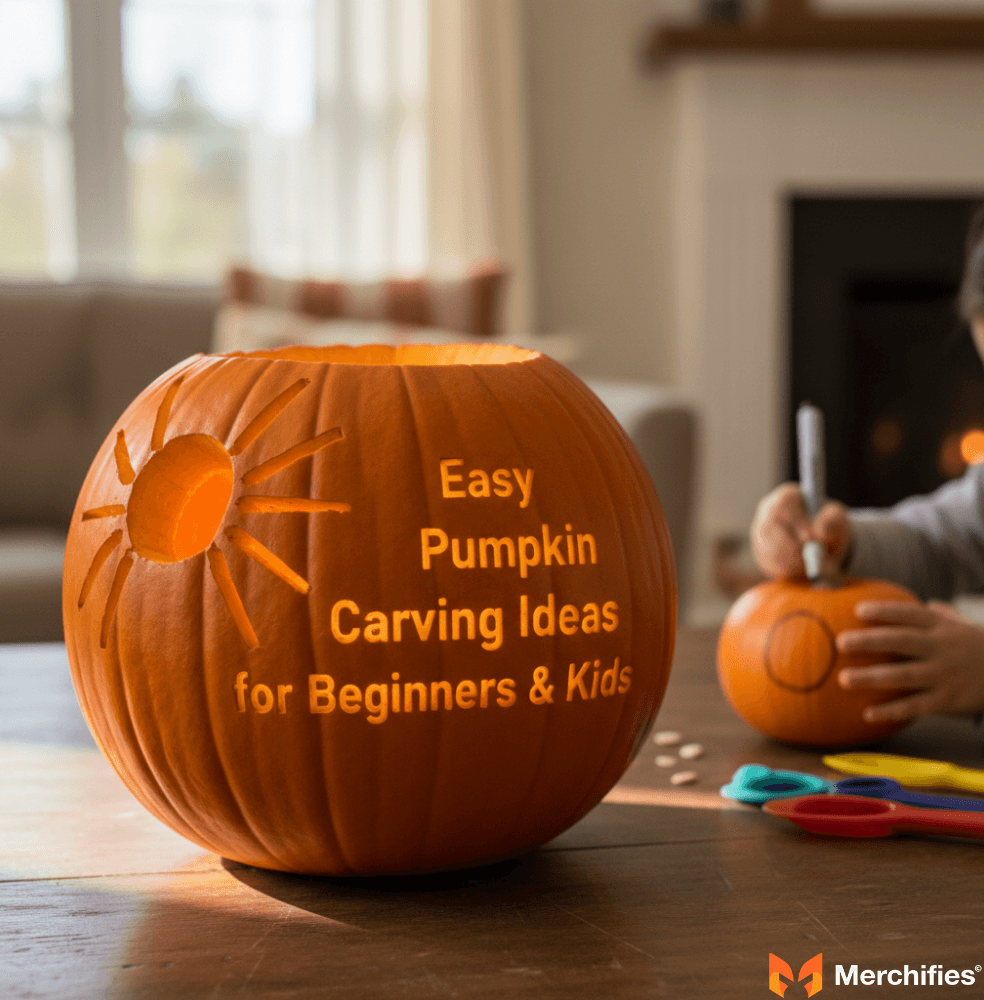
Pumpkin carving is a fun and creative way to celebrate Halloween, especially for beginners and kids who want simple yet exciting designs. Easy carving ideas help make the activity enjoyable, less messy, and perfect for family-friendly fall traditions. In this guide to easy pumpkin carving ideas, you’ll find beginner-friendly patterns, cute jack-o’-lantern faces, and creative designs that are safe and simple for kids to enjoy. Whether you’re carving your first pumpkin or planning a fun family activity, these ideas will help you create festive Halloween decorations with ease.

Halloween is all about spooky fun, crisp autumn air, and, of course, the enchanting glow of a jack-o'-lantern. If the thought of intricate carving makes you sweat, don't worry. This comprehensive guide is packed with simple halloween pumpkin carving ideas designed for beginners, kids, and anyone who wants to enjoy the season without the stress. We’ll show you how to create memorable, vibrant pumpkins that capture the true spirit of Halloween, making your home a festive beacon for trick-or-treaters. For more comprehensive decorating inspiration, check out our main Halloween Decorations Hub.
Simple carving is best for a stress-free Halloween because it prioritizes enjoyment and accessibility over perfection. Frankly, the obsession with overly intricate pumpkin designs often misses the point of the holiday. The goal should be fun, not a contest. Complex patterns, like highly detailed haunted houses or character portraits, can be incredibly frustrating to execute, especially with young, eager hands involved. Focusing on basic pumpkin carving ideas allows everyone, from toddlers to grandparents, to participate meaningfully without the pressure of precision. This approach reduces the likelihood of cracks, broken tools, and general carving fatigue, ensuring a more positive and collaborative experience for the whole family.

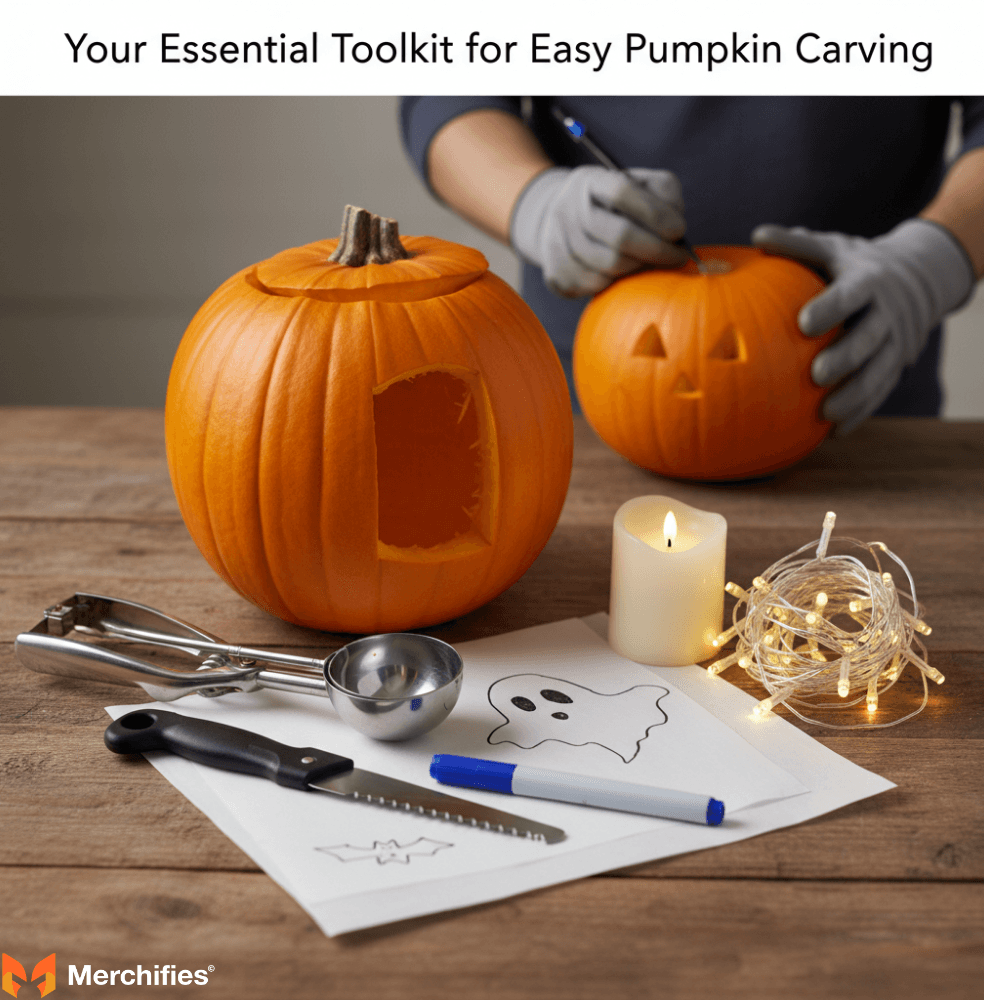
Getting started with pumpkin carving doesn't require a professional studio or a massive investment. In fact, a few key items are all you really need to bring your simple halloween pumpkin ideas to life. Having the right tools makes the process safer, more efficient, and ultimately more enjoyable, particularly for those new to the craft.
For beginners and kids, the must-have supplies are safety-focused and efficient. You'll definitely want a sturdy, serrated pumpkin carving saw – the small, fine-toothed ones found in most carving kits are ideal for making clean cuts without excessive force. A large metal scoop or a heavy-duty spoon is essential for efficiently removing pumpkin guts; a standard ice cream scoop, for example, makes quick work of clearing out seeds and stringy pulp. On top of that, a dry-erase marker is a game-changer for drawing designs directly onto the pumpkin because mistakes wipe away easily, unlike permanent markers. Finally, a reliable light source, such as an LED candle or battery-operated fairy lights, is crucial for illuminating your finished creation safely. In my experience, the cheap plastic carving knives that come in dollar store kits are often too flimsy; investing in a slightly better quality kit, like the Pumpkin Masters brand I've used since 2015, makes a huge difference in cutting ease and safety, preventing frustration and potential injuries.
Choosing the perfect pumpkin for your simple design is about finding one that’s healthy, stable, and appropriately sized. Look for pumpkins with smooth, unblemished skin, as bumps and soft spots can make carving tricky and lead to premature rot. A flat bottom is also key to ensure your pumpkin stands upright without wobbling, which is especially important for safety during the carving process. For easy designs for pumpkin carving, a medium-sized pumpkin (around 10-14 inches in diameter) offers ample surface area without being too cumbersome to handle. When selecting, give the pumpkin a gentle tap; a hollow sound usually indicates a ripe, healthy gourd, ready for its transformation into a festive jack-o'-lantern.
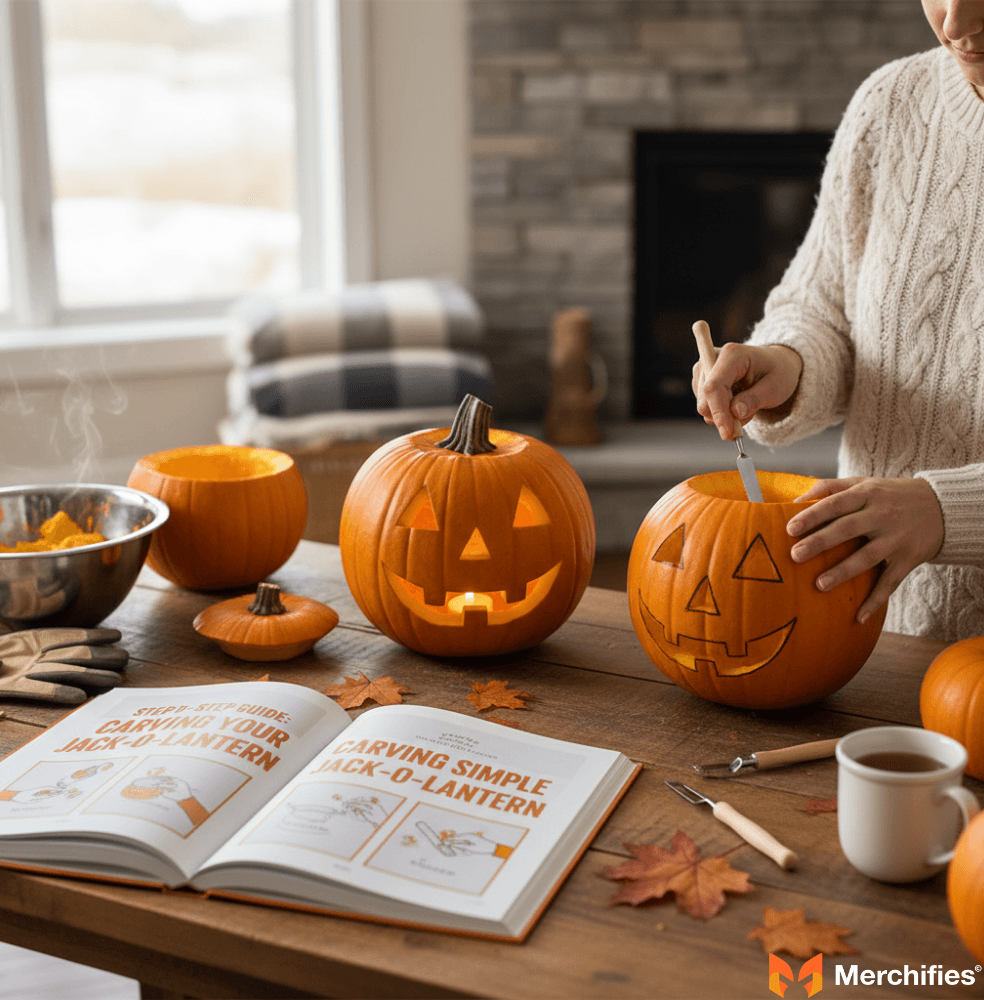
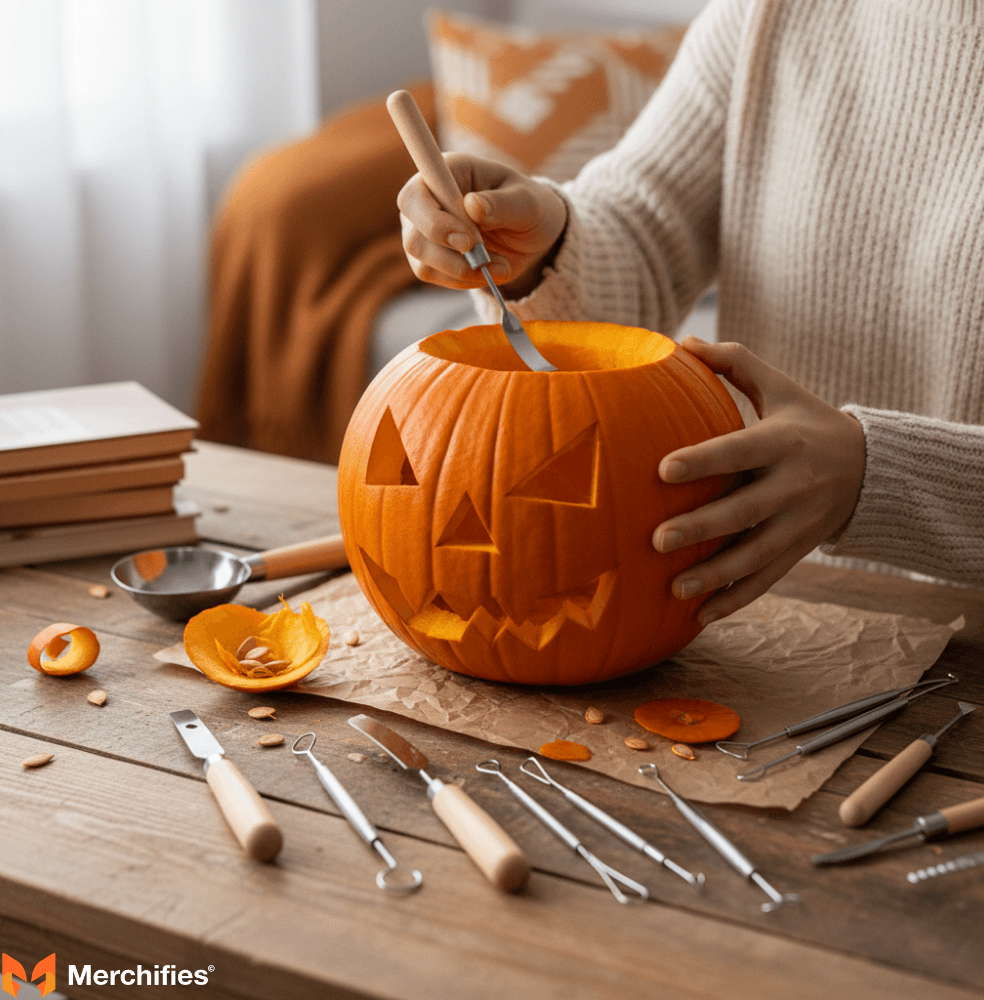
Carving a pumpkin doesn't have to be intimidating. By breaking it down into manageable steps, even first-timers can create impressive jack-o'-lanterns. This comprehensive guide will walk you through the entire process, ensuring a smooth and fun experience from start to finish.
Preparing your pumpkin involves cleaning it thoroughly and creating an access point for scooping. First, wipe down the pumpkin's exterior with a damp cloth to remove any dirt or debris from the patch. Next, decide where to cut your lid. While many people cut a circle around the stem, cutting a lid from the bottom of the pumpkin is often a smarter move; it creates a more stable base and makes it easier to place your lighting. Use your serrated pumpkin saw to cut a large, roughly circular or hexagonal opening, angling the blade inward slightly to create a ledge that will support the lid once it's replaced. After cutting, reach inside and pull out all the loose stringy pulp and seeds. A sturdy scoop or a large spoon works wonders for scraping the inside walls clean, aiming for about an inch of thickness. This thorough cleaning not only prevents premature rotting but also creates a smoother, brighter surface for light to shine through, enhancing your simple halloween pumpkin ideas.
Transferring your design with ease is crucial for successful easy pumpkin carving ideas. You can simply draw your design directly onto the pumpkin using a dry-erase marker, or use a stencil for more complex shapes. For beginners, using free templates is highly recommended. Simply print out your chosen template, tape it securely to the pumpkin, and then use a thumbtack or a small poking tool to create a series of closely spaced holes along the design lines. Once the pattern is transferred, remove the template and connect the dots with your dry-erase marker. If you're going freehand, start with simple shapes like triangles for eyes and a jagged line for a mouth, similar to the classic jack-o'-lantern in *The Legend of Sleepy Hollow* (1820 short story, many adaptations). Remember, precision isn't the goal; character and simplicity are.
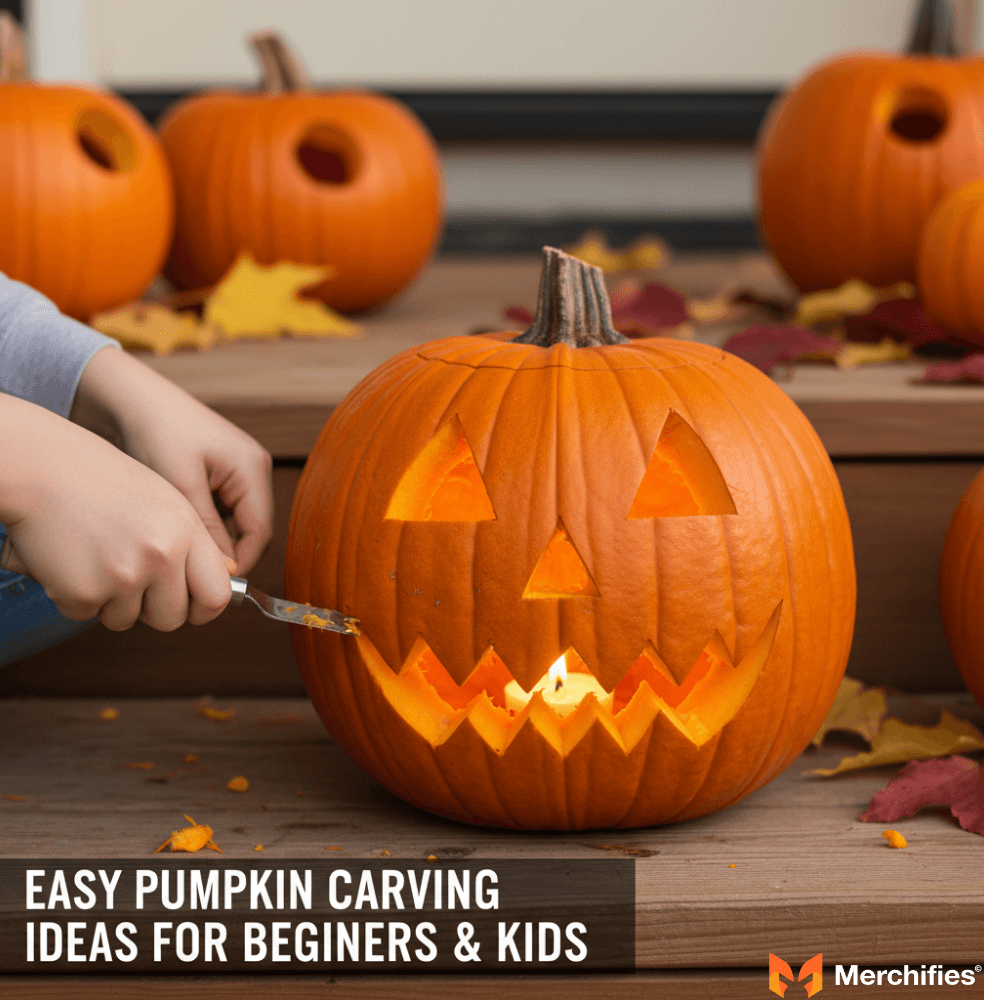
Mastering basic carving cuts for clean, simple lines is all about steady pressure and controlled movements. Hold your pumpkin carving saw like a pencil, with a firm but not rigid grip. Begin carving by slowly pushing the saw blade through the pumpkin skin along your marked lines. Use a gentle back-and-forth motion, allowing the saw's teeth to do the work rather than forcing the blade. For corners and tight turns, remove the saw, reinsert it at a new angle, and continue carving. Don't try to remove carved pieces until all the surrounding cuts are complete. Once your design is fully outlined, gently push the cut-out pieces inward from the outside of the pumpkin. If a piece gets stuck, don't yank it; instead, carefully re-saw any missed connections. This patient approach prevents accidental breakage and ensures your simple pumpkin design ideas come out looking sharp and clean.
Bringing your pumpkin to life with safe and creative lighting is the final, magical step. Traditional wax candles are classic but pose a fire hazard, especially with children around. For a safer alternative, consider battery-operated LED candles, which flicker realistically without the flame. Fairy lights, strung inside the pumpkin, can create a softer, more whimsical glow, perfect for cute designs or a constellation effect. For a dramatic effect, a small LED spotlight placed inside can illuminate your pumpkin's features with intensity, making it stand out even more. In my own carvings, I’ve found that a single large LED puck light (like the ones I used for our "Boo!" pumpkin in 2021) provides a bright, even glow that really highlights the carved features, making them visible from a distance and bringing your simple halloween pumpkin ideas to vibrant life.
This section is your go-to gallery for easy carving ideas for pumpkins. We've curated a collection of over 50 distinct designs that are perfect for beginners, kids, and anyone looking for a quick, impactful jack-o’-lantern. While we can’t provide actual image downloads here, imagine these ideas brought to life with easily printable, free templates readily available online. Let’s dive into a world of creativity and simplicity!
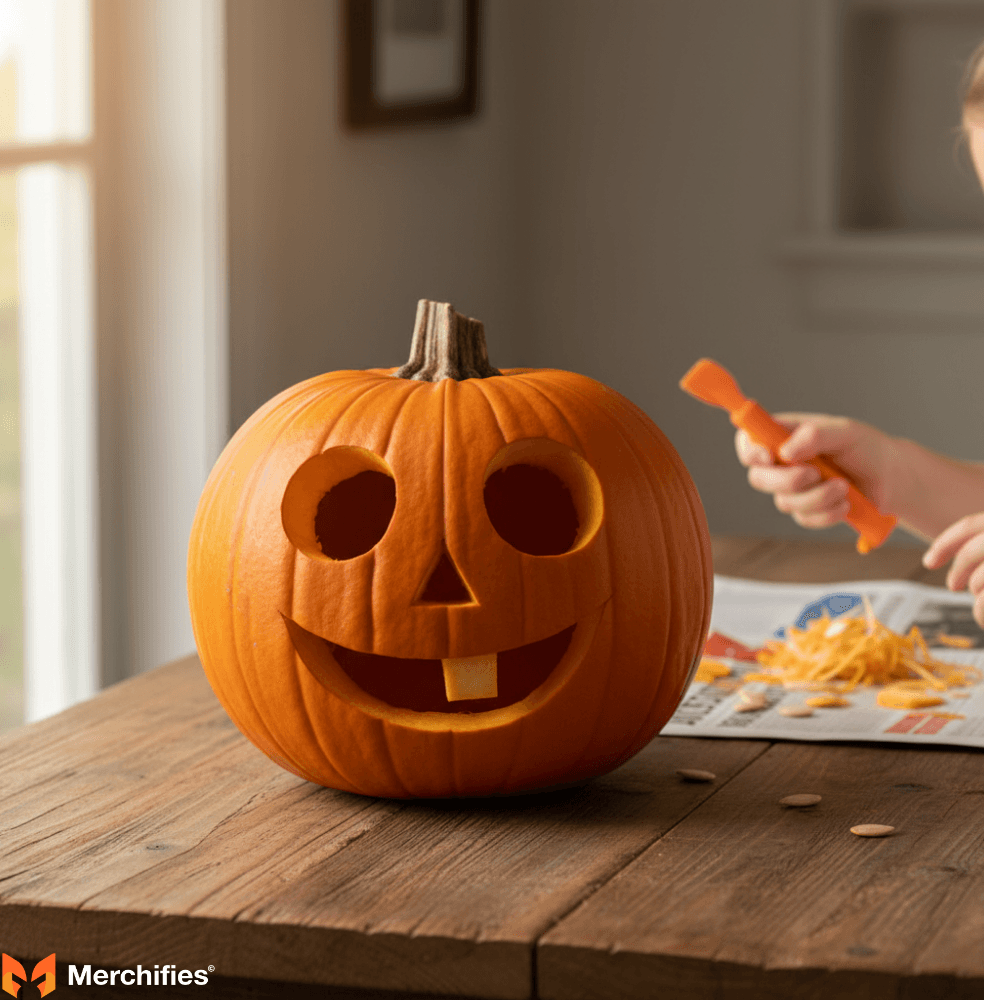
The classic jack-o’-lantern face is a timeless choice, and it’s incredibly simple to execute. Think basic shapes and playful variations. You can vary the size and angle of the shapes to give each face a unique personality without adding complexity. These simple halloween pumpkin carving ideas are universally loved.
The Traditional Triangle Face: Two upright triangles for eyes, a smaller inverted triangle for a nose, and a jagged, toothy grin.
The Friendly Crescent: Two gentle crescent moon shapes for eyes (pointing up or down), a small triangle nose, and a simple, upward-curving smile.

Surprised “O” Mouth: Circular eyes, a small triangular nose, and a wide, open “O” shape for a surprised or shocked expression.
Sleepy Slit Eyes: Thin, horizontal slits for eyes, a tiny dot or triangle for a nose, and a gentle, wavy line for a mouth.
Square-Eyed Grin: Two square eyes, a small square nose, and a wide, straight-line mouth with a few blocky teeth.
Winking Jack: One triangle eye, one horizontal slit eye, a small nose, and a playful, asymmetrical smile.
Goofy Grin with One Tooth: Two simple round eyes, a small nose, and a wide, slightly curved mouth with just one prominent square tooth in the middle.
Happy Half-Moon Eyes: Eyes shaped like half-moons (flat side down), a small triangular nose, and a cheerful, wide smile.
Angry Eyebrows: Two triangular eyes, a small nose, and a frowning mouth, with two small, upward-pointing triangles carved above the eyes as angry brows.
Simple Dot Face: Two small carved circles for eyes, one for a nose, and a series of small, evenly spaced dots forming a smile.
Zigzag Mouth: Classic triangle eyes, a small nose, and a mouth carved with a continuous zigzag pattern.
Cross-Eyed Jack: Two round or square eyes, slightly angled inward, a small nose, and a simple smile to create a humorous, cross-eyed look.
Missing Tooth Grin: A wide, jagged mouth with one or two “missing” teeth sections, giving it character.
Open-Mouth Scream: Large, round or oval eyes, a small nose, and a wide, open mouth with a jagged or wavy outline.
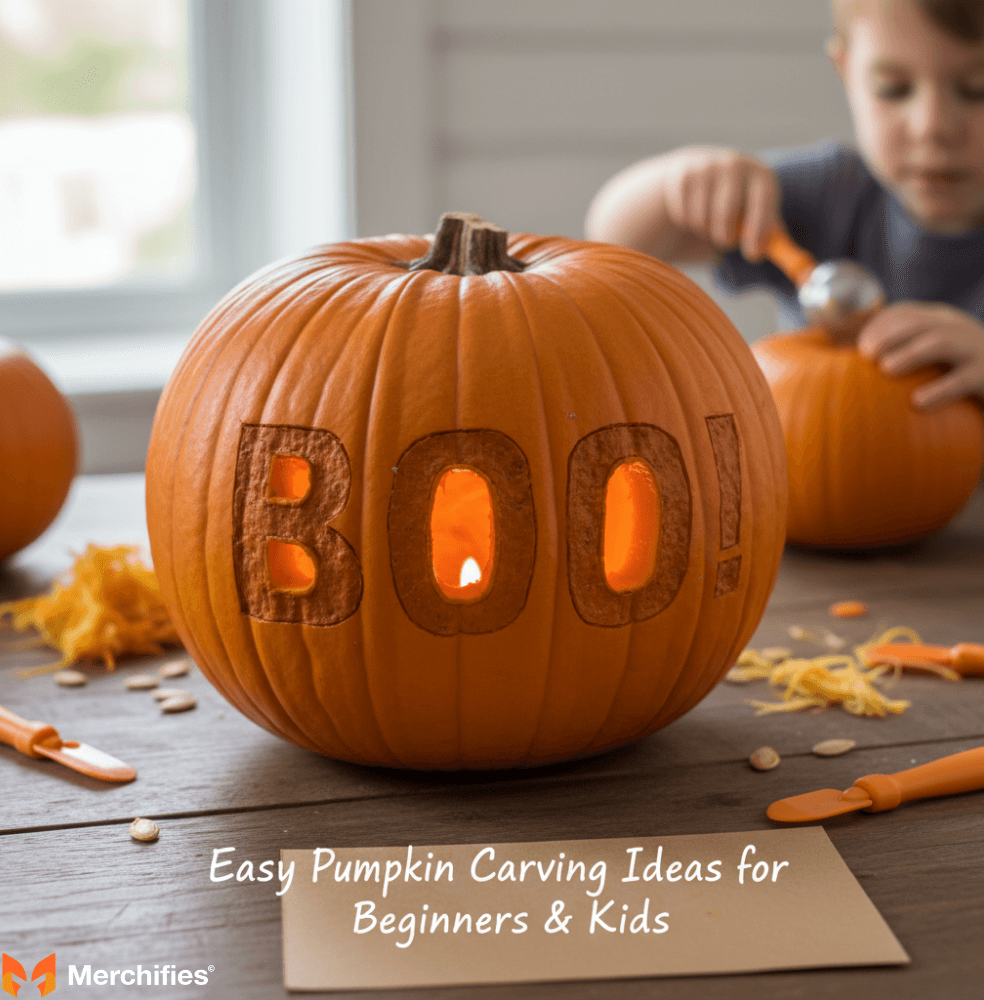
The “Boo!” Face: Two round eyes, a small nose, and a mouth shaped like the letter “B” or “O.”

For those who prefer a touch of fright without the fuss, these spooky but easy pumpkin carving ideas rely on iconic silhouettes rather than intricate details, making them ideal for quick carving and instant recognition.
Classic Sheet Ghost: A simple, wavy outline of a ghost with two small circular eyes.
Flying Bat Silhouette: A crescent body with two pointed ears and two simple triangular or scalloped wings.
Single Spider: A round body with eight simple, straight stick legs radiating outward.
Spider Web Corner: Concentric V-shapes or radiating lines in one corner for a minimalist web.
Witch’s Hat: A simple triangle for the hat with a wider base for the brim.
Broomstick: A long thin handle with short vertical bristle lines.
Skull Outline: A basic skull shape with two eye sockets and a nose hole.

Crossbones: Two simple bone shapes crossed over each other.
Coffin Shape: A rectangle with angled top edges resembling a coffin.
Tombstone: A rounded rectangle with a simple “RIP.”
Vampire Fangs: Two sharp teeth carved into a simple curved mouth.

Mummy Eyes: Two eye slits with horizontal “bandage” lines above and below.
Black Cat Silhouette: Pointed ears, round eyes, and an arched back.
Moon & Stars: A crescent moon with tiny scattered stars.
Ghostly Handprint: A carved hand outline reaching outward.
If you’re leaning toward adorable rather than alarming, these easy jack o’ lantern ideas capture charm through minimalist shapes.
Simple Cat Face: Pointed ears, round eyes, a triangle nose, and whiskers.

Wise Owl: Large circular eyes and a tiny pointed beak.
Goofy Monster: One giant eye, a wavy mouth, and tiny horn outlines.
Friendly Alien: Oval eyes, a tiny smile, and two antennae.
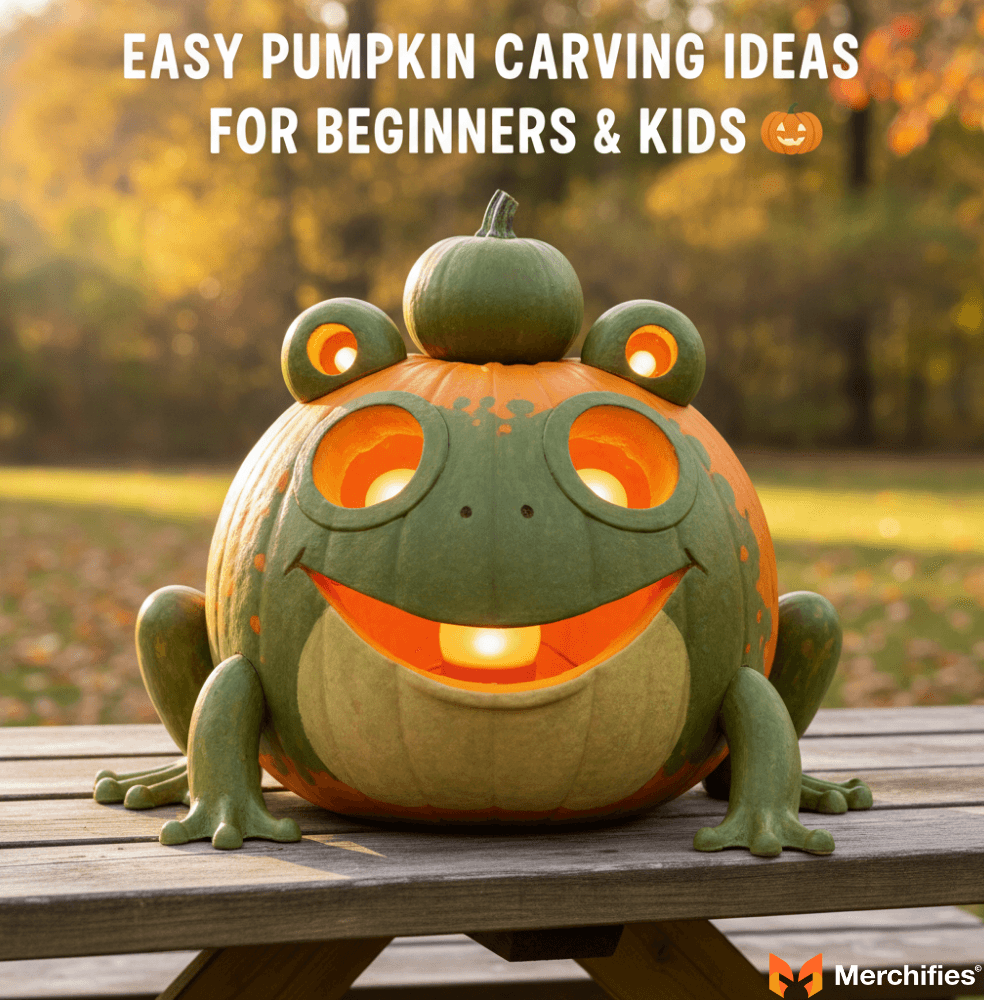
Happy Frog: Big round eyes and a huge curved grin.
Playful Puppy: Floppy ears, round eyes, and a tongue sticking out.
Charming Mouse: Large ears, tiny eyes, and a triangle nose.
Bunny Face: Long oval ears, round eyes, and an “X” nose-mouth combo.
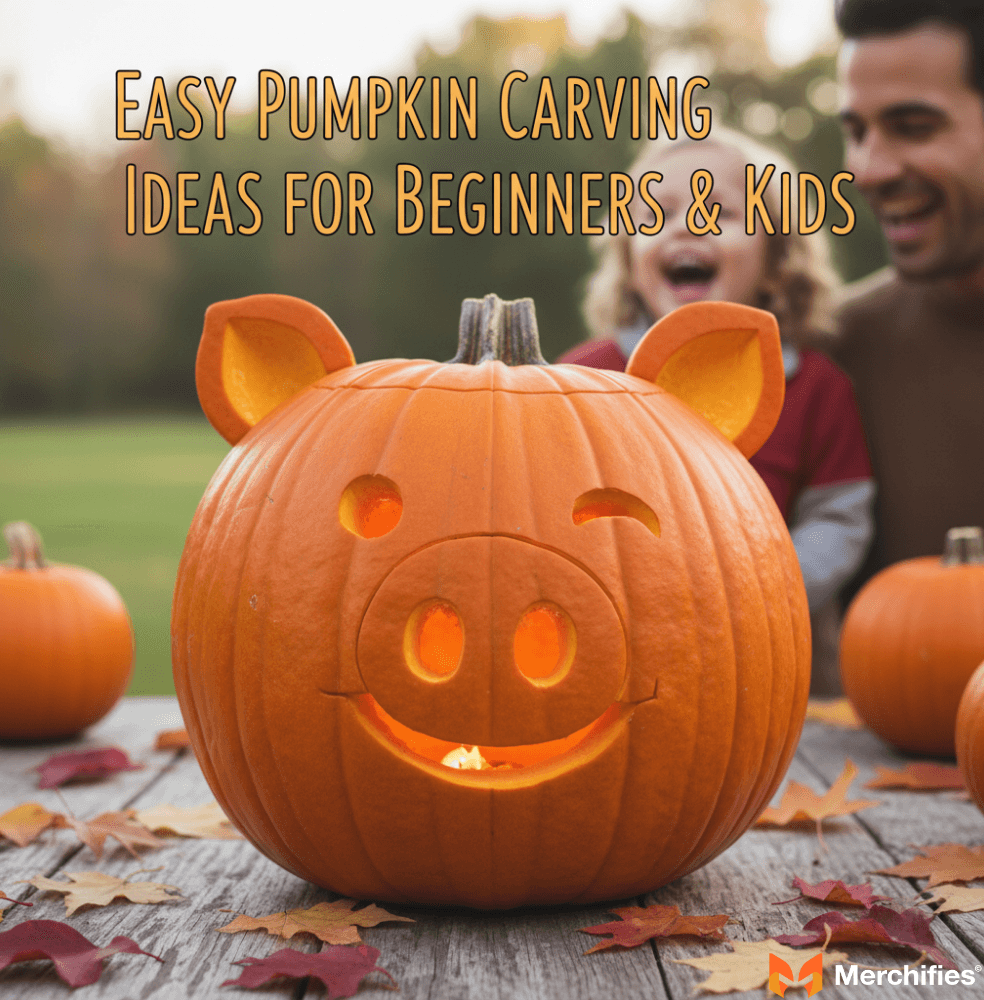
Smiling Pig: Rounded ears, tiny eyes, and a big oval snout.
Bear Cub: Rounded ears and a soft “W”-shaped mouth.
These simple pumpkin design ideas create clean, modern looks with very little effort.
Scattered Stars: Different-sized stars carved randomly.
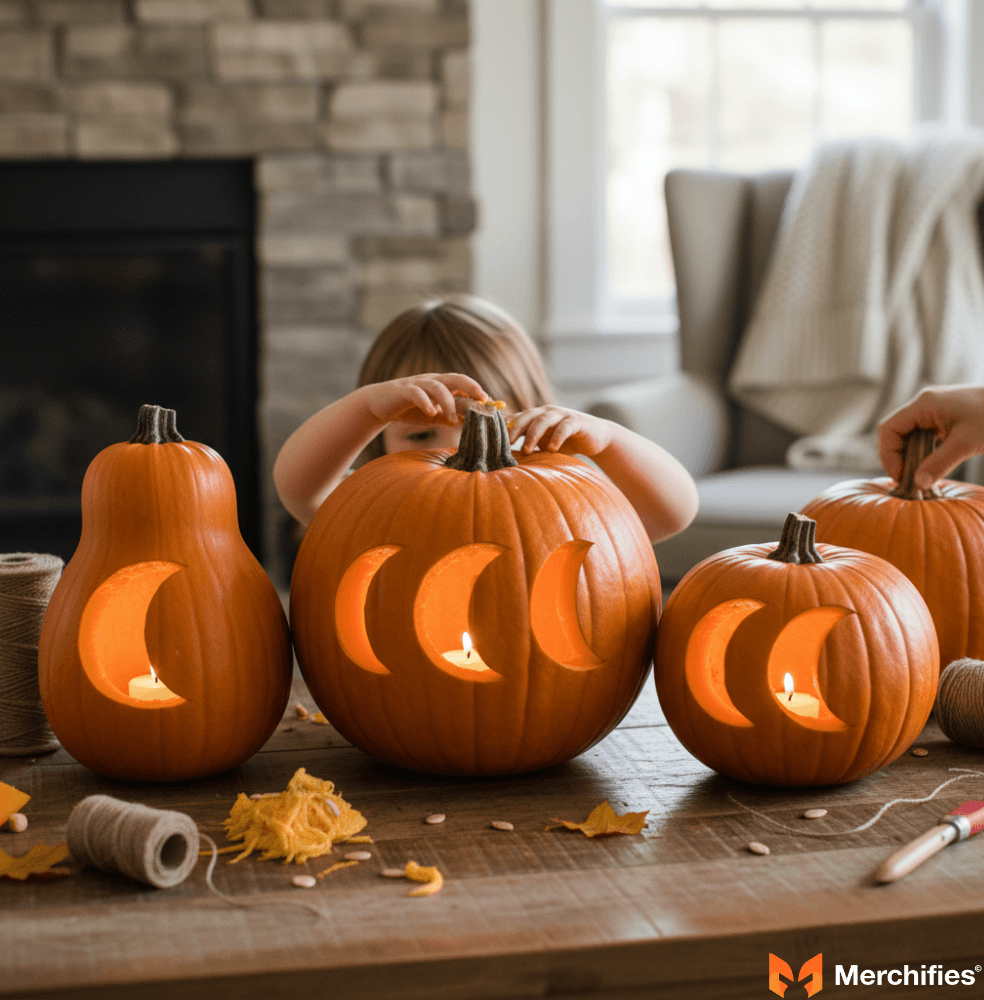
Crescent Moon Cluster: Multiple crescent moons in varying directions.
Polka Dot Pumpkin: Small carved circles or drilled holes.
Vertical Stripes: Long evenly spaced carved lines.
Zigzag Pattern: Continuous zigzag cuts wrapping around the pumpkin.
Checkerboard: Alternating carved and uncarved squares.
Heart-Filled Pumpkin: Tiny hearts scattered across the surface.

Diamond Grid: Repeating diamond shapes.
Spiral Swirl: One large spiral or multiple mini spirals.
Arrow Pointers: Simple arrows facing different directions.
Word art pumpkins are bold, fun, and easy to recognize from a distance.
“BOO!” Pumpkin: Large block letters spelling BOO.
“EEK!” Pumpkin: Bold E-E-K lettering.
“SPOOKY” Pumpkin: Simple spooky lettering across the front.
“HAPPY” Pumpkin: A cheerful family-friendly option.

“TREAT” Pumpkin: Perfect for trick-or-treat night.
These simple halloween pumpkin carving ideas offer tons of creative possibilities without requiring advanced carving skills. The most important part is enjoying the process and creating a festive Halloween display full of personality.
For very young children or those who prefer to avoid knives altogether, no-carve alternatives are a brilliant solution. Painting pumpkins is a classic choice; acrylic paints work well and allow for vibrant colors and detailed designs like friendly ghosts or abstract patterns. Markers, especially paint pens, offer precision for drawing faces or intricate lines. You can also decorate pumpkins with glue-on accessories like googly eyes, yarn hair, pipe cleaner spiders, or even glitter. For example, my niece decorated a mini pumpkin with googly eyes and pipe cleaner legs in 2022, turning it into a charming, fuzzy spider that required no carving at all. These methods are safe, mess-free, and allow for boundless creativity, making them excellent easy halloween pumpkin ideas for all ages and skill levels.
Even with the simplest designs, a few expert tips can elevate your carving experience and ensure a clean, long-lasting result. These insights address common challenges and offer ways to enhance your basic creations, making your simple halloween pumpkin carving ideas truly shine.
Troubleshooting common carving challenges, like cracks or stuck knives, often comes down to technique and preparation. If your knife gets stuck, don't force it; instead, gently pull it out and re-insert it at a slightly different angle or re-saw any incomplete cuts. Forcing the blade is a surefire way to break it or, worse, crack your pumpkin. If you notice a crack forming during carving, try to stop the crack from spreading by carving a small, V-shaped notch at the end of the crack. This can sometimes prevent it from extending further. Also, ensure your pumpkin is stable on a flat surface; a wobbly pumpkin is more prone to accidental damage. In my early days of carving, I learned the hard way that a dull knife or a dried-out pumpkin is a recipe for frustration, leading to multiple jagged edges and accidental gashes. Always ensure your tools are sharp and your pumpkin is fresh.
Enhancing simple halloween pumpkin carving ideas with basic detailing tools doesn't mean making them complex. A small V-gouge, for instance, can be used to carve shallow lines for eyebrows or wrinkles, adding expression to a basic face without cutting all the way through the pumpkin wall. Small loop tools are excellent for scraping away thin layers of skin to create shaded areas or subtle textures, like the fur on a carved cat or the texture of a ghost. Even a simple linoleum cutter can create fine lines for hair or spiderwebs. These tools allow you to add depth and personality to your simple pumpkin design ideas without requiring intricate cut-outs. Just remember to work slowly and with light pressure to avoid over-carving.
Creative lighting goes well beyond the traditional candle, offering safer and more dynamic illumination for your jack-o'-lantern. Battery-operated LED tea lights are a staple for a reason: they're safe, long-lasting, and emit a warm, realistic glow. For a more whimsical effect, consider stringing small fairy lights inside the pumpkin, especially effective for designs with many small holes, like a star-studded sky or polka dots. If you want your pumpkin to truly pop, a small, bright LED spotlight or puck light placed inside can highlight specific features, making them visible from a greater distance. For example, a "BOO!" pumpkin with a blue LED light inside (as I used for a display in 2020) can create an eerie, cool-toned glow that stands out from typical orange light, making your easy designs for pumpkin carving even more impactful.
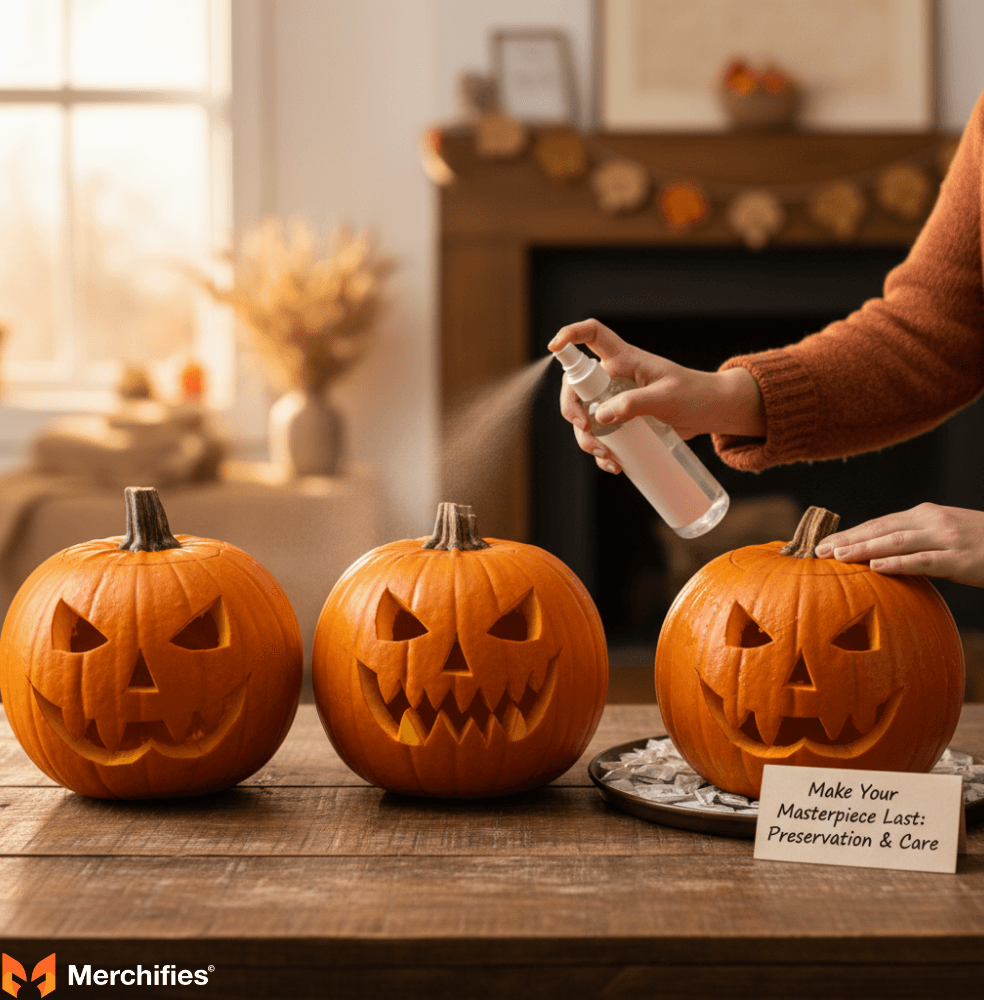
You've put effort into your easy pumpkin carving ideas, and you want them to last beyond just one night. Proper preservation and care can significantly extend the life of your jack-o'-lantern, allowing you to enjoy its spooky charm for days, or even weeks.
Simple methods to extend your pumpkin's life focus on hydration and preventing mold. After carving, one of the most effective tricks is to apply a thin layer of petroleum jelly (like Vaseline) to all cut edges, both inside and out. This creates a barrier that locks in moisture and slows down dehydration. On top of that, a diluted bleach solution (one teaspoon of bleach per quart of water) or a lemon juice spray can be misted onto the entire pumpkin, inside and out, to inhibit mold and bacterial growth. Some people even soak their entire carved pumpkin in a cold water bath overnight if it starts to look shriveled; this rehydrates the pumpkin, much like reviving wilted vegetables. In my experience, a good petroleum jelly application on the day of carving can add at least 3-5 extra days to a pumpkin's life, especially in drier climates, ensuring your simple halloween pumpkin ideas stay fresh.
Storing your carved pumpkin for maximum freshness is crucial when it's not on display. When you're not showing off your simple halloween pumpkin ideas, keep them in a cool, shaded place. Direct sunlight and warm temperatures accelerate decomposition. If possible, bring your pumpkin indoors at night, especially if temperatures drop below freezing, as freezing and thawing can damage the pumpkin's cells. A garage, basement, or even a cool porch can be ideal storage spots. For even longer preservation, some people store their carved pumpkins in a plastic bag in the refrigerator, though this is only practical for smaller pumpkins. The key is to keep it away from extreme heat and direct sun to minimize decay.
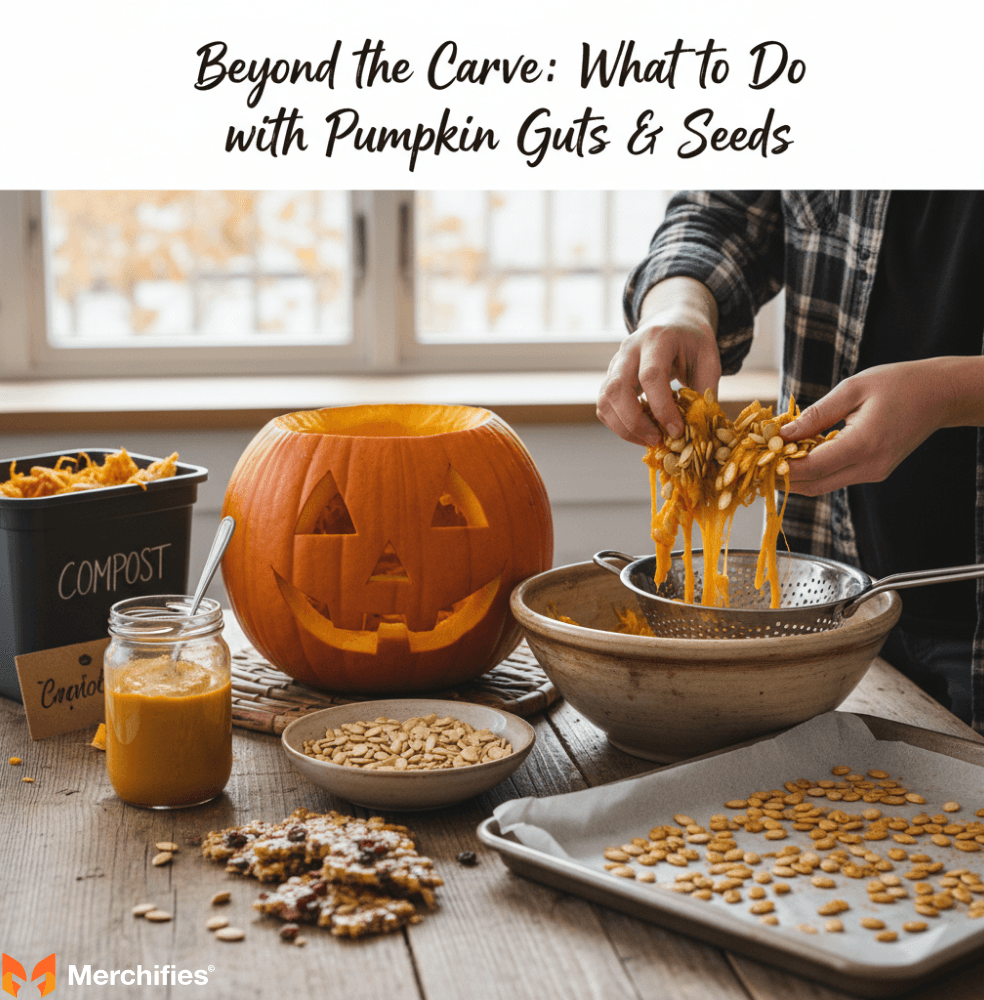
Carving a pumpkin generates more than just a festive decoration; it also leaves you with a bounty of pumpkin guts and seeds. Don't let these go to waste! There are delicious, creative, and eco-friendly ways to utilize every part of your pumpkin, extending the fun beyond the carving itself.
Delicious and simple roasted pumpkin seed recipes are a classic autumnal treat. After separating the seeds from the stringy pulp, rinse them thoroughly and pat them dry. Toss them with a tablespoon of olive oil or melted butter, a pinch of salt, and your favorite seasonings. For a savory snack, try garlic powder, paprika, cayenne pepper, or a dash of Worcestershire sauce. For a sweet version, cinnamon sugar is a winner. Spread the seasoned seeds in a single layer on a baking sheet and roast at 300°F (150°C) for 20-30 minutes, stirring occasionally, until golden brown and crispy. This simple preparation turns a byproduct into a highly addictive snack, perfect for enjoying after a day of creating easy jack o lantern ideas.
Creative uses for pumpkin pulp extend beyond just discarding it. While the stringy bits aren't ideal for cooking, the thicker, fleshier pulp scraped from the pumpkin walls can be pureed and used in various simple halloween pumpkin ideas in the kitchen. Think pumpkin bread, muffins, pies, or even a simple pumpkin soup. For crafts, the stringy pulp can be dried and used as a natural confetti or composted. You can also use small pieces of the pulp in sensory bins for kids, offering a tactile experience that connects them to the carving process. Just be sure to separate the edible flesh from the truly stringy, fibrous parts for culinary uses.
Eco-friendly pumpkin disposal and composting after Halloween ensures your festive gourd returns to the earth responsibly. Instead of tossing your pumpkin in the trash, which contributes to landfill waste, consider composting it. Most municipalities offer composting programs, or you can add it to your backyard compost pile. Just make sure to remove any candles, lights, or decorative elements first. Breaking the pumpkin into smaller pieces will help it decompose faster. If composting isn't an option, some local farms or animal sanctuaries may accept pumpkins as animal feed, particularly for pigs or goats. This approach aligns with sustainable practices, turning your easy pumpkin carving idea into a nutrient source rather than waste.
You're now equipped with everything you need to tackle simple halloween pumpkin carving ideas with confidence and creativity. From selecting the perfect pumpkin and mastering basic cuts to preserving your masterpiece and even repurposing the guts, this guide empowers you to enjoy the full Halloween experience. Embrace the ease, let your imagination (and dry-erase marker) lead the way, and get ready for your most stress-free and fun jack-o'-lantern season yet. Happy carving!
-d4c38c342cdf20ca.jpeg)


-b555fcc6b204c456.jpeg)


