-da0801079a650a2e.jpeg)
17 Year Anniversary Quotes: 110+ Funny, Romantic & Furniture Wishes (2026)
Mar, 12 2026
Pumpkin painting and no-carve decorating are fun, creative alternatives to traditional carving—perfect for kids, beginners, or anyone who wants less mess and longer-lasting decorations. With paint, stickers, glitter, and other craft supplies, you can transform pumpkins into unique seasonal masterpieces. In this guide to creative pumpkin painting and no-carve design ideas, you’ll discover colorful, stylish, and easy ways to decorate pumpkins for Halloween. From cute characters and spooky themes to elegant modern designs, these ideas are perfect for adding festive charm to your fall décor.

Forget the mess and short lifespan of carved pumpkins. Painted pumpkins offer a durable, versatile, and incredibly creative way to celebrate fall and Halloween, transforming simple gourds into lasting works of art. This approach to pumpkin design painting opens up a world of possibilities for unique seasonal decor, from whimsical characters to elegant autumnal statements. Let's dive into making your next pumpkin a masterpiece without the knife, exploring a wealth of ideas for every style and skill level.
For many, the scent of autumn air brings thoughts of pumpkins, but the traditional carving knife often means a short-lived display and a sticky cleanup. Enter the world of painted pumpkins, a fantastic alternative that offers both longevity and boundless creativity. This method allows you to explore intricate pumpkin design painting without the structural compromises of carving, giving you more time to enjoy your seasonal creations. It’s a canvas for your imagination, offering diverse ideas for every aesthetic.
In fact, painted pumpkins have evolved from simple craft projects into a sophisticated form of seasonal artistry, offering a cleaner, safer, and ultimately more versatile way to decorate. You can achieve looks that are simply impossible with a carving tool, from delicate floral patterns to hyper-realistic portraits. It's a method that truly allows your artistic vision to flourish on a gourd canvas, transforming a humble pumpkin into a focal point of your autumn decor. Each pumpkin design painting can be a unique expression, limited only by your creativity.
Choosing painted pumpkins over carved ones offers significant advantages in longevity, safety, and versatility, making them a superior option for many decorators. They last much longer, are safer for all ages to decorate, and can be adapted to almost any aesthetic or theme imaginable, providing endless ideas for your pumpkin design painting projects.
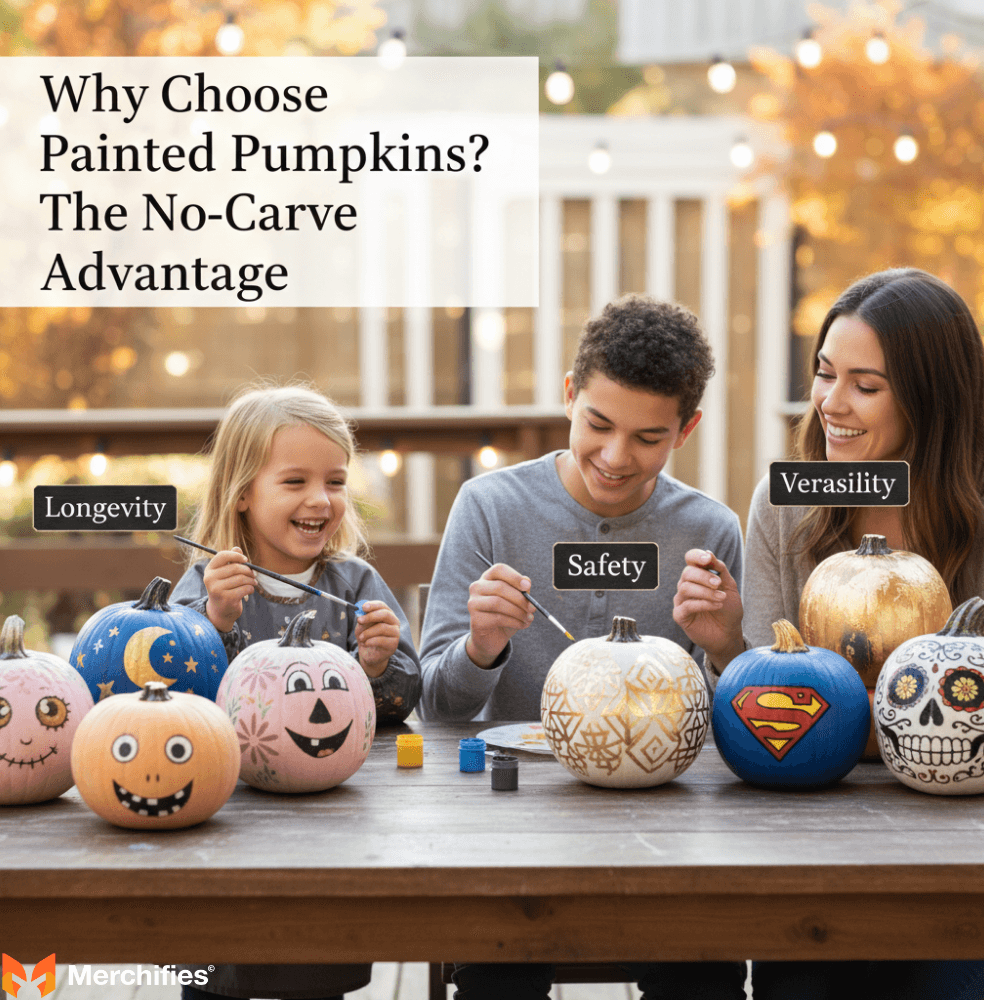
The primary benefit of a no-carve pumpkin design is its extended lifespan. Carved pumpkins, exposed to air and bacteria, typically last only a few days to a week before succumbing to rot, especially in warmer climates. Painted pumpkins, however, remain intact for several weeks, or even months, if properly prepared and sealed. This longevity means your artistic efforts aren't fleeting. Beyond that, the absence of sharp tools makes painting a pumpkin a far safer activity, particularly for children, turning it into an enjoyable family craft rather than a supervised hazard. This also links directly to no-carve pumpkin decorating ideas, which emphasize safety and durability. From a versatility standpoint, the sky's the limit: you can create intricate patterns, elegant monochromatic schemes, whimsical characters, or even elaborate scenes, adapting your pumpkin designs to paint for any occasion or decor style. The possibilities for pumpkin design painting are truly endless.
Editorial Take: While the smell of a freshly carved pumpkin is undeniably nostalgic, I've personally found the frustration of watching a meticulously carved jack-o'-lantern collapse after just three days (a particular tragedy with my ambitious "Great Pumpkin" design in 2019) far outweighs that fleeting sensory pleasure. The longevity of painted designs, like the metallic gold and white striped pumpkins I still use from 2021, simply makes them a more rewarding investment of time and effort. Plus, the sheer variety of pumpkin design painting ideas means you're never stuck with the same look.
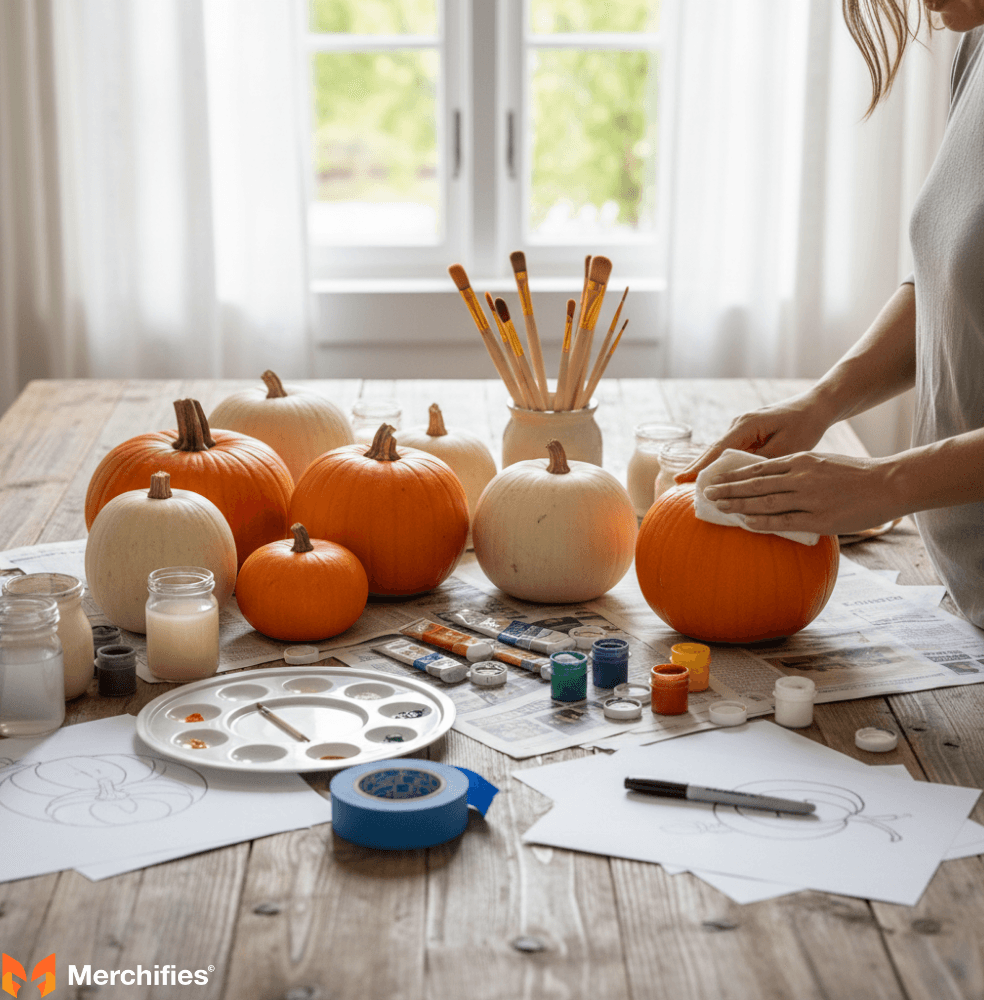
Before you dive into the exciting world of pumpkin design painting, gathering the right tools and preparing your canvas properly are crucial steps. These foundational elements ensure your project runs smoothly and your final artwork looks its best, no matter which creative ideas you choose.
Your first decision will be between a real pumpkin and a faux one. Real pumpkins offer an authentic, organic feel, with natural variations in shape and texture that can add character to your design. However, they are temporary and require more careful preparation to maximize their lifespan. Faux pumpkins, typically made from foam, plastic, or papier-mâché, are reusable year after year, offering a perfectly smooth and consistent surface for your artwork. They are also lighter and easier to store. For intricate, long-term displays, I often opt for faux pumpkins; my set of pastel-painted faux pumpkins from last year are already stored away, ready for next autumn. The choice depends on your specific pumpkin design painting ideas – whether you envision a fleeting seasonal display or a lasting piece of decor.
For most pumpkin design painting projects, acrylic paints are your best friend. They are water-based, dry quickly, offer vibrant colors, and clean up easily. For base coats, especially on larger pumpkins, spray paint (acrylic-based) provides a smooth, even finish with minimal effort. Chalk paint offers a matte, vintage look, while oil-based paints can provide rich, durable finishes, though they take longer to dry. Specialty paints like glow-in-the-dark or metallic paints can add unique touches to your pumpkin designs. As for brushes, a variety pack with flat brushes for large areas, round brushes for detailing, and a fine-tip brush for intricate lines is ideal. Don't forget sponges for texture, painter's tape for crisp lines, and stencils for repeatable patterns. Embellishments like glitter, rhinestones, faux leaves, fabric scraps, sequins, or even small plastic spiders can elevate your designs for pumpkins, adding texture, sparkle, and personality.
Proper preparation is key to a lasting and vibrant pumpkin design. For real pumpkins, begin by gently washing the surface with a damp cloth to remove any dirt, dust, or residual field grime. Allow it to air dry completely—any moisture can prevent paint from adhering properly or lead to premature rot. For faux pumpkins, a quick wipe-down to remove dust is usually sufficient. Once clean and dry, consider applying a primer or a base coat. A coat of white or light-colored spray paint, like Rust-Oleum Painter's Touch 2X Ultra Cover in Flat White, can create a uniform canvas, make subsequent colors appear brighter, and improve paint adhesion, especially on darker or waxy pumpkin skins. This step is particularly important if you're aiming for a complex pumpkin design painting with multiple layers or vibrant colors, ensuring your creative ideas truly pop.
Once you have your supplies and your pumpkin is prepped, understanding fundamental painting techniques will transform your vision into reality. These core methods are the building blocks for any successful pumpkin design painting project, allowing you to bring your creative ideas to life with precision.

Applying a solid base coat is the foundation of any great painted pumpkin. For large, even coverage, spray paint is often the superior choice. Hold the can about 6-8 inches away from the pumpkin and apply thin, even layers, rotating the pumpkin as you go. This prevents drips and ensures a smooth finish. Allow each coat to dry fully—typically 15-30 minutes for quick-dry acrylic spray paints like Krylon COLORmaxx. If using a brush, opt for a wide, flat brush and apply paint in consistent, overlapping strokes. Acrylic craft paints generally dry to the touch in 10-20 minutes, but it's wise to wait at least an hour before adding subsequent layers to avoid smudging. When I tackled a series of large pumpkins for an outdoor display in 2022, I found that rushing the base coat always led to visible brush strokes or uneven color, so patience truly pays off here, ensuring your pumpkin design painting starts on the right foot.
For crisp, professional-looking lines and patterns, painter's tape and stencils are indispensable tools. To use painter's tape, firmly press it onto the pumpkin surface in your desired pattern, ensuring all edges are sealed to prevent bleed-through. Paint over the tape, and once the paint is dry to the touch, carefully peel off the tape to reveal sharp lines. This is perfect for stripes, chevrons, or geometric blocks in your pumpkin design painting. Stencils, on the other hand, allow for repeatable designs. Secure the stencil firmly with temporary adhesive spray or painter's tape, then dab paint onto the open areas with a sponge or stencil brush. Avoid overloading your brush to prevent paint from seeping under the stencil. This technique is perfect for creating symmetrical designs on pumpkins, such as polka dots, intricate mandalas, or themed silhouettes, which are especially popular for modern fall decor or specific holiday themes.
Adding layers and details brings your pumpkin design painting to life, giving it depth and dimension. Once your base coat is completely dry, begin adding larger design elements, then move to finer details. Techniques like dry brushing (applying a very small amount of paint to a dry brush for a subtle, textured effect) can create a weathered look, soft shadows, or furry textures for animal designs. Stippling, using the tip of a brush or sponge to create small dots, is great for texture, pointillist effects, or creating a starry night sky. For fine lines and intricate patterns, use a small, round, or liner brush. Don't be afraid to mix colors directly on your palette to achieve custom shades. For example, painting a subtle gradient from dark green to light green on a botanical design can make the leaves appear more lifelike, while adding small white dots to eyes can give characters more personality. This approach elevates a simple painted pumpkin to a piece of art.
Once your pumpkin design painting is complete and fully dry, sealing it is essential for protection and longevity. For indoor displays, a clear acrylic sealant spray or brush-on varnish (available in matte, satin, or gloss finishes) will protect against dust, minor scratches, and fading. For outdoor pumpkins, you need a more robust, weather-resistant, and UV-protective sealant. Look for products specifically labeled for outdoor use, such as Rust-Oleum Clear Gloss Protective Enamel. Apply several thin, even coats, allowing each to dry completely according to manufacturer instructions. This barrier will shield your design from rain, humidity, and sun, ensuring your pumpkin designs painted with care last through the season, preserving your artistic efforts.
Even seasoned crafters encounter issues. Streaking often occurs from applying paint too thickly or not allowing previous layers to dry. The fix? Apply thinner coats and be patient with drying times. Smudging is usually a result of touching wet paint. Keep a steady hand, and again, ensure each layer is fully dry before proceeding. Peeling paint, especially on real pumpkins, can happen if the surface wasn't properly cleaned or primed, or if there's moisture trapped beneath the paint. To prevent this, thoroughly clean and dry your pumpkin, and consider a primer. If peeling occurs, you might need to gently sand the affected area (if on a faux pumpkin) or carefully remove the loose paint and reapply. In my own experience, painting a particularly slick heirloom pumpkin, I found that a light scuff with fine-grit sandpaper before priming significantly improved adhesion and prevented peeling, a trick I now swear by for any challenging surface, ensuring your pumpkin design painting stays put.
The beauty of pumpkin design painting lies in its endless possibilities. Whether you're aiming for frightful fun, sophisticated elegance, or whimsical charm, there's a design waiting for your brush. Let's explore some captivating ideas for your next creative pumpkin project, breaking them down into distinct styles and techniques.

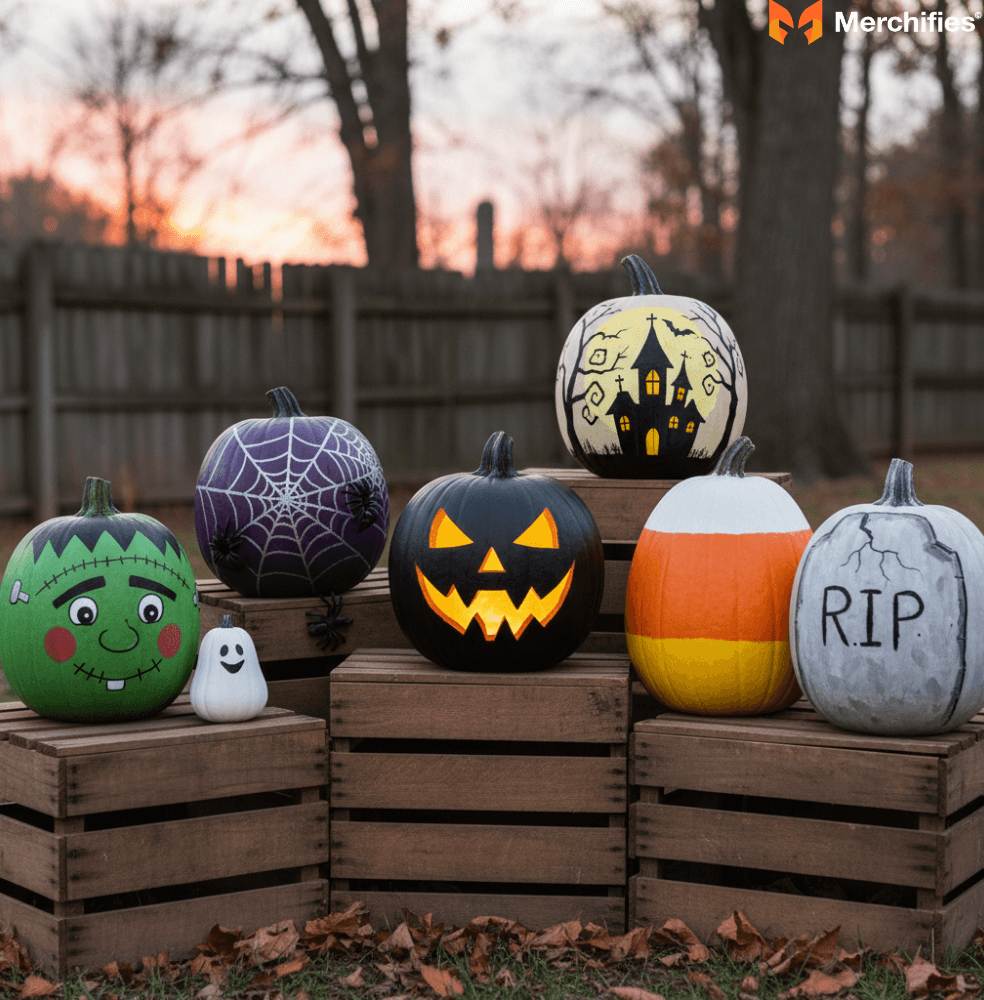
Halloween is the prime time for playful and eerie pumpkin designs to paint. These ideas bring classic spooky charm without the mess of carving:
Monster Faces: Go beyond the traditional jack-o'-lantern. Paint classic Frankenstein's monster features, friendly ghosts with rosy cheeks, menacing vampires with fangs, or silly mummies with painted bandages. Use black and white for eyes and mouths, then add details like stitches, scars, or rosy cheeks.
Spider Webs & Spiders: Intricately paint spider webs in black, silver, or glow-in-the-dark paint against an orange, black, or purple base. Add painted spiders crawling on the web or even attach small plastic spiders for a 3D effect.
Classic Painted Jack-o'-Lanterns: For a twist on the traditional, paint traditional carved features (triangular eyes, jagged mouth) onto the pumpkin instead of cutting them out. This preserves the pumpkin's integrity while still capturing that iconic look. You can even add painted "glow" effects around the eyes.
Haunted House Silhouettes: Paint a spooky house silhouette, complete with bare trees and bats, against a moonlit (yellow or white) background for an atmospheric scene.
Candy Corn Theme: A simple yet iconic design. Paint sections of the pumpkin in white, orange, and yellow to mimic the beloved Halloween treat.
Grave Markers & Epitaphs: Paint your pumpkin to look like a tombstone, complete with "RIP" or humorous epitaphs. Add cracks and moss effects for an aged look.
Witches' Brew & Potions: Paint cauldrons, bubbling potions, or witch hats on your pumpkins. You can even paint "poison" labels for a playful touch.
My personal favorite is painting a ghostly silhouette against a dark background, inspired by the eerie, minimalist art direction of "The Woman in Black" (2012) – it's simple but incredibly effective at creating atmosphere with pumpkin design painting.
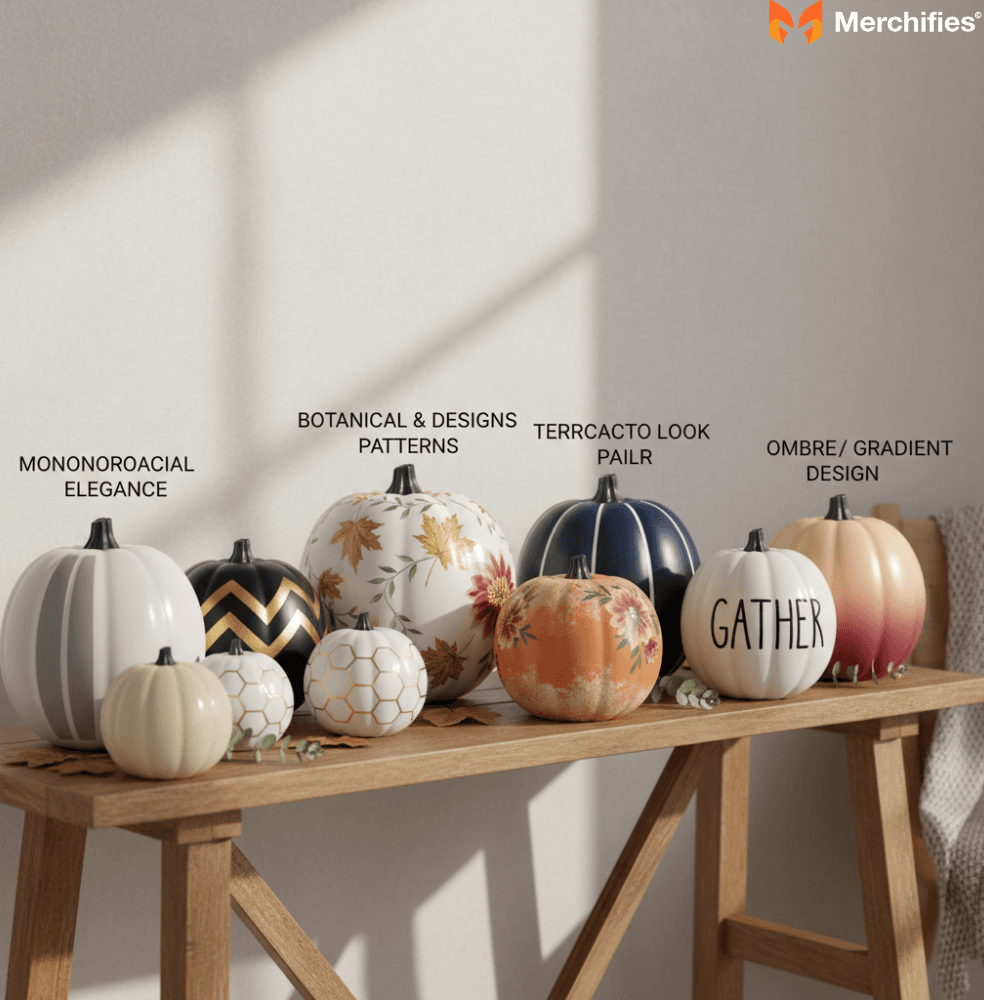
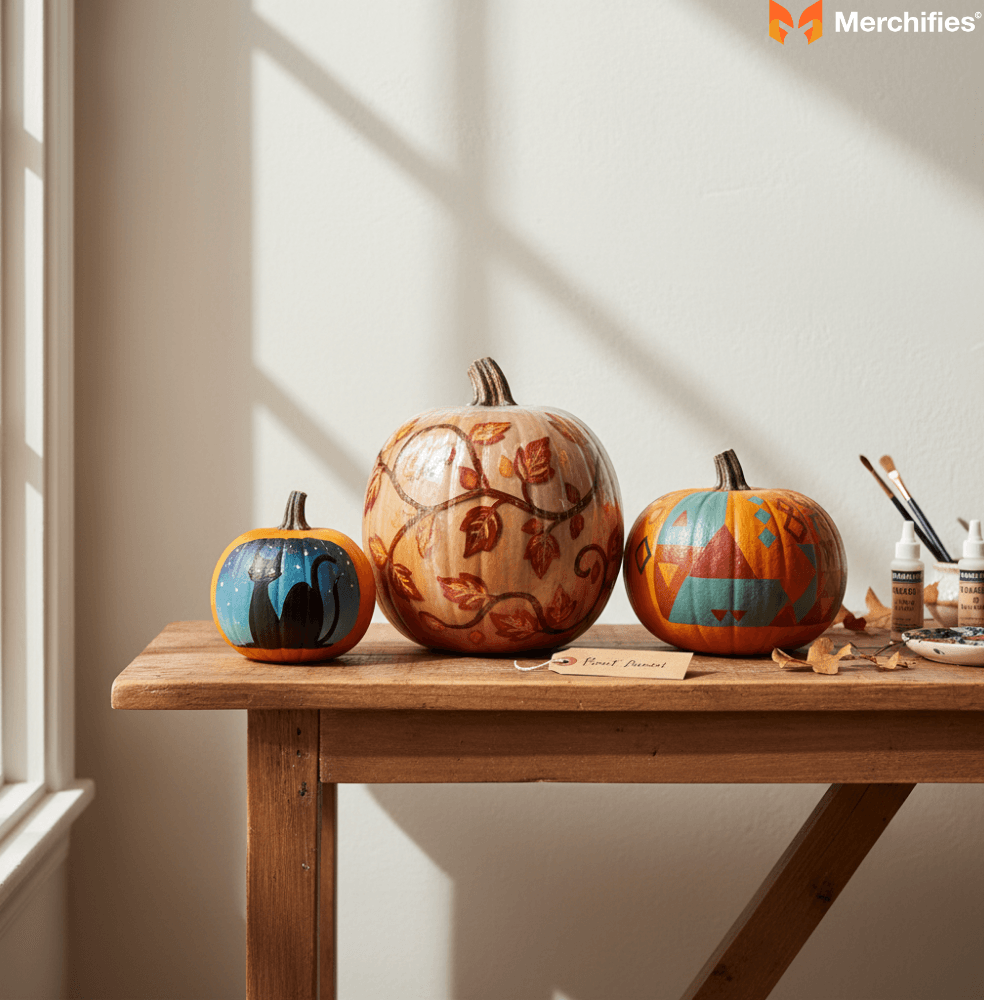
Beyond Halloween, painted pumpkins serve as stunning fall decor. These ideas focus on sophistication and contemporary aesthetics:
Monochromatic Elegance: Use varying shades of a single color like white, cream, soft gray, matte black, or deep navy. This creates a sophisticated, cohesive look. You can combine different textures within the same color, like matte and gloss finishes.
Geometric Patterns: Offer a contemporary aesthetic with clean lines, triangles, chevrons, stripes, polka dots, or honeycomb patterns. Use painter's tape for crisp edges and metallic accents for a modern touch.
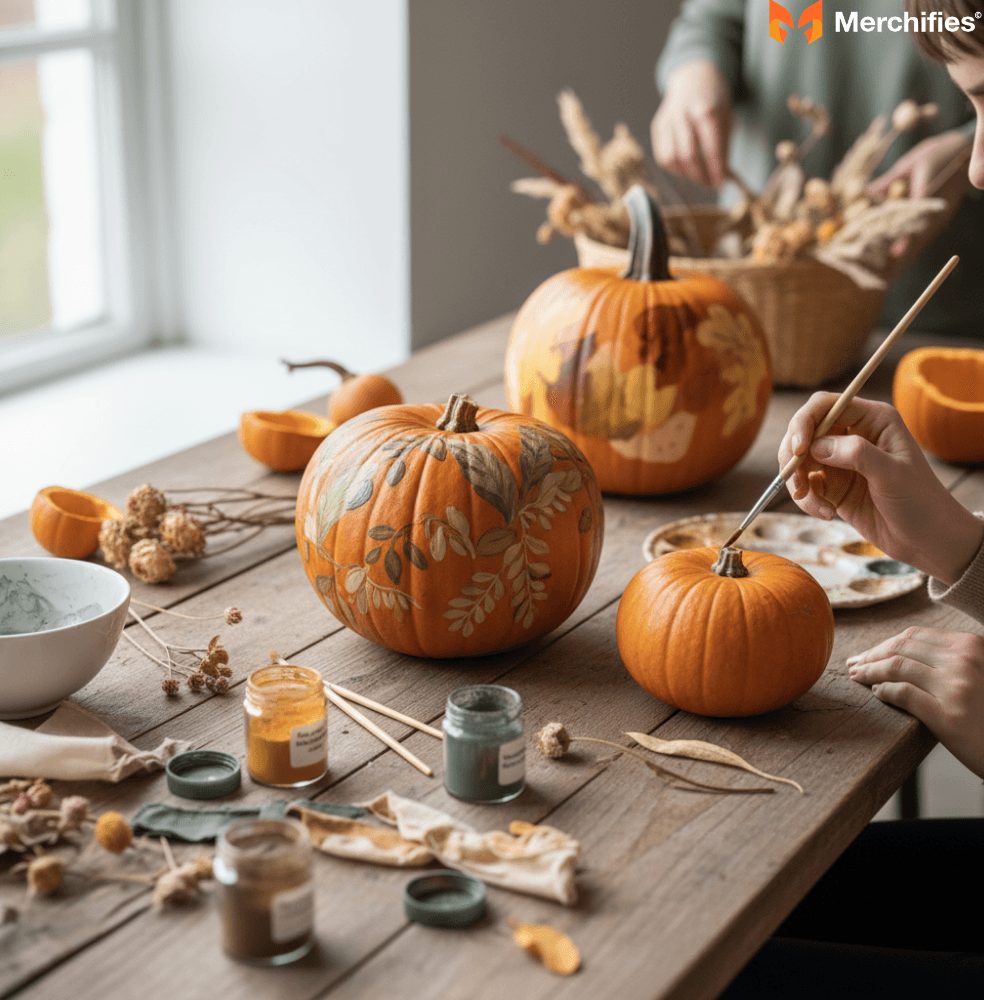
Botanical & Floral Designs: Bring a touch of nature indoors with painted leaves (maple, oak, ginkgo), delicate flowers (sunflowers, dahlias, wildflowers), vines, or intricate botanical mandalas. Soft greens, yellows, and muted reds work beautifully.
Terracotta Look: Achieve an on-trend, rustic vibe by painting your pumpkin with a matte, earthy orange-brown chalk paint. Add a distressed finish with a bit of sanding for an authentic aged pottery look.
Farmhouse Chic: Paint pumpkins white or cream, then add hand-painted script or stenciled words like "Grateful," "Harvest," "Autumn," or "Gather" in black or dark gray.
Ombre/Gradient Designs: Blend colors seamlessly from dark to light, or from one color to another (e.g., deep burgundy fading to soft peach, or forest green to sage).
Metallic Accents & Gold Leaf: Elevate any design with touches of metallic gold, silver, or copper paint. You can paint entire pumpkins metallic, or add delicate metallic details to geometric or botanical patterns. Gold leaf can also be applied for a truly luxurious finish.
Textured Finishes: Mix baking soda or joint compound into paint for a stone-like, concrete, or plaster texture. This adds a unique tactile dimension to your pumpkin design painting.
These pumpkin designs painted with a refined palette can seamlessly blend into any modern home, making them perfect for DIY fall centerpieces or mantel displays.
For those looking to push boundaries, several unique techniques can create show-stopping pumpkin designs:
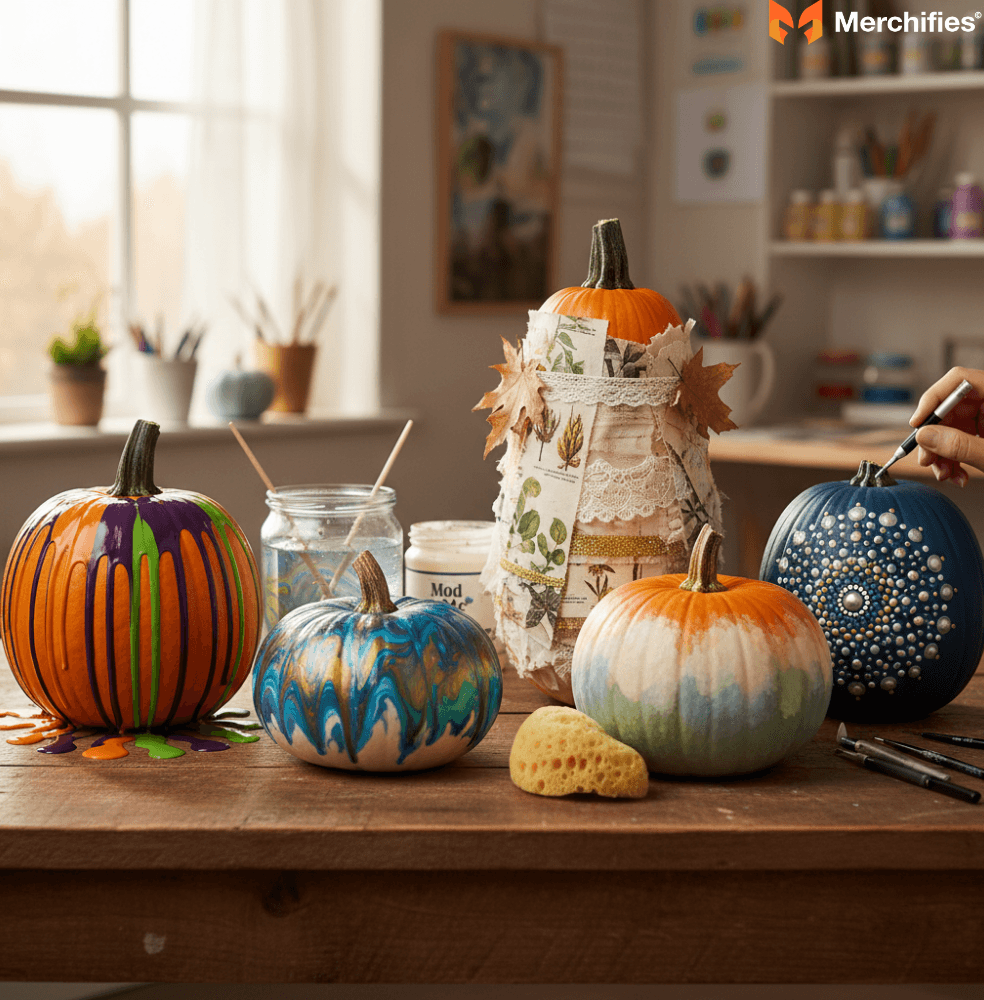
Drip Painting: Involves pouring diluted paint from the top of the pumpkin, allowing it to naturally cascade down the sides for an abstract, vibrant, or even eerie effect. Experiment with contrasting or complementary colors.
Marbling with Nail Varnish: A surprisingly simple yet stunning method. Fill a container with water, drip various nail varnish colors onto the surface, swirl gently with a toothpick, then dip your pumpkin to transfer the marbled pattern.
Mod Podge & Decoupage: Use Mod Podge to adhere fabric scraps, lace, glitter, dried leaves, pressed flowers, tissue paper, or even printed images (like vintage botanical prints or comic book panels) to your pumpkin, creating a textured, mixed-media design.
Sponge Painting: Use natural or synthetic sponges to dab paint onto the pumpkin, creating textured backgrounds, soft gradients, or cloud-like effects.
Dot Painting (Mandala Style): Using various sized tools (like the ends of paintbrushes, toothpicks, or specialized dotting tools) to create intricate, symmetrical dot patterns in the style of mandalas. This is mesmerizing and very therapeutic.
Chalkboard Pumpkins: Paint your pumpkin with chalkboard paint, then you can draw and redraw designs, messages, or spooky faces with chalk. Perfect for customizable, interactive decor.
Glitter Bomb: For ultimate sparkle, cover an entire pumpkin in adhesive and then generously apply glitter. You can use a single color or create ombre glitter effects.
I once used a Mod Podge technique to cover a faux pumpkin in vintage comic book panels, creating a truly unique piece that garnered compliments for years, showcasing the versatility of pumpkin design painting.
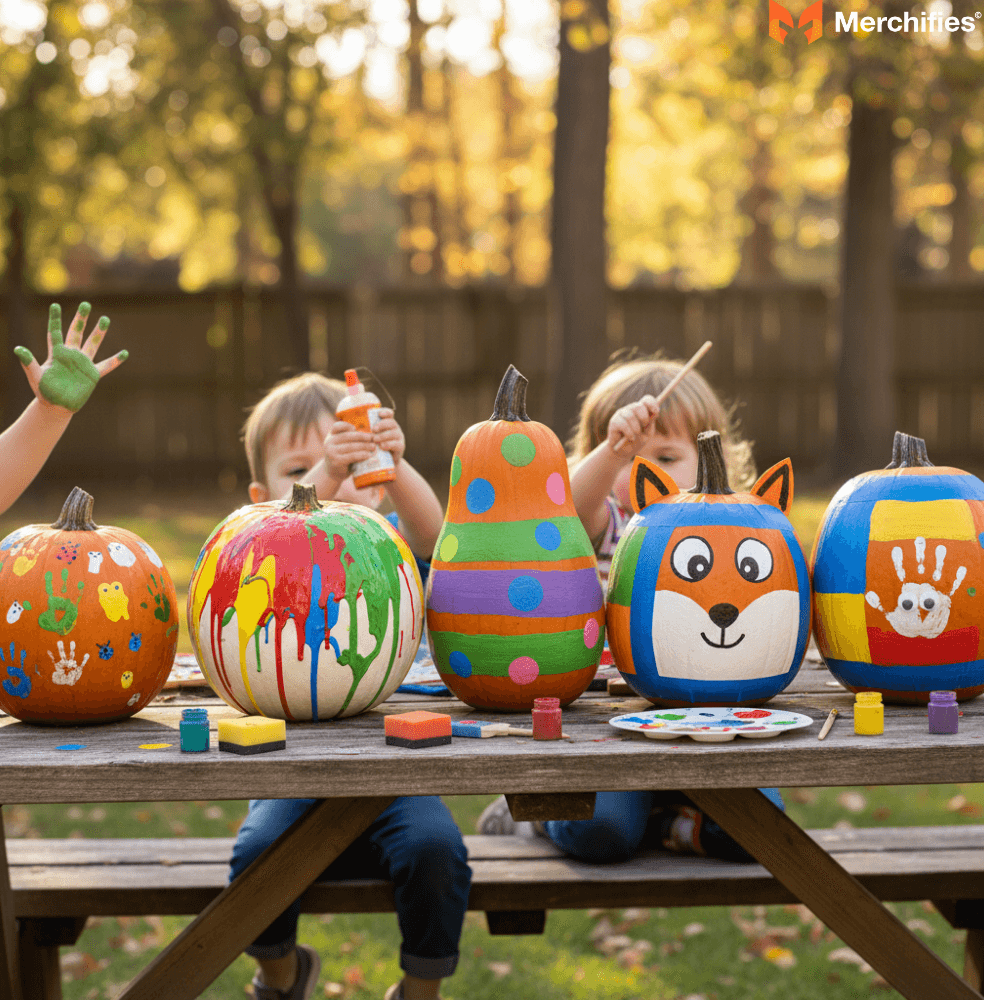
Pumpkin design painting is a fantastic activity for kids, offering a safe and fun creative outlet. These ideas are simple and encourage little artists:
Thumbprint Pumpkins: Incredibly simple and adorable. Kids dip their thumbs in paint and press them onto the pumpkin to create "leaves," "ghosts," "bugs," or even a pumpkin patch scene.
Splash Painting: Set up outdoors! Let kids splatter paint onto the pumpkin with brushes or even squirt bottles for an energetic, abstract, and colorful look.
Simple Patterns: Polka dots, stripes, freehand squiggles, or simple shapes (stars, hearts) are easy for little hands to create. Use large brushes or even sponges for ease.
Character Faces: Paint simple animal faces (cats, owls, foxes), friendly monsters, or silly robots. Focus on big eyes and simple mouths.
Color Blocking: Divide the pumpkin into large sections with painter's tape and let kids fill each section with a different bright color.
Handprint Pumpkins: Let children put their entire handprint on the pumpkin, which can then be decorated to look like a ghost, a turkey, or simply a colorful memory.
Using washable tempera or acrylic paints makes cleanup a breeze, ensuring the focus remains on the fun of creating a design for a pumpkin.
Who says pumpkins are just for autumn? With faux pumpkins, your designs can last year-round, offering endless decorative possibilities:
Home Decor Accents: Paint pumpkins in colors that match your home's decor, like muted blues, grays, metallics, or pastels. Use them as permanent decorative accents on shelves, coffee tables, or entryways.
Holiday Themes (Beyond Halloween/Fall):
Christmas: Paint pumpkins white with silver glitter, red with green stripes, or even create miniature gingerbread house designs.
Valentine's Day: Pink, red, and white pumpkins with painted hearts.
Easter/Spring: Pastel colors with floral designs, polka dots, or bunny faces.
Patriotic: Red, white, and blue stripes or stars for July 4th.
Decorative "Planters": Transform miniature faux pumpkins into decorative "succulent planters" by painting them white or a neutral color and adhering faux succulents to the top – a brilliant way to extend their life beyond October.
Personalized Gifts: Paint a faux pumpkin with a monogram, a family name, or a special date for a unique, personalized gift.
A small white pumpkin with delicate gold script could be a charming addition to a bookshelf, while a stack of gradient-painted pumpkins could serve as an elegant room accent, showcasing the versatility of pumpkin design painting year-round.
For those with a more developed artistic eye, incorporating advanced concepts like color theory and freehand techniques can elevate your pumpkin design painting from a craft project to a genuine piece of art. These approaches allow for greater control and personal expression, leading to truly unique ideas.

Understanding basic color theory can dramatically improve your pumpkin designs. Consider these ideas:
Complementary Colors: Using colors opposite each other on the color wheel (like orange and blue, purple and yellow, or red and green) creates high contrast and visual pop, making your design stand out. For an orange pumpkin, a vibrant blue design will grab attention.
Analogous Colors: Colors next to each other on the color wheel (like reds, oranges, and yellows for a warm palette, or blues, greens, and purples for a cool one) create harmonious, soothing palettes. This is great for elegant, understated pumpkin design painting.
Monochromatic Schemes: As discussed, using varying shades of a single color offers sophistication and elegance. Think subtle variations of white, gray, or even a deep forest green.
Warm vs. Cool Palettes: Consider the emotional impact of colors. Warm colors (reds, oranges, yellows) evoke energy and excitement, perfect for festive or spooky designs. Cool colors (blues, greens, purples) suggest calm and tranquility, ideal for elegant fall decor.
Neutral Bases with Pop Accents: Paint your pumpkin a neutral color (white, black, gray) and then add a single, vibrant accent color for a modern, striking look.
For a truly impactful design, I often choose a primary color from the pumpkin itself (orange or white) and then select a complementary or analogous palette to ensure the painted elements enhance, rather than clash with, the natural gourd, making each pumpkin design painting a thoughtful composition.
Freehand painting offers the ultimate creative freedom for your pumpkin designs. This involves sketching your design directly onto the pumpkin with a pencil first, then filling it in with paint. Here are some ideas and tips:
Sketching & Composition: Before painting, lightly sketch your design with a pencil. Consider the pumpkin's natural curves and how your design will wrap around it. Think about focal points and balance.
Brush Control & Strokes: Practice basic brush strokes, blending, and shading on a separate surface before tackling your pumpkin. Experiment with different brush types (flat, round, liner, fan) to see how they interact with the curved surface and create different effects.
Blending & Gradients: Learn to blend colors smoothly for realistic effects (like shadows or highlights) or for beautiful ombre gradients. This often involves applying two wet colors side-by-side and gently merging them with a clean brush.
Shading & Highlights: Add depth by painting darker shades in areas that would naturally be in shadow and lighter shades/highlights where light would hit. This makes flat designs appear three-dimensional.
Developing Your Unique Style: This comes from consistent practice and embracing imperfections. Perhaps your style leans towards whimsical illustrations, abstract expressionism, detailed botanical art, or minimalist patterns. Don't be afraid to experiment and let your personality shine through. For example, my friend, a graphic designer, developed a distinctive style of painting minimalist animal silhouettes on pumpkins, a technique she honed by sketching dozens of animal forms until they felt uniquely hers, making each pumpkin design painting a signature piece.
Ensuring your beautifully painted pumpkins endure and are showcased effectively is just as important as the painting process itself. Thoughtful choices in materials and display methods can significantly extend their life and impact, preserving your pumpkin design painting for longer.
For pumpkin designs intended for outdoor display, choosing the right paints is crucial for weather resistance. These ideas ensure your outdoor art endures:
Exterior-Grade Acrylic Paints: These are formulated to withstand the elements better than standard craft acrylics, resisting fading and cracking.
Outdoor Spray Paints: Specifically designed for outdoor use, such as those used for exterior furniture or automotive applications, provide excellent durability and UV protection. They create a hard, protective shell.
Oil-Based Enamel Paints: Offer a very hard, weather-resistant finish, though they require longer drying times and specialized cleanup. They are very durable for outdoor pumpkin design painting.
Marine-Grade Sealants: For ultimate protection in harsh weather, consider a marine-grade varnish or sealant over your finished design.
When selecting paints, look for terms like "outdoor use," "UV resistant," or "all-weather" on the label. This proactive choice in paint selection can mean the difference between a design for pumpkins fading in a week or lasting all season.
Beyond sealing, proactive steps can protect your painted pumpkin designs from damage. Here are some ideas:
Placement for Real Pumpkins: Keep real painted pumpkins in a cool, dry, shaded area to slow down decomposition. Avoid direct sunlight, which can fade colors and accelerate spoilage. If displaying outdoors, bring them in during heavy rain or freezing temperatures.
Careful Handling: For both real and faux pumpkins, handle them carefully, especially if they have delicate embellishments or intricate details.
Proper Storage for Faux Pumpkins: Store faux pumpkins wrapped individually in tissue paper, bubble wrap, or soft cloth to prevent designs from rubbing off, scratching, or sticking together during off-season storage. Store them in a climate-controlled area to prevent material degradation.
Dusting: Gently dust your painted pumpkins with a soft, dry cloth or a feather duster to keep them looking fresh. Avoid harsh cleaners.
My elaborately painted faux pumpkin from 2020, featuring a detailed harvest scene, has lasted perfectly because I meticulously wrap it in bubble wrap and store it in a dedicated box each year, preserving its intricate pumpkin design painting.
How you display your painted pumpkins can enhance their visual impact. Consider these ideas:
Clustered Arrangements: Cluster pumpkins of varying sizes, shapes, and designs on porch steps, a mantelpiece, or a console table for a dynamic arrangement. Vary heights using risers or pedestals.
Natural Elements Integration: Incorporate natural elements like hay bales, cornstalks, mums, gourds, dried leaves, or pinecones to create a cohesive fall scene around your painted pumpkins.
Illuminated Displays: For a dramatic evening display, use flameless LED candles or string lights around or within your pumpkins (if they are faux or have a small opening) to illuminate their designs safely.
Hanging Displays: Hang smaller, lighter faux pumpkins from tree branches, indoor hooks, or a garland for an unexpected whimsical touch.
Focal Point: Place a single, exquisitely painted pumpkin as a focal point on a dining table or entryway console, making it the star of your autumn decor, perhaps even as a DIY fall centerpiece.
Tiered Trays: Arrange small painted pumpkins on a tiered tray with other fall-themed items for a charming tabletop display.
As conscious consumers, it's important to consider the environmental impact of our crafting. Sustainable pumpkin design painting involves making eco-friendly choices and thinking about the lifecycle of our materials, offering ideas for responsible crafting.
When selecting paints, look for brands that offer low-VOC (Volatile Organic Compound) or zero-VOC options. These paints release fewer harmful chemicals into the air, making them better for both your health and the environment. Water-based acrylics are generally a more eco-friendly choice than oil-based paints. Consider using natural pigments or homemade dyes if you're feeling adventurous, though these might require more experimentation. For embellishments, prioritize natural or recycled materials like dried flowers, leaves, twigs, natural twine, or repurpose old fabric scraps instead of new plastic items. Even selecting a faux pumpkin made from recycled materials can contribute to a more sustainable craft, aligning your pumpkin design painting with eco-conscious values.
For real painted pumpkins, once the season is over, if the paint used is non-toxic (like standard acrylics), you can compost them. Remove any non-compostable embellishments first. If you've used heavier, toxic paints or sealants, check local waste disposal guidelines, as they might need to be treated as hazardous waste. The great advantage of faux pumpkins is their reusability. Instead of discarding them, clean them gently and store them for next year. If you tire of a particular pumpkin design painting, you can often paint right over it, giving the faux pumpkin a fresh new look for a different season or theme. This repurposing is a cornerstone of sustainable decorating, making faux pumpkins a best pumpkin carving alternative and a canvas for endless new pumpkin design painting ideas.
Creating beautiful painted pumpkins doesn't have to break the bank. Here are some ideas for budgeting your pumpkin design painting projects:
Use What You Have: Start by utilizing supplies you already have on hand, like old paintbrushes, leftover craft paints, or fabric scraps.
Shop Smart: Dollar stores, discount retailers, and craft store sales often carry affordable craft acrylics, sponges, and even small faux pumpkins.
DIY Stencils: Instead of buying expensive stencils, try making your own from cardboard, printer paper, or even cutting out designs from contact paper.
Forage for Embellishments: Forage in your yard or local park for natural items like pinecones, acorns, interesting leaves, or twigs to use as free embellishments.
End-of-Season Sales: Buying pumpkins (real or faux) during end-of-season sales can save a significant amount for next year's projects.
Multi-Purpose Supplies: Invest in versatile paints and brushes that can be used for various craft projects, not just pumpkins.
By being resourceful and planning your designs, you can achieve stunning results on a modest budget, proving that creativity isn't tied to cost when it comes to pumpkin design painting.
From the practical advantages of longevity and safety to the boundless creative opportunities, pumpkin design painting offers a rewarding way to celebrate the autumn season. Whether you're a novice looking for simple, kid-friendly projects or an experienced artist ready to tackle advanced techniques and explore color theory, there's a world of design for a pumpkin waiting to be discovered. We've explored a multitude of ideas, from spooky Halloween themes to elegant modern decor, unique artistic techniques, and sustainable practices. So gather your supplies, choose your canvas, and let your imagination flow. Your next painted pumpkin isn't just decor; it's a testament to your creativity, ready to bring joy and beauty to your home for weeks, or even years, to come. Embrace the art of pumpkin design painting and make this autumn truly unforgettable.
-d4c38c342cdf20ca.jpeg)


-b555fcc6b204c456.jpeg)


