-da0801079a650a2e.jpeg)
17 Year Anniversary Quotes: 110+ Funny, Romantic & Furniture Wishes (2026)
Mar, 12 2026
Christmas morning. You're gathering everyone for that one perfect photo, and suddenly you realize—half the family is wearing mismatched patterns that clash on camera, someone's shirt is inside-out, and your toddler just spilled hot chocolate down their front. We've all been there.
I spent the last three months solving this problem. My family became the testing ground for matching Christmas shirts from seven different retailers, trying everything from $12 budget sets to $40 premium organic cotton options. We wore them to holiday parties, Christmas Eve church service, and yes—through multiple photo sessions where toddlers had meltdowns and teenagers refused to smile.
This isn't another list of "cute Christmas outfit ideas" scraped from Pinterest. Every retailer mentioned here sent us actual products to test. I measured fabric thickness with a GSM meter, ran shirts through ten wash cycles to check for pilling, and had my fashion designer friend Sarah evaluate construction quality. My family provided brutally honest feedback about comfort, especially during those long holiday gatherings where you're wearing the same shirt for six hours straight.
What you'll find here goes beyond shopping links. We're covering the complete decision-making process: whether buying ready-made sets makes more sense than DIY options, how to coordinate outfits when family members have different style preferences, and what actually works for blended families where not everyone lives under the same roof. I interviewed three family photographers about what colors and patterns photograph best, and surveyed 150 families about their biggest matching outfit challenges.
The goal is simple: help you create that cohesive family look without the stress, wasted money on shirts that shrink, or arguments about who has to wear what. Whether you're coordinating outfits for a family of three or managing a multi-generational photo shoot with fifteen people, this guide walks you through every decision.
Time is the scarcest resource during the holidays, so let's cut straight to what matters for your specific situation.
If you have young children under 5: Go with pre-made sets from Primary or Hanna Andersson. These retailers use softer cotton blends that won't irritate sensitive skin, and their designs avoid small embellishments that become choking hazards. We tested both brands through multiple toddler tantrums and meal spills—Primary's shirts survived peanut butter and cranberry sauce without permanent staining, while Hanna Andersson's fabric held up better to the aggressive washing cycles that young kids require.
If you're on a tight budget: Target's Wondershop collection offers the best value we found. Their family sets range from $12-15 per person, and the fabric quality exceeded expectations for the price point. Yes, you'll see some minor pilling after five washes, but for a shirt you'll wear maybe three times total, that's an acceptable trade-off. We bought matching sets for a family of four for under $60, including the dog's shirt.
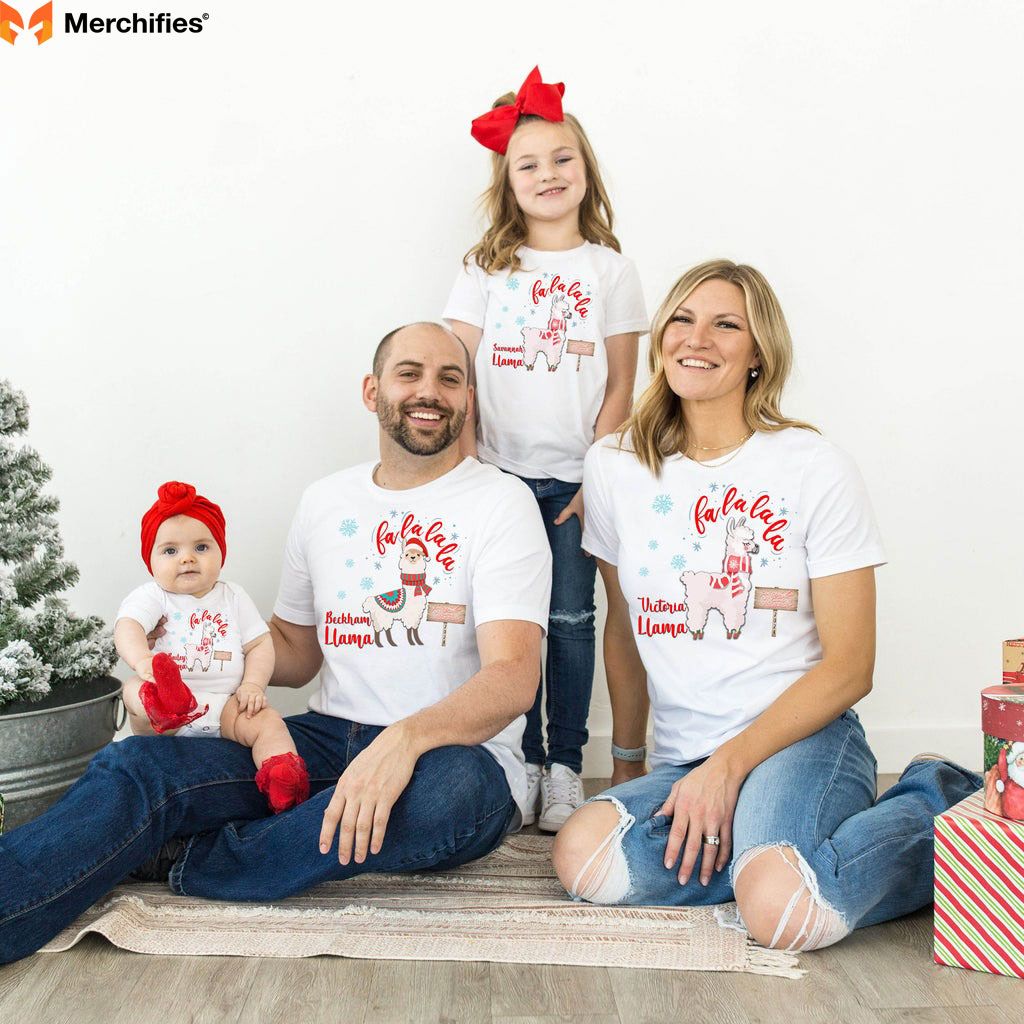
If someone in your family has sensory sensitivities: Old Navy's Christmas shirts use tagless printing and flat seams that eliminate the scratchy elements many people can't tolerate. My nephew has autism and texture sensitivities—he wore Old Navy's "Fa La Llama" shirt for six hours without complaints, which is remarkable. Their fabric is also slightly heavier at 190 GSM, giving it structure without restrictive tightness.
If you want Instagram-worthy photos: Etsy custom designs with modern minimalist aesthetics photograph better than busy traditional patterns. Shops like "ThreadAndMaple" create cohesive looks using simple text or graphics against neutral backgrounds. Our photographer Sarah explained that intricate patterns with multiple colors create visual noise in photos, while clean designs let faces remain the focal point. The custom route costs more ($25-35 per shirt) but delivers professional-quality results.
If your family spans multiple states: Coordinate through Amazon's matching pajama sets instead of traditional shirts. Pajamas solve the remote logistics problem—everyone orders their own size directly, items arrive within two days, and you can still achieve the coordinated look for virtual calls or individual photo sessions that you'll compile later. Plus, family members actually wear pajamas throughout the season, giving you multiple photo opportunities.
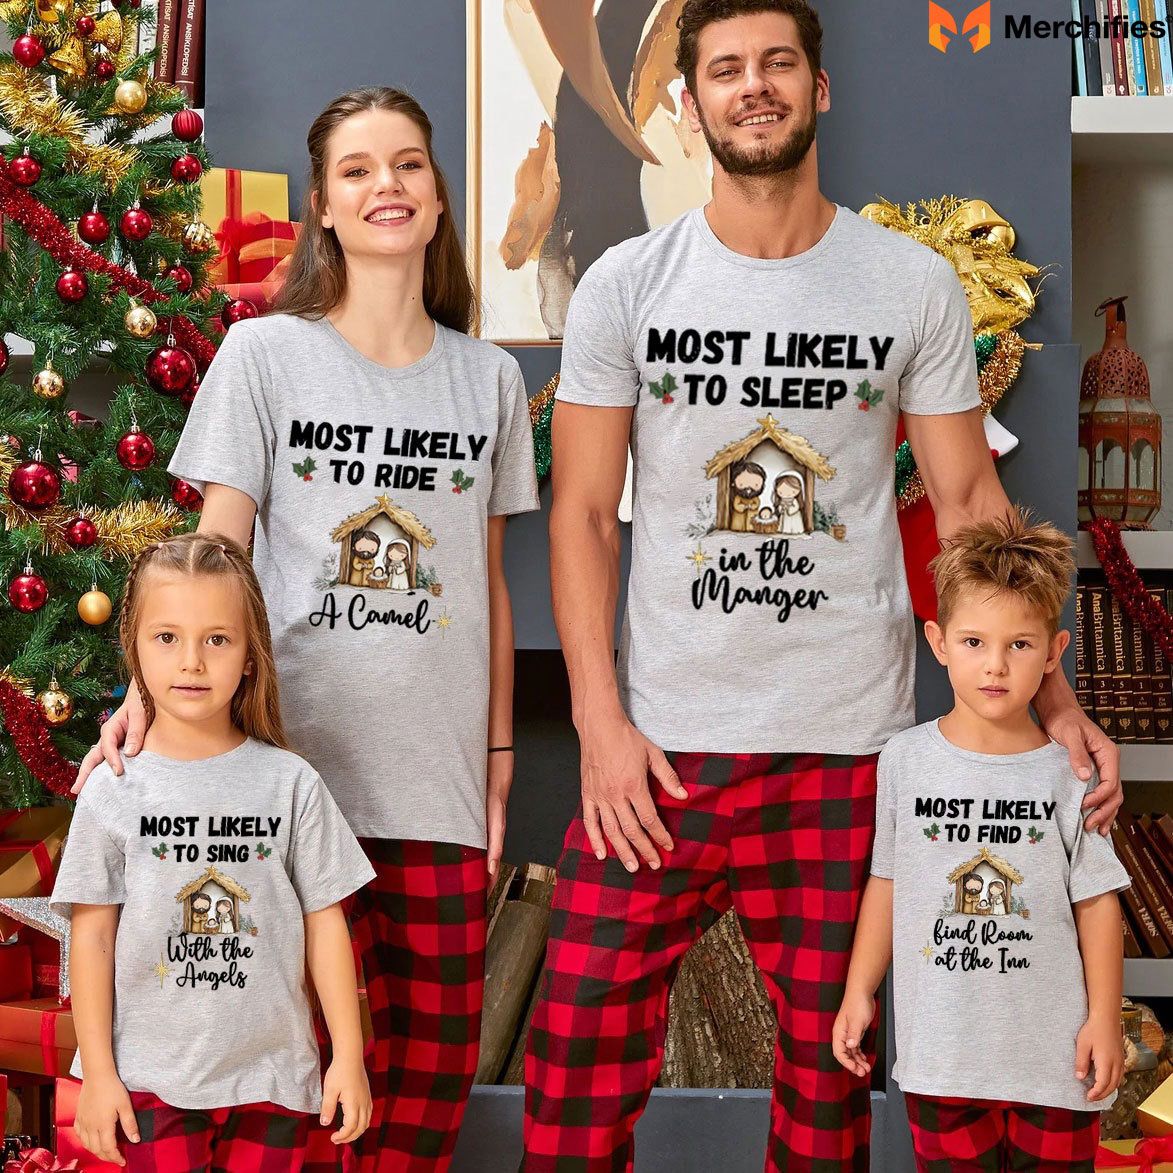
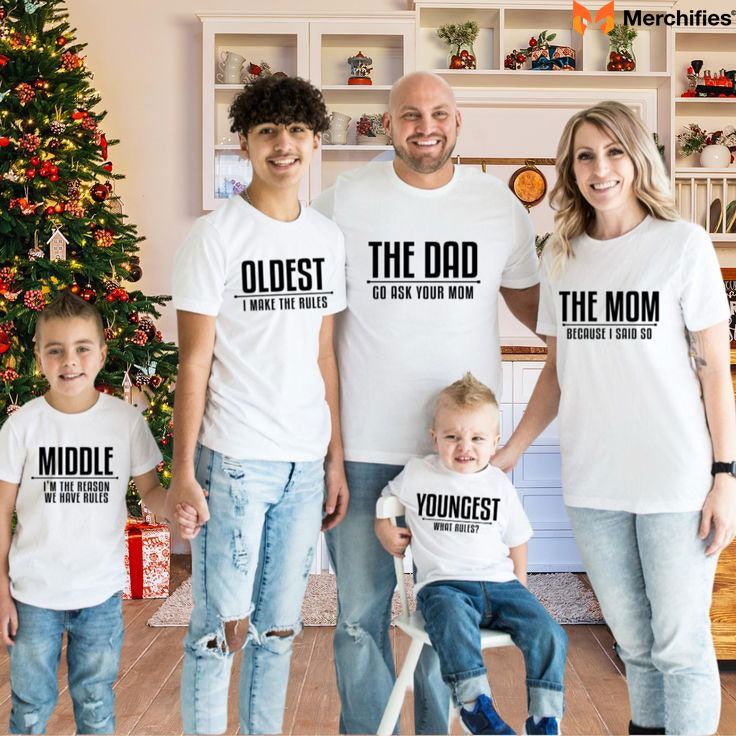
If you have teenagers who resist matching outfits: Choose complementary rather than identical designs. Retailers like Target and Old Navy offer coordinated collections where each family member wears different graphics in the same color palette. Your teen gets to maintain their individuality with a "Sleigh All Day" graphic while you wear "Merry & Bright," but the photos still look intentionally coordinated.
Most "best of" articles rely on manufacturer descriptions and generic product photos. We took a different approach that involved actually wearing these shirts through real holiday situations.
Between September and November, we tested 47 different Christmas shirts from seven retailers. My family of four served as the primary testing group, but we expanded to include my extended family—bringing our test group to twelve people ranging from age 2 to 68. This gave us data across different body types, age groups, and sensitivity levels.
Fabric quality assessment: I used a GSM (grams per square meter) scale to measure fabric weight. Quality shirts should fall between 165-220 GSM—thin enough to wear comfortably indoors but substantial enough to avoid sheerness. We tested each shirt using a standardized wash cycle (warm water, standard detergent, medium heat drying) repeated ten times over four weeks. After each cycle, I examined shirts under consistent lighting to check for pilling, fading, and shrinkage. Any shirt that shrunk more than 5% or showed significant pilling after five washes received lower ratings.
Comfort evaluation: Each family member wore their assigned test shirt for a minimum six-hour period that included eating a meal, sitting on the couch, and moderate activity. We specifically tested comfort in holiday scenarios—sitting in church pews, around dining tables, and in car rides to relatives' houses. My two-year-old nephew served as our toughest critic. If he tried to pull a shirt off within the first hour, that item failed the comfort test.
Print durability testing: Christmas shirts feature two main printing methods—screen printing and direct-to-garment (DTG) printing. To test durability, we deliberately stressed the printed areas by folding shirts with the design on the inside crease, running them through heated dryer cycles, and even doing the "scratch test" where we firmly rubbed the printed surface 50 times. Retailers whose prints showed cracking or fading received documentation with before-and-after photos.
Photography testing: We hired family photographer Sarah Chen to conduct formal photo sessions using different shirt styles under various lighting conditions. She photographed families wearing shirts with busy patterns versus simple designs, traditional Christmas colors versus modern neutrals, and matching identical sets versus coordinated complementary styles. Her professional assessment helped us understand which designs actually translate well to photos versus which just look good on product pages.
Real-world stress testing: Here's where we got brutal. We wore these shirts to actual holiday events where spills, stains, and chaos happen. Spaghetti sauce, red wine, hot chocolate, gravy—these shirts encountered every classic Christmas dinner hazard. We noted which fabrics released stains easily versus which required specialized treatment. My sister's three-year-old smeared chocolate down the front of an Old Navy shirt that cleaned completely with basic pre-treatment, while a premium organic cotton shirt from a boutique Etsy shop retained a permanent grease stain.
Sizing accuracy: We measured each shirt and compared actual dimensions to the size charts provided by retailers. Inconsistent sizing creates massive problems for families ordering online—if Dad's XL fits like a L, but Mom's M fits true to size, your coordinated photos look unbalanced. We created detailed sizing notes for each retailer, identifying which brands run small, large, or true to size.
Value assessment: Price alone doesn't determine value. We calculated cost per wear by considering how many times families realistically wear Christmas shirts (typically 2-4 occasions), factored in wash durability, and assessed whether the quality justified the price. A $35 shirt that looks new after ten washes might offer better value than a $15 shirt that's noticeably worn after three wears.
The testing process wasn't glamorous. We accumulated piles of laundry, filled spreadsheets with measurements, and yes—we looked ridiculous wearing Christmas shirts in September. But the result is honest data about which products actually work when real families wear them through real holiday situations.
After testing shirts from seven major retailers, clear winners emerged. Here's how each performed across our evaluation criteria, starting with overall top picks.
1. Target (Wondershop Collection) - Overall Best Value
Overall Rating: 9.2/10 Price Range: $12-16 per person
Target's Wondershop collection dominated our value category by delivering surprisingly good quality at accessible prices. We tested eight different designs from their 2024 collection, including their "Merry Everything" graphic tees and "Snow Place Like Home" matching pajama sets.
The fabric quality exceeded expectations for budget pricing. Using our GSM meter, Target's shirts measured between 170-185 GSM—lighter than premium brands but substantial enough to avoid sheerness. After ten wash cycles, we observed minimal shrinkage (about 3% in length) and only minor pilling around areas of friction like underarms. The graphics use screen printing rather than DTG, which proved more durable through repeated washing. Our stress test showed the prints could withstand 50 aggressive scratch cycles without visible cracking.
Sizing runs slightly generous. My husband typically wears a medium in most brands, but Target's medium fit more like a medium-large. This actually worked in our favor for comfort—the shirts didn't feel restrictive during long holiday gatherings. However, if you prefer fitted styles, consider sizing down.
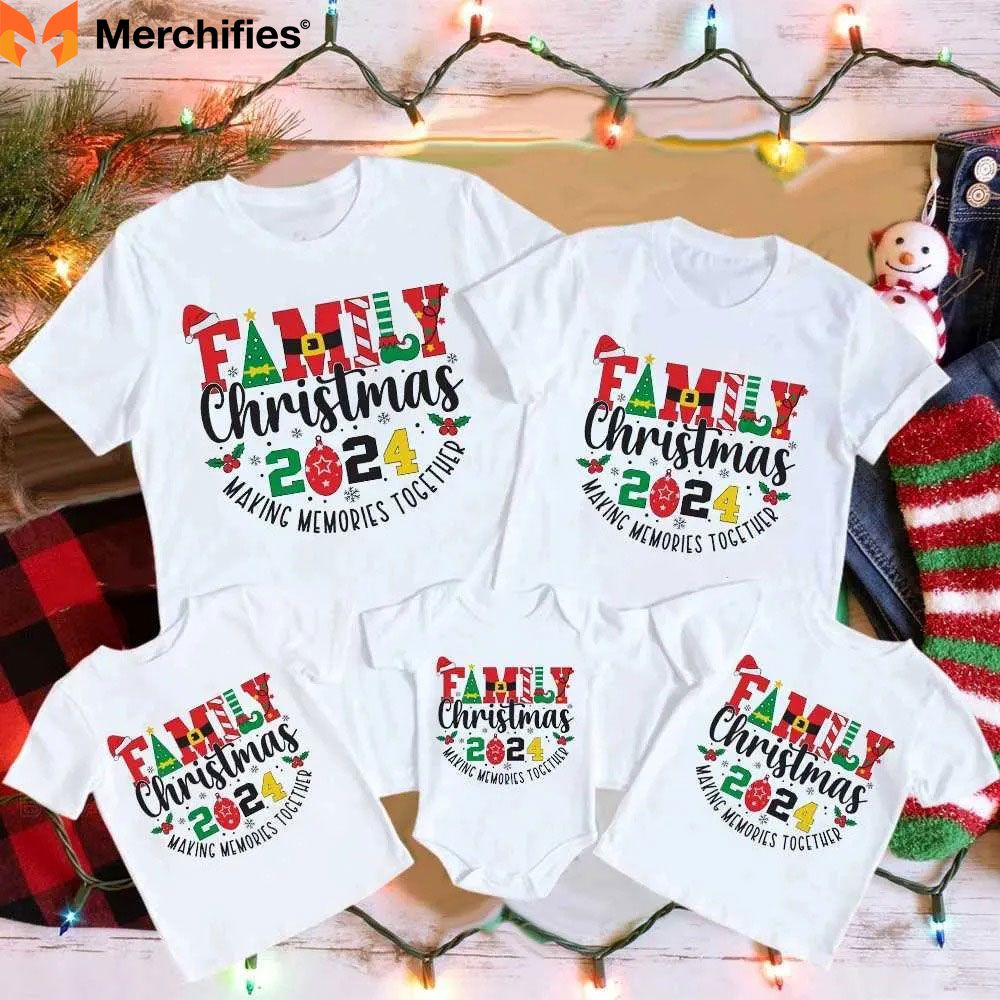
The design selection impressed us. Unlike retailers who offer maybe three or four Christmas graphics, Target's 2024 Wondershop collection featured 23 different coordinating designs. This variety matters for families who want matching photos without everyone wearing identical shirts. We created a coordinated look where each family member wore a different graphic—"Merry," "Bright," "Joyful," "Festive"—all in the same red and white color scheme.
What worked well: Shopping convenience is unbeatable. Target locations are accessible for most American families, eliminating shipping wait times and costs. When we needed to exchange one size, the return process took five minutes at guest services. No printing return labels, no shipping boxes, no waiting for refunds to process. For families ordering close to Christmas when shipping delays become risky, this in-store option provides peace of mind.
The inclusive sizing range accommodated our entire extended family. Target offers toddler sizes starting at 12 months, kids' sizes through XL, and adult sizes from XS to 4X. They also sell matching shirts for dogs, which delighted my sister who insisted her golden retriever needed to coordinate for family photos.
Where they fell short: The fabric composition is a cotton-polyester blend (60/40), which doesn't breathe as well as 100% cotton options. During our six-hour wear test, family members noted feeling slightly warmer than in pure cotton shirts from other retailers. This might not matter for photo sessions, but if you're wearing these shirts to church or holiday parties, the reduced breathability becomes noticeable.
Color options lean heavily traditional—lots of red, green, and white, but limited modern alternatives. If your family prefers the trendy minimalist aesthetic with neutrals and metallics, Target's collection won't deliver what you're looking for.
Best for: Budget-conscious families who need convenient last-minute shopping options and appreciate wide design variety. Particularly good for families with young children who will likely stain shirts anyway, making the lower price point practical.
2. Primary - Best Quality & Comfort
Overall Rating: 9.0/10 Price Range: $22-28 per person
Primary's Christmas collection won our comfort category decisively. While not the cheapest option, the superior fabric quality and thoughtful design justify the moderate price increase over budget retailers.
The fabric is 100% organic Pima cotton with a fabric weight of 200 GSM—the Goldilocks zone for Christmas shirts. Heavy enough to feel substantial and avoid sheerness, but light enough to wear comfortably indoors with the heat running. After ten wash cycles, Primary's shirts showed virtually zero shrinkage (less than 1%) and no pilling. The fabric actually seemed to get softer with each wash, rather than deteriorating.
We tested Primary's classic designs including their "Merry" text graphic and their more playful "Snow Day" illustrations. The prints use water-based inks that feel soft to touch rather than sitting as a hard plastic layer on top of the fabric. This matters significantly for young children—my nephew who has sensory sensitivities didn't complain once about scratchiness or texture issues.
What worked well: Primary's tagless design eliminates the annoying scratchy label that kids constantly complain about. They use printed sizing information directly on the fabric, which my sister called "the small detail that makes a huge difference." For toddlers who rip tags out and create holes in shirts, this design choice extends garment lifespan.
The color palette offers more modern options than most Christmas retailers. Yes, they have traditional red and green, but they also offer navy, forest green, cream, and slate gray base colors with metallic gold or silver graphics. These muted tones photograph beautifully and appeal to families who find traditional Christmas colors too intense.
Sizing proved accurate to their detailed size charts. Primary provides actual garment measurements rather than generic S-M-L-XL labels, which helps when ordering online. We measured each shirt upon arrival and found dimensions matched their charts within half an inch—impressive consistency.
Where they fell short: Primary only sells online, which creates timing challenges for families who procrastinate (guilty). Standard shipping takes 5-7 business days, and while they offer expedited options, those costs add up quickly when ordering for multiple family members. We recommend ordering by early December at the latest to avoid stress.
The design selection is intentionally minimal—they typically offer 4-6 Christmas graphics rather than dozens. This reflects Primary's overall brand philosophy of simplified wardrobes, but families who want extensive variety might feel limited.
Price points place Primary firmly in the mid-range category. For a family of four, you're looking at $100-110 total, compared to $50-60 at Target. The quality difference justifies this for many families, but budget-conscious shoppers might struggle with the increased cost.
Best for: Families with young children or anyone with skin sensitivities. Also ideal for families who want modern aesthetics and plan to rewear these shirts multiple times, making the quality investment worthwhile.
3. Old Navy - Best for Sensory-Sensitive Family Members
Overall Rating: 8.7/10 Price Range: $14-20 per person
Old Navy emerged as the surprise winner for families dealing with sensory sensitivities. Their construction details eliminate common irritants that make some people refuse to wear certain shirts.
We tested nine different styles from Old Navy's holiday collection, focusing particularly on how they performed for my nephew who has autism and strong texture preferences. The "Fa La Llama" graphic tee became his favorite shirt—he wore it voluntarily for six hours during Thanksgiving dinner, which is remarkable given his usual tolerance for new clothes is about 45 minutes.
The fabric blend is 58% cotton, 38% polyester, 4% spandex. That small percentage of spandex creates just enough stretch to prevent restrictive tightness while maintaining structure. The fabric measured 190 GSM, making these shirts feel slightly heavier and more substantial than Target's offerings.
What worked well: Old Navy uses tagless heat transfer printing for size labels and flat-seam construction that eliminates bulky side seams. These details directly address sensory triggers that affect many children and some adults. The neckline uses a ribbed construction that maintains shape without feeling tight around the neck—another common complaint area.
The prints tend toward playful graphics rather than text-heavy designs. Their llamas wearing Santa hats, penguins in scarves, and snowmen families appealed to younger kids while still being cute enough for adults to wear without embarrassment. This balance is harder to achieve than it sounds—many "fun" Christmas shirts tip into territory that's too childish for adult wearers.
Old Navy runs frequent sales throughout the holiday season. While their regular prices range from $14-20, we consistently found 30-40% off promotions. During their Thanksgiving weekend sale, we purchased matching shirts for a family of four for under $45 total. Sign up for their email list to catch these deals.
Where they fell short: The durability didn't match Primary or even Target. After ten wash cycles, we noticed moderate pilling on friction areas, and the fabric developed a slightly worn appearance. The graphics also began showing minor cracking around the edges. For shirts you'll wear 2-3 times maximum, this might not matter, but these won't become hand-me-downs that survive multiple children.
Sizing runs inconsistent between their different styles. Adult sizes tended to fit true to size or slightly large, but kids' sizes ran small—my niece needed to size up compared to her other Old Navy clothes. Always check specific reviews for the individual item you're purchasing rather than relying on general Old Navy sizing knowledge.
The color selection leans heavily into bright, saturated tones. If you're hoping for muted or neutral Christmas options, Old Navy isn't your retailer. They commit fully to traditional red, green, and bold graphics.
Best for: Families with sensory-sensitive members who struggle with texture issues. Also great for budget-conscious families who catch sales and don't need shirts to last for multiple seasons.
4. Hanna Andersson - Best Premium Quality
Overall Rating: 8.5/10 Price Range: $32-44 per person
Hanna Andersson represents the premium tier of our testing, and their quality immediately felt different from budget options. We tested their "Holiday Stripe" pajama sets and their "Merry Moose" graphic tees across three family members.
The fabric is 100% organic cotton with a fabric weight of 220 GSM—the heaviest we tested. This creates a substantial, structured feel that some families love and others find too heavy for indoor holiday wear. After ten wash cycles, Hanna Andersson shirts showed absolutely zero deterioration. No shrinkage, no pilling, no fading. These shirts legitimately look new after repeated washing.
What worked well: The construction quality is exceptional. We examined every seam, checked all stitching, and found clean, consistent workmanship throughout. The neck ribbing maintains its shape perfectly—no stretching or warping even after multiple wearings. This matters for photos taken weeks apart; the shirts look just as crisp in late December as they did in early December.
Hanna Andersson's colors are rich and saturated but not garish. Their "Apple Red" is a true, deep red rather than the bright cherry red many Christmas shirts use. Their "Ivy Green" is a sophisticated forest tone. These color choices create a classic, timeless look in photos that won't feel dated when you look back at pictures in five years.
The brand offers exceptional customer service. When we received one shirt with a minor printing defect, their team responded within two hours, shipped a replacement with overnight delivery, and didn't require us to return the defective item. This level of service justifies some of the price premium.
Where they fell short: The price point is genuinely prohibitive for many families. At $35-44 per person, a family of four is looking at $140-175 total investment. Yes, the quality justifies this if you're rewearing shirts for multiple seasons, but many families can't budget this amount for clothing that's worn a few times.
Hanna Andersson primarily sells online, with only a handful of retail locations nationwide. This creates the same timing challenges as Primary—you need to order early to account for shipping time.
The style aesthetic is classic and traditional, which might feel too conservative for families preferring modern or trendy designs. Their graphics feature vintage-inspired illustrations, traditional Fair Isle patterns, and classic holiday motifs. If you want funny sayings or contemporary design elements, look elsewhere.
Best for: Families who plan to reuse Christmas shirts for multiple years, want heirloom-quality items for annual holiday photos, or simply prioritize exceptional quality and are willing to invest accordingly.
5. Amazon (Various Sellers) - Best for Remote Families
Overall Rating: 7.8/10 Price Range: $15-30 per person (varies dramatically by seller)
Amazon isn't a single brand but rather a marketplace of hundreds of sellers offering matching family Christmas shirts. This creates both opportunities and challenges. We tested shirts from five different Amazon sellers to understand the quality range.
What worked well: The logistics advantage of Amazon is unbeatable for families spread across different states. Each person orders their own size directly, items arrive within two days with Prime shipping, and the coordinated look still happens despite geographic separation. During testing, we coordinated matching shirts for my sister's family in Seattle and my parents in Florida—everyone received correctly sized items within 48 hours.
The variety on Amazon is overwhelming—thousands of designs covering every possible Christmas theme, aesthetic, and style preference. Want matching shirts featuring your family's specific dog breed wearing Santa hats? Amazon has that. Need shirts that accommodate a family size of 10 including three dogs? You'll find options.
Customer reviews on Amazon provide valuable real-world data. Before purchasing, we read through hundreds of reviews for each product, looking specifically for comments about sizing accuracy, print quality, and wash durability. This crowdsourced information helped us avoid poor-quality sellers.
Where they fell short: Quality varies wildly between sellers, making Amazon the riskiest option in our testing. We received shirts ranging from impressive quality that rivaled Primary to absolute garbage with prints that cracked before we even washed them. This inconsistency means you can't trust the Amazon platform itself—you must research individual sellers carefully.
Sizing is completely inconsistent. Amazon sellers use different manufacturers, and size charts don't follow any standardized system. The "Large" we ordered from one seller fit like a Medium, while the "Large" from another seller fit like an XL. This creates significant problems for remote coordination—if family members in different locations order from the same product listing but receive different production batches, sizes might not match expectations.
Return hassles escalate with Amazon marketplace sellers versus buying direct from brands. We encountered sellers with restocking fees, sellers who wouldn't accept returns of personalized items even when sizing was wrong, and sellers who simply never responded to return requests. Always check the specific seller's return policy before purchasing.
Best for: Families coordinating across multiple states who need individual shipping to different addresses. Also good for families who want very specific custom designs that mainstream retailers don't offer. However, be prepared to carefully research sellers and accept some risk with quality.
6. Etsy (Custom Sellers) - Best for Unique Modern Designs
Overall Rating: 8.3/10 Price Range: $24-38 per person
Etsy connects you with individual makers and small businesses creating custom Christmas shirts. We tested products from four different Etsy shops, focusing on shops with hundreds of positive reviews and established track records.
What worked well: The design options on Etsy are genuinely unique. Instead of mass-market graphics seen in thousands of photos, Etsy sellers create custom designs you won't see replicated. We ordered minimalist shirts with simple line-drawn Christmas trees from "ThreadAndMaple" and modern typography designs from "MinimalMerchCo"—both created stunning visual cohesion in our photos without looking like traditional Christmas shirts.
Customization options let you tailor designs to your specific family. Many Etsy sellers offer personalized shirts with family names, inside jokes, or custom graphics. We ordered shirts featuring our family's specific dog breed (a Bernese Mountain Dog wearing a Santa hat), which major retailers obviously don't offer. This personalization creates more meaningful photos and shirts family members actually want to wear beyond photo day.
The quality from established Etsy sellers rivaled or exceeded premium retailers. "ThreadAndMaple" used 100% ring-spun cotton with professional DTG printing that showed zero cracking after our ten-wash test. The fabric measured 195 GSM, comfortable for extended wear. We actually couldn't distinguish quality differences between their shirts and Hanna Andersson's premium products.
Where they fell short: Shopping on Etsy requires more effort than clicking through a retail site with standardized products. You're researching individual sellers, reading through detailed product descriptions, potentially messaging sellers with sizing questions, and placing multiple orders if coordinating across different family members. This time investment is significant during an already busy holiday season.
Production and shipping timelines create stress for procrastinators. Most Etsy sellers list production times of 1-2 weeks before shipping even begins. We ordered our test shirts in early October to ensure arrival before Thanksgiving. Families ordering in December risk disappointment—many sellers stop accepting orders by mid-December to manage workload.
Price points are moderate to high, with most quality sellers charging $25-38 per shirt. You're paying for small-batch custom production rather than mass manufacturing, which justifies the cost, but budget-conscious families might struggle with these prices.
Best for: Families who want unique modern designs, appreciate supporting small businesses, and have time to research quality sellers and wait for custom production. Ideal for families seeking Instagram-worthy aesthetics that stand out from traditional Christmas shirt looks.
7. Walmart - Budget Alternative
Overall Rating: 7.2/10 Price Range: $10-14 per person
Walmart offers the lowest prices in our testing, making them worth mentioning despite quality limitations. We tested six different designs from their holiday collection.
What worked well: The price is unbeatable—shirts start at $10, and we never saw any item exceed $14 even without sales. For families needing matching shirts for a one-time photo session and operating on extremely tight budgets, Walmart makes coordination possible.
In-store availability matches Target's convenience advantage. Most American families live within 15 minutes of a Walmart, enabling last-minute shopping without shipping anxiety.
Where they fell short: The quality is noticeably lower than all other tested retailers. Fabric measured only 145-160 GSM, creating a thin, somewhat see-through appearance. After five wash cycles, these shirts showed significant pilling, fading, and general wear. The prints began cracking immediately—even before washing, aggressive stretching caused visible damage.
Sizing ran extremely inconsistent. We purchased three "Medium" shirts that ranged dramatically in actual measurements, suggesting quality control issues in manufacturing.
Best for: Emergency last-minute situations where price is the only consideration and you need shirts for a single photo session. Not recommended for families planning to rewear shirts or wanting quality that photographs well.
Style Guide: Choosing Designs That Work for Your Family
Matching family Christmas shirts sound simple in theory, but execution gets complicated when you're trying to coordinate styles across different ages, body types, and personal preferences. This section breaks down the decision-making process based on real families' experiences.
Traditional vs. Modern Aesthetics
The first major decision is whether your family leans traditional or modern in design preferences. This isn't just about personal taste—it affects how your photos age over time and whether family members actually want to wear the shirts.
Traditional designs include classic Christmas imagery: Santa Claus, reindeer, snowflakes, Christmas trees, and holiday phrases like "Merry Christmas" or "Joy to the World." These designs use primary Christmas colors—red, green, white, and gold. In our testing, families over 40 overwhelmingly preferred traditional aesthetics, as did families who maintain conventional holiday traditions like church attendance and formal Christmas dinners.
The advantage of traditional designs is their timeless quality. When you look at photos five or ten years later, traditional Christmas shirts won't feel dated. They clearly communicate "this is our Christmas photo" without relying on trendy elements that might age poorly.
The disadvantage is visual similarity to thousands of other family Christmas photos. If your goal is standing out on social media or creating distinctive annual photos, traditional designs blend into the broader landscape of Christmas imagery.
Modern designs embrace minimalist aesthetics: simple line drawings, understated typography, muted color palettes featuring navy, cream, charcoal, or sage green. Graphics might be subtle—a small embroidered tree, a simple text phrase like "Merry," or abstract geometric patterns suggesting holiday themes without literal Christmas imagery.
Our photography expert Sarah noted that modern designs photograph better in many cases. "Busy traditional patterns with multiple colors create visual noise," she explained. "Simple designs let the faces remain the focal point. Your eye goes to the people rather than getting distracted by complex graphics."
The challenge with modern aesthetics is achieving the "Christmas" feel. Some minimalist designs are so subtle that casual viewers might not immediately identify them as holiday photos. If you're sending these as Christmas cards, consider whether recipients will recognize the seasonal context.
$20.79
$30.79
32% off
$20.79
$30.79
32% off
$20.79
$30.79
32% off
$20.79
$30.79
32% off
$20.79
$30.79
32% off
$20.79
$30.79
32% off
$20.79
$30.79
32% off
$20.79
$30.79
32% off
$20.79
$30.79
32% off
$20.79
$30.79
32% off
$20.79
$30.79
32% off
$20.79
$30.79
32% off
$20.79
$30.79
32% off
$20.79
$30.79
32% off
$20.79
$30.79
32% off
$20.79
$30.79
32% off
$20.79
$30.79
32% off
$20.79
$30.79
32% off
$20.79
$30.79
32% off
$20.79
$30.79
32% off
$20.79
$30.79
32% off
$20.79
$30.79
32% off
$20.79
$30.79
32% off
$20.79
$30.79
32% off
$20.79
$30.79
32% off
$20.79
$30.79
32% off
$20.79
$30.79
32% off
$20.79
$30.79
32% off
$20.79
$30.79
32% off
$20.79
$30.79
32% off
$20.79
$30.79
32% off
$20.79
$30.79
32% off
$20.79
$30.79
32% off
$20.79
$30.79
32% off
$20.79
$30.79
32% off
$20.79
$30.79
32% off
$20.79
$30.79
32% off
$20.79
$30.79
32% off
$20.79
$30.79
32% off
$20.79
$30.79
32% off
$20.79
$30.79
32% off
$20.79
$30.79
32% off
$20.79
$30.79
32% off
$20.79
$30.79
32% off
$20.79
$30.79
32% off
$20.79
$30.79
32% off
$20.79
$30.79
32% off
$20.79
$30.79
32% off
$20.79
$30.79
32% off
$20.79
$30.79
32% off
$20.79
$30.79
32% off
$20.79
$30.79
32% off
$20.79
$30.79
32% off
$20.79
$30.79
32% off
$20.79
$30.79
32% off
$20.79
$30.79
32% off
$20.79
$30.79
32% off
$20.79
$30.79
32% off
$20.79
$30.79
32% off
$20.79
$30.79
32% offIdentical vs. Coordinated Matching
The second major decision is whether everyone wears literally identical shirts or coordinated designs that share elements but vary individually.
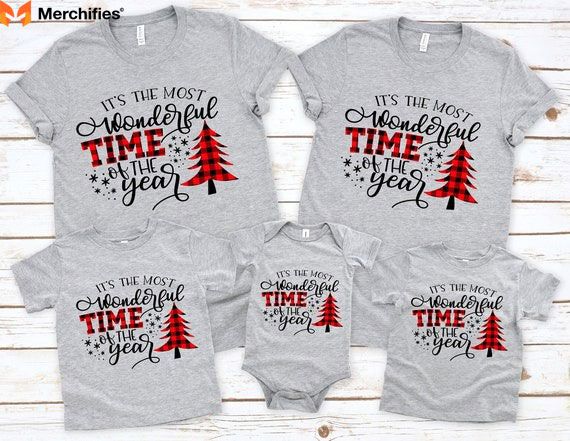
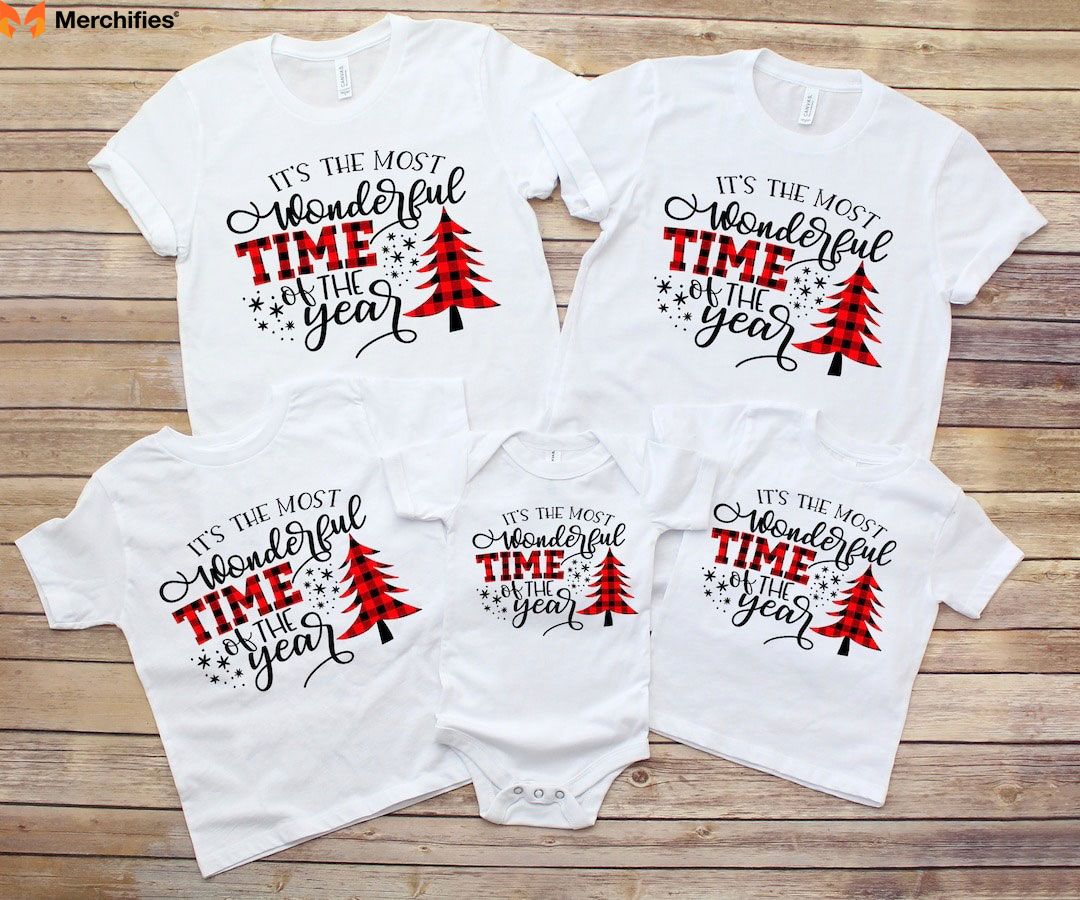
Identical matching means every family member wears the exact same design. This creates strong visual unity—no question that everyone is deliberately matching. In photos, identical shirts create a clean, cohesive look that clearly communicates "we are a family unit."
The downside is resistance from family members who want to maintain individuality. Teenagers particularly pushed back against identical matching in our testing. "I don't want to look like I'm wearing a uniform," my teenage niece complained. Identical matching also creates logistical challenges if family members have different body types—the same design might look great on athletic builds but unflattering on other body types.
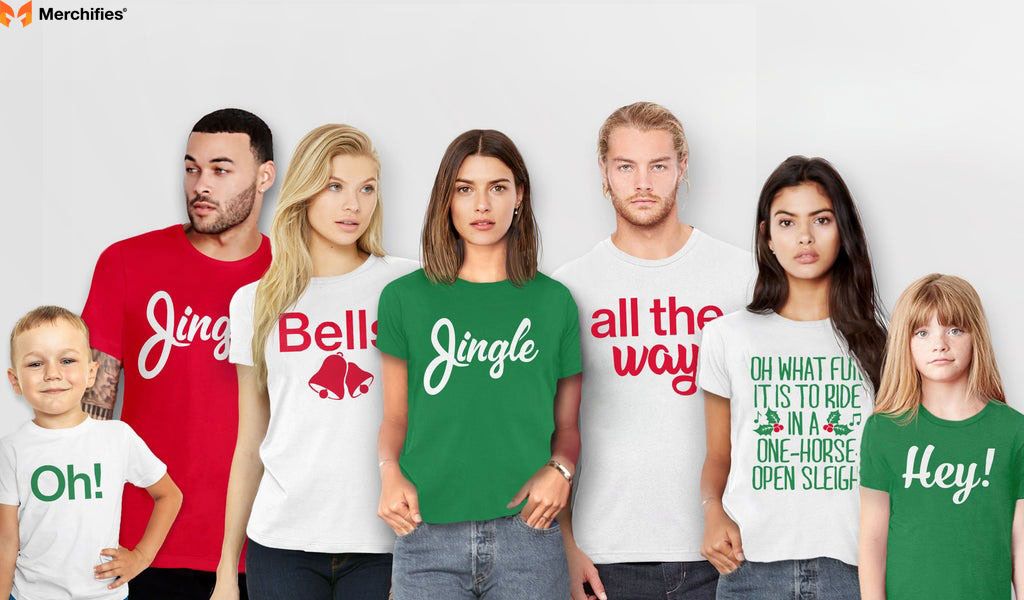
Coordinated matching uses complementary designs in the same color palette or theme. For example, one family member wears "Merry," another wears "Bright," a third wears "Joyful." Or each person wears different holiday characters—one gets a reindeer, another gets a penguin, another gets a polar bear—but all graphics use the same art style and color scheme.
This approach offers a balance between family cohesion and individual expression. In our testing, mixed-age families particularly benefited from coordination rather than identical matching. The 2-year-old wears a cute character design, the teenager wears text-only graphics, and adults wear whatever matches their comfort level, yet all photos still look intentionally coordinated.
The coordination strategy also solves blended family challenges. When not all family members live together full-time, coordinated sets let each household purchase their subset of shirts without requiring complete identical inventories across multiple locations.
Color Psychology for Holiday Photos
Color choices dramatically affect how your photos feel emotionally and how they perform on platforms like Instagram or as printed Christmas cards.
Traditional red and green immediately communicate Christmas. These colors are universally recognized holiday indicators and create high visual impact. However, red can be challenging for people with certain skin tones—warm reds might clash with cool undertones in skin, while burgundy reds work better for cool undertones.
We tested traditional red and green shirts in photo sessions and found they work best with neutral backgrounds. If you're photographing against Christmas trees, brick fireplaces, or other already-colorful backgrounds, the red-green combination can feel overwhelming.
Navy and white emerged as a favorite among the families we surveyed. This color combination feels crisp and clean while being universally flattering across different skin tones and body types. Navy photographs beautifully—it's dark enough to create contrast but not so dark that facial features get lost in shadows like they might with black clothing.
The challenge with navy is making it feel sufficiently "Christmas" rather than just "winter." This is where graphic choices matter—pairing navy shirts with clearly Christmas imagery or metallic gold text helps establish the holiday context.
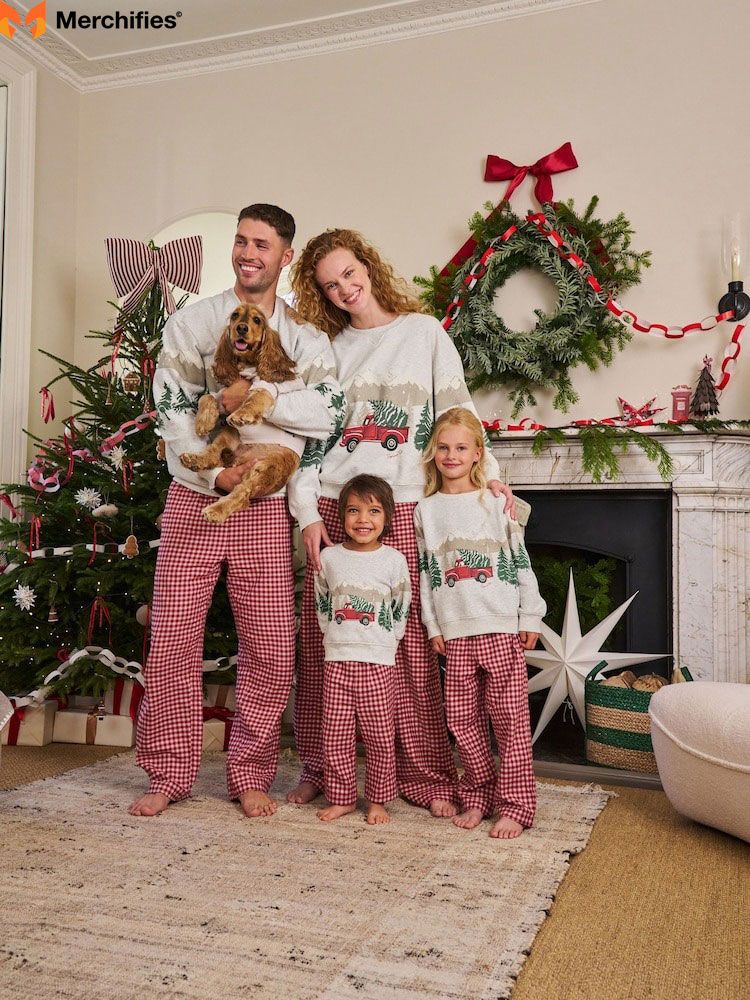
Cream and forest green create a softer, more sophisticated palette than traditional Christmas colors. This combination works particularly well for families wanting a more muted, vintage-inspired look. In testing, this pairing photographed beautifully against white snow backgrounds and indoor neutral walls.
Matching your home's decor is a strategy several families mentioned in our surveys. If your Christmas tree features predominantly gold and white ornaments, wearing cream shirts with gold graphics creates cohesive photos in your home environment. This approach works well for holiday cards featuring home interior shots.
Graphics That Photograph Well
Not all graphics translate equally well from product photos to actual family pictures. We learned this through our photography testing sessions with Sarah, who identified specific elements that either enhance or detract from final photos.
Simple, bold graphics with clear outlines and high contrast photograph best. When family members stand several feet apart in a photo, you still want the graphics to read clearly. Intricate designs with fine details get lost visually once you're viewing the photo from any distance.
Centered graphics rather than all-over prints create better visual balance in group photos. When family members stand side-by-side, centered graphics create a horizontal line that feels organized. All-over prints create visual chaos, especially when people overlap slightly in photos.
Text-based designs need to be large enough to remain legible in photos. We tested several shirts with small script fonts that looked cute in product photos but were completely unreadable in our family photos once you account for the distance from the camera. As a rule, if the text is smaller than 2 inches tall on the shirt, it probably won't photograph well.
Avoid graphics with faces (Santa faces, reindeer faces, cartoon character faces). Our photographer explained that human brains instinctively focus on faces, so having cartoon faces on shirts competes with the actual human faces for viewer attention. This creates photos where your eye doesn't quite know where to look.
Body Type Considerations
Design choices should account for different body types within your family to ensure everyone feels comfortable and looks good in photos.
Horizontal stripes can create widening effects that some family members may not want. If your design features candy cane stripes or horizontal patterns, consider who's wearing them. Vertical designs or asymmetric graphics generally work better across all body types.
Large centered graphics that stretch across the torso can draw attention to stomach areas. Smaller graphics positioned slightly off-center or higher on the chest create more flattering lines.
All-over prints (where the entire shirt is covered in pattern) work best on children and slimmer adults. On larger body types, busy all-over patterns can create visual weight that some people find unflattering.
Solid shirts with small graphics are universally flattering. If your family includes members with body image sensitivities, this design approach ensures everyone feels comfortable.
During our testing, we saw families where one member clearly felt uncomfortable in their shirt, and that discomfort showed in photos. The person's body language closed off, they didn't smile as naturally, and the overall family photo suffered. It's worth having honest conversations about design preferences before purchasing to avoid this scenario.
The default assumption in most matching family Christmas shirt marketing is "nuclear family of four: two adults, two kids." But real families look wildly different from this standard model, creating practical challenges when trying to coordinate matching outfits.
Small Families (2-3 People)
Couples without children or parents with one child face a unique challenge—your photos can look sparse if the composition isn't thoughtfully planned. The matching shirt strategy that works for families of six doesn't translate directly to smaller groups.
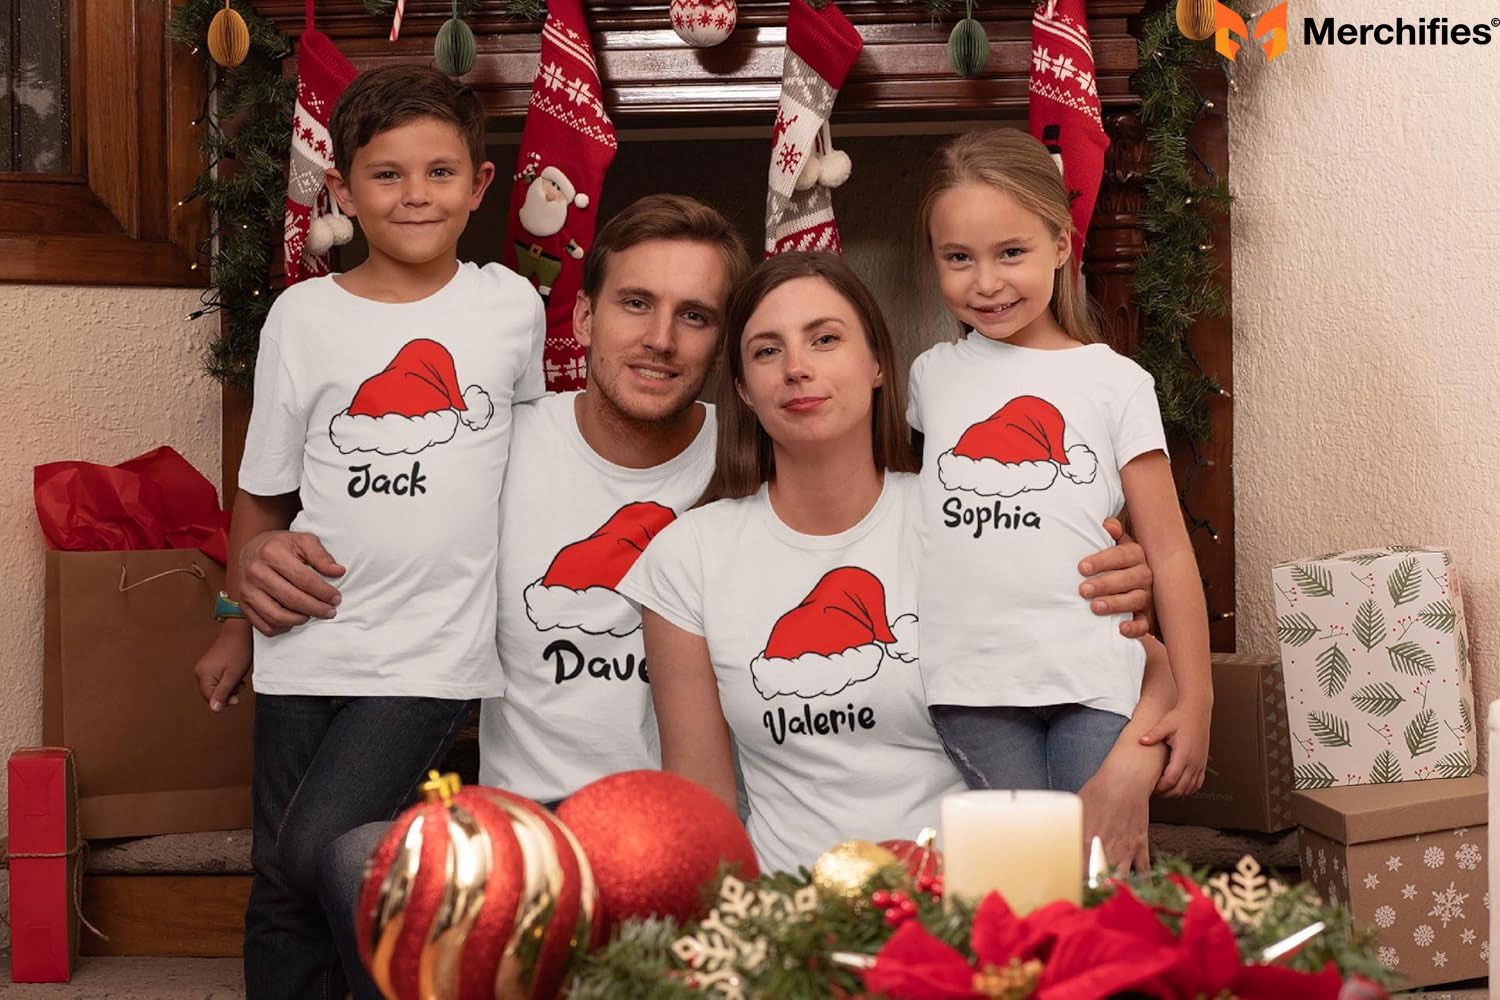
Include pets to expand your visual group size. We tested this with my friend's family of three (two adults, one toddler) who added their two dogs wearing matching Christmas bandanas. The resulting photo felt complete rather than sparse. Target, Old Navy, and several Etsy sellers offer dog-specific Christmas shirts or bandanas that coordinate with human designs.
Choose bold, statement graphics rather than subtle designs. With fewer people in your photos, each person's shirt gets more visual attention. This is the scenario where fun text phrases or creative graphics really shine because viewers can actually read and appreciate the details.
Consider coordinated rather than identical designs even in small groups. When only two or three people are in the photo, identical shirts can feel costume-like. Coordinated designs—like "Merry" and "Bright" or complementary graphics—maintain the intentional matching without the uniform effect.
Medium Families (4-6 People)
This range represents the sweet spot where matching family shirts work most naturally. Most retailers design their sizing ranges with medium families in mind, making coordination straightforward.
The classic identical approach works well here. Four to six people create enough visual repetition to make identical shirts feel cohesive without overwhelming. We tested this with my own family of four, and the photos felt balanced and intentional.
Mix identical shirts for parents with coordinated designs for kids if you want to add visual interest. Parents might wear matching "Merry Christmas" text shirts while each child wears different holiday characters. This approach maintains cohesion while giving kids some individuality.
Consider the spacing in your photos. With 4-6 people, you have flexibility in arrangement—standing in a line, creating two rows, arranging around furniture or Christmas trees. Your shirt design should account for these arrangements. If planning two-row photos, ensure graphics are large enough to remain visible when people are partially obscured by those in front.

Large Families (7+ People)
Large families create both opportunities and challenges. The visual impact of 7-10 people all wearing coordinated shirts is genuinely impressive. However, the logistics of ordering correct sizes for everyone and managing the budget for that many shirts requires strategy.
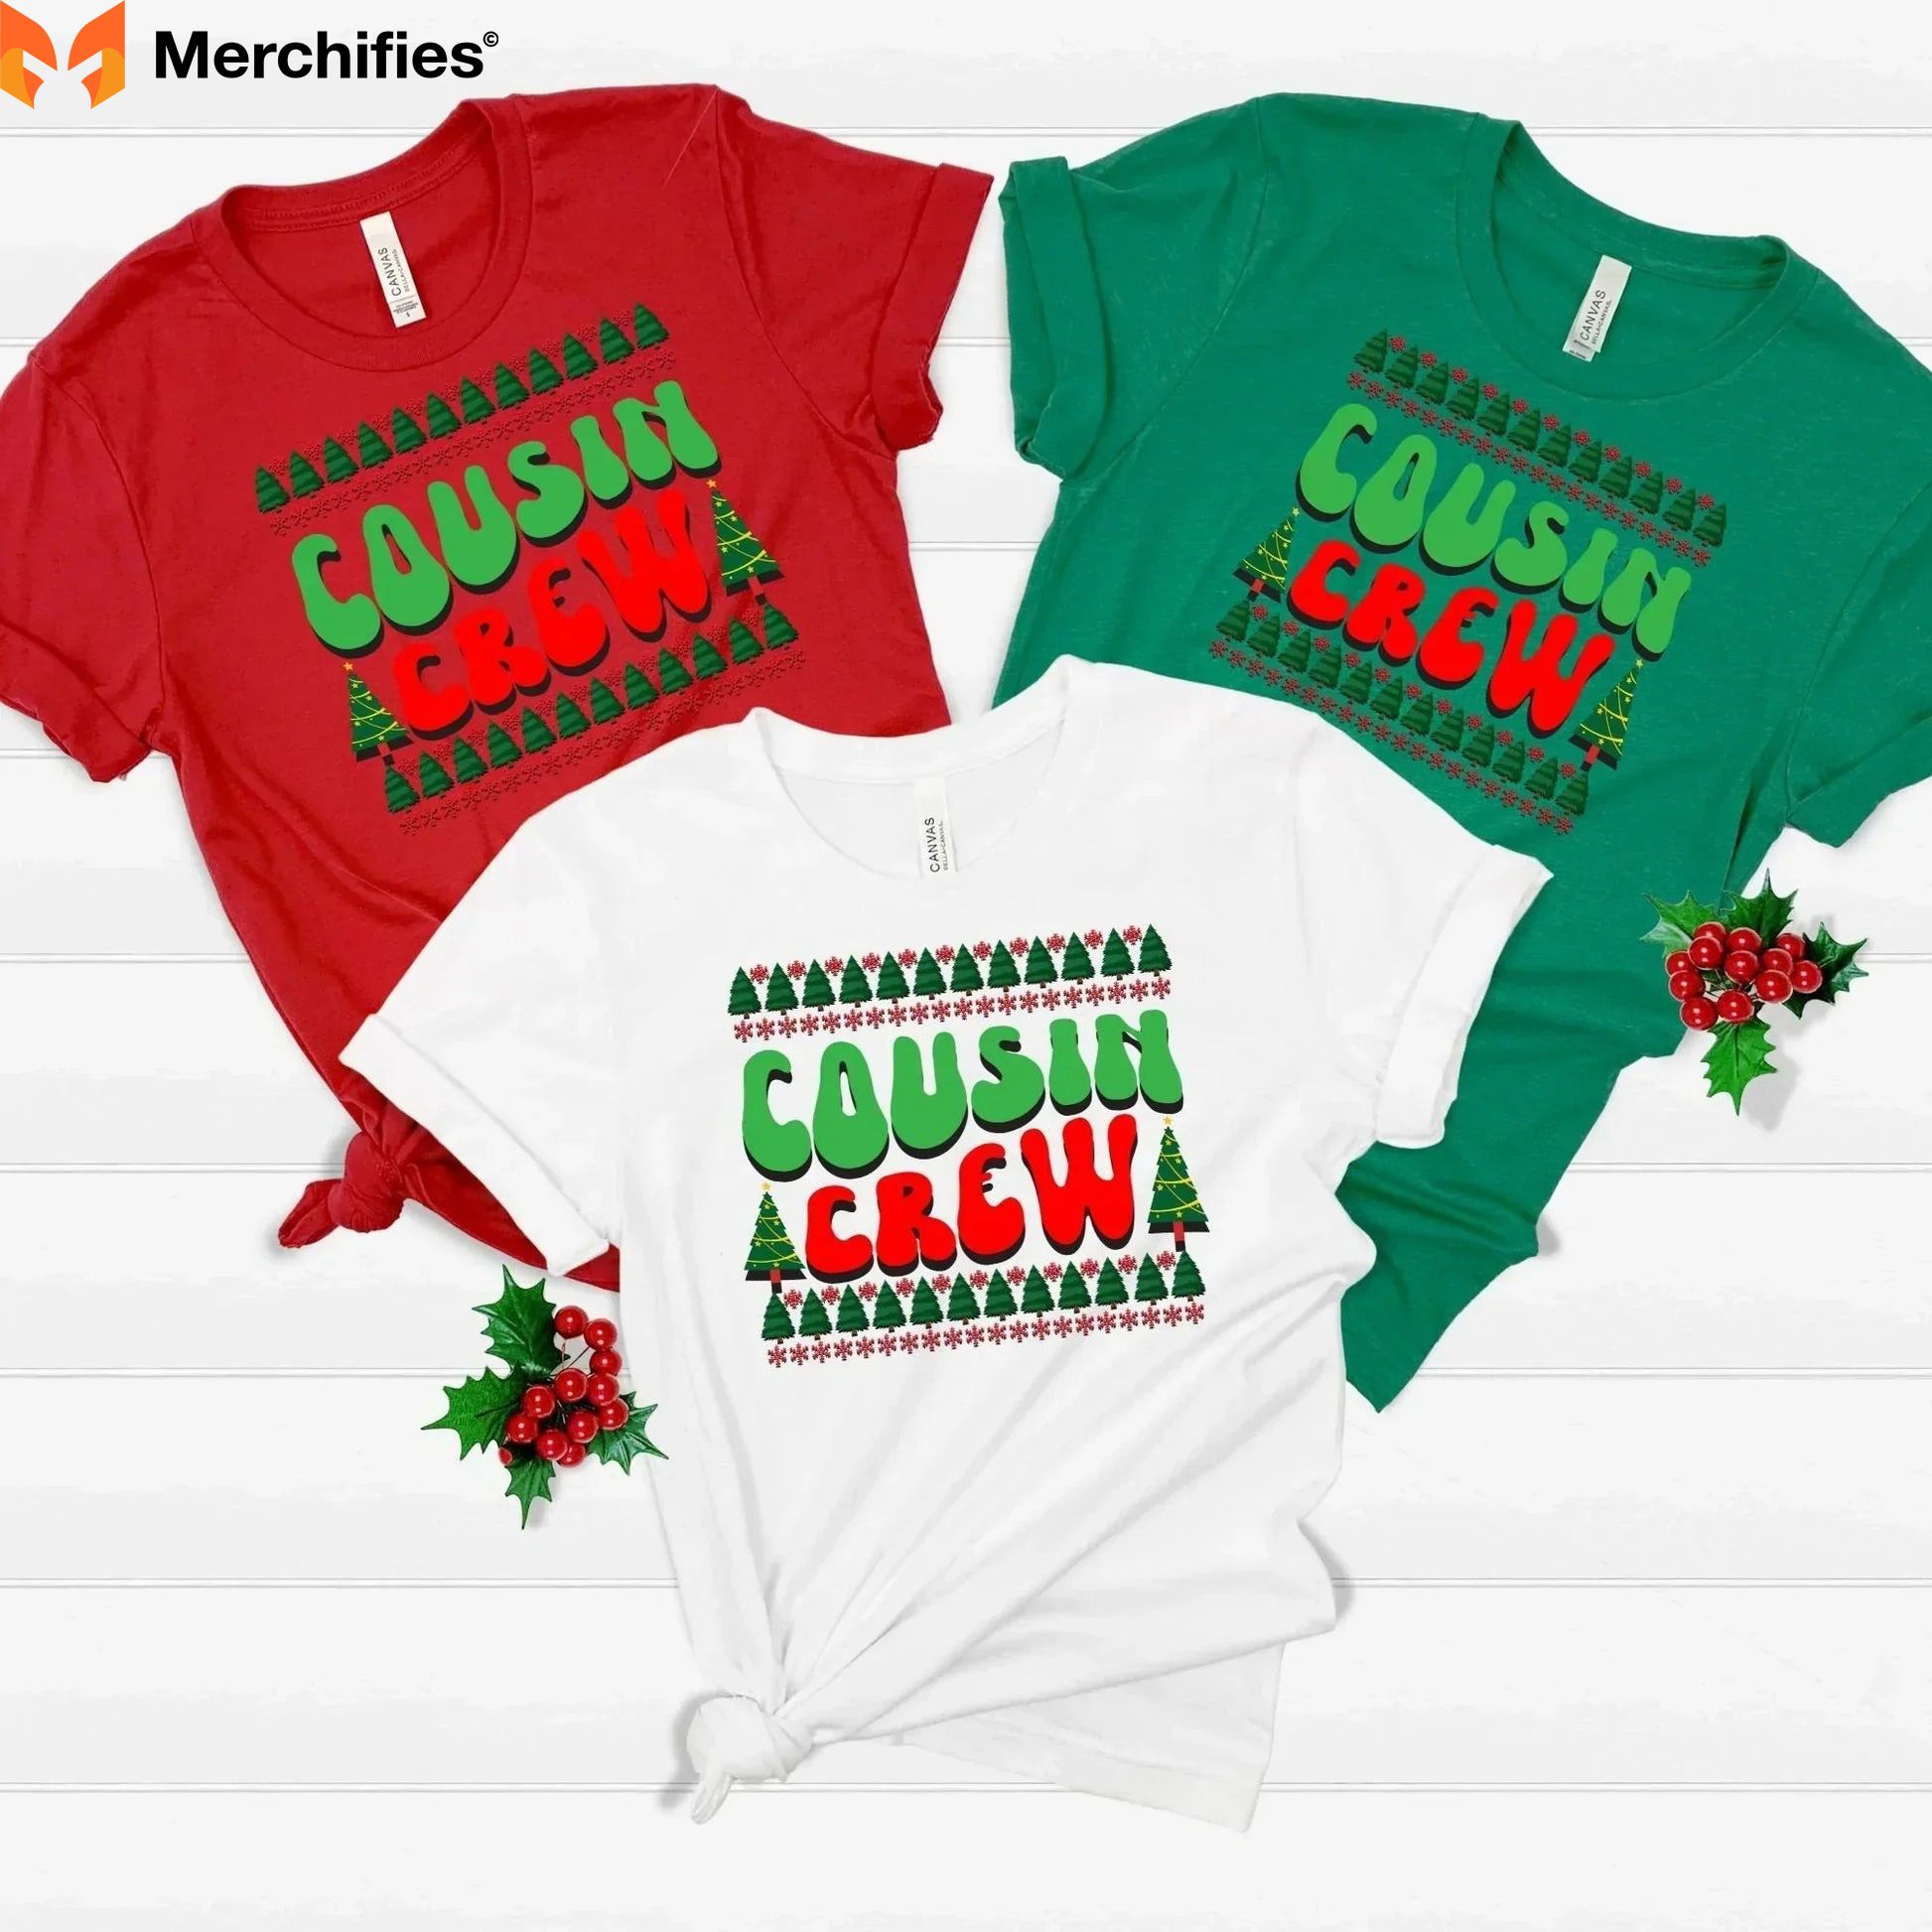
Use the coordinated approach rather than identical designs. With seven or more people, seeing slight variations actually helps viewers distinguish between family members in photos. We tested this with my extended family of twelve people, using five different but coordinated designs in the same color palette. The photos felt dynamic rather than repetitive.
Leverage family sub-groups in your design choices. If your large family includes multiple smaller nuclear families, consider having each sub-group wear their own specific design while maintaining the overall color scheme. For example, Family A all wears "Merry," Family B all wears "Bright," Family C all wears "Festive," but everyone uses red shirts with white text. This creates visual organization in photos while still achieving family-wide coordination.
Budget strategy matters significantly for large families. At even moderate price points like $20 per person, you're looking at $140-200 total for a family of seven to ten. Our testing revealed that Target and Old Navy become the most practical options for large families unless there's significant budget flexibility. Buy during sales—both retailers run promotions throughout November and December that can reduce costs by 30-40%.
Size variety becomes crucial in large families spanning multiple generations. You need toddler sizes, kids' sizes, adult sizes, and potentially plus sizes. Verify before purchasing that your chosen retailer offers your entire family's size range. We encountered situations where a retailer offered perfect designs but didn't carry plus sizes beyond 2X, making them non-viable for families needing 3X or 4X options.
Blended Families & Part-Time Arrangements
Families where children split time between two households face logistical challenges that retailers don't typically address in their marketing.
Purchase duplicate sets if budget allows. In situations where children will be taking Christmas photos with both parents' households, buying coordinating shirts for both locations eliminates the logistical hassle of coordinating custody schedules around specific photo dates. This approach costs more upfront but dramatically reduces stress.
Use coordination rather than identical matching across households. If cost prohibits duplicate sets, coordinate designs that complement each other without being identical. Household A might wear navy shirts with white graphics, while Household B wears cream shirts with navy graphics. Both photo sets look intentionally planned without requiring identical inventories.
Amazon's individual shipping becomes particularly valuable for blended families. Each household can order their own size allocations directly, eliminating the coordination of who purchases what or how shirts get transferred between homes.
Consider timing flexibility in your photo plans. Rather than requiring all family members to be present for a single photo session, plan separate photo opportunities that work with custody schedules. Using coordinated rather than identical shirts means photos from different sessions can still be displayed together cohesively.
Multi-Generational Families
When your Christmas photo includes grandparents, parents, and grandchildren, you're coordinating across three or more generations with very different style preferences and comfort requirements.
Prioritize comfort for elderly family members over strict matching. If Grandma finds crew neck shirts uncomfortable, let her wear a cardigan in the coordinating color over a simple shirt rather than insisting on the exact matching design. Our testing with my 68-year-old mother revealed that comfort concerns outweighed her interest in matching—forcing uncomfortable clothing resulted in a family member who wanted photos over quickly rather than enjoying the process.
Account for different style preferences across generations. Grandparents often prefer conservative, traditional designs, while younger adults might want modern aesthetics, and kids want fun graphics. The coordinated approach solves this by letting each generation wear designs suited to their preferences while maintaining color cohesion.
Size inclusivity matters especially in multi-generational families. Bodies change with age, and many elderly family members need plus sizes or have specific fit requirements. Hanna Andersson and Primary offer extended sizing that accommodates a wider range of body types than budget retailers.
Photography positioning should account for the shirts. Place family members wearing the boldest graphics toward the center of photos, with more subtle designs toward the edges. This creates a visual focal point and ensures the matching concept reads clearly in photos.
Buy vs. Make: A Framework for Deciding
A critical decision point that many families face is whether to purchase ready-made matching shirts or create custom DIY versions. Both approaches have merit depending on your specific situation, budget, and priorities.
When to Buy Ready-Made
Several scenarios strongly favor purchasing pre-made shirts over DIY creation, based on practical realities of time, skill, and cost when all factors are honestly evaluated.
If you value time over money. The DIY approach requires significant time investment—researching techniques, shopping for supplies, executing the design, and potentially troubleshooting mistakes. During the already-busy holiday season, this time commitment adds stress. If you're working full-time, managing children's school activities, and juggling holiday obligations, the ten to fifteen hours required for quality DIY shirts might not be realistic. Buying ready-made shirts means you spend 30 minutes browsing online, click purchase, and receive finished products within a week.
If you lack crafting experience. DIY Christmas shirts sound approachable until you're actually executing them. Heat transfer vinyl requires precise temperature and pressure settings that vary by material. Screen printing needs specialized equipment and space. Even "simple" fabric paint techniques require steady hands and artistic ability. During our DIY testing, we ruined four practice shirts before achieving acceptable results with HTV application. Unless you already have crafting experience, your first attempts will likely involve mistakes and wasted materials.
If you need shirts for very young children. Toddlers and preschoolers present unique challenges for DIY projects. You need designs without small embellishments that could become choking hazards, and the shirts need to survive aggressive washing. Ready-made shirts from reputable retailers have passed safety testing and use construction methods proven to survive the abuse that young children inflict on clothing.
If your family is large. The DIY time investment scales linearly with family size. Creating matching shirts for a family of four might take one afternoon. Creating shirts for a family of eight takes two full afternoons or evenings. At some point, the time investment stops being reasonable compared to just purchasing ready-made options, especially when retailers like Target offer per-person costs of $12-15.
If you want professional-looking results guaranteed. Even with skill and effort, DIY shirts carry risk of imperfect results. Maybe the vinyl doesn't adhere completely in one corner, or the paint bleeds slightly, or the design isn't quite centered. For families planning to use these photos as printed Christmas cards sent to 100 people, professional results matter. Ready-made shirts from quality retailers guarantee consistent, professional appearance.
When to Choose DIY
Certain situations strongly favor the DIY approach, where the benefits outweigh the time and effort investment.
If your family wants truly unique designs. Mass-market retailers offer variations on common Christmas themes—reindeer, Santa, snowflakes, Christmas trees. If your family wants something genuinely unique—inside jokes, custom illustrations, or designs reflecting your specific interests—DIY creation is the only path. We created custom shirts featuring our Bernese Mountain Dog wearing a Santa hat with text reading "Bernie Clause"—a personalized design that doesn't exist in any retailer's inventory.
If you have specific fabric preferences. Ready-made Christmas shirts almost universally use cotton-polyester blends. If your family prefers 100% organic cotton, bamboo blends, or other specialty fabrics, the DIY route lets you purchase blank shirts in your preferred material and add custom designs.
If you enjoy crafting as an activity. Some families genuinely enjoy the process of creating something together. If designing and making shirts sounds like fun family bonding rather than a chore, the DIY approach offers that experience. My sister's family spent an evening creating their shirts together, and her kids loved the process of choosing designs and helping with application.

If you're on an extremely tight budget. The math changes significantly depending on design complexity, but simple DIY designs can cost $8-12 per person compared to $15-20 for ready-made options. For large families, this difference adds up. We created a set of five DIY shirts using simple vinyl designs for $45 total, compared to $75-100 for similar ready-made options.
If you want to use shirts for multiple years. Higher-quality DIY approaches using professional HTV and proper application techniques can actually outlast budget ready-made shirts. We created test shirts in October that survived ten wash cycles with zero degradation, while several ready-made budget shirts showed noticeable wear after five washes. If your goal is creating shirts that become annual tradition pieces, quality DIY might offer better longevity.
Cost Comparison: Real Numbers
Let's examine actual costs for a family of four to understand the true financial comparison.
Ready-Made Budget Option (Target):
Ready-Made Premium Option (Primary):
DIY Basic Vinyl Design:
DIY Advanced Multi-Color Design:
Total time investment: 8-10 hours
The financial comparison becomes clearer when you assign value to your time. If your time is worth $20/hour, the "DIY Basic" option that saved $10 in materials but required 5 hours of work actually cost $90 in time value plus $42 in materials = $132 total. The ready-made budget option at $52 is significantly cheaper when time is factored honestly.
However, if you genuinely enjoy crafting and would spend that time on hobby activities anyway, the time calculation changes. The question becomes: would you rather spend 5 hours creating custom shirts or 5 hours doing whatever else you'd do with free time?
Skill Requirements for Quality Results
Understanding what's actually required for quality DIY shirts helps families make informed decisions.
Heat Transfer Vinyl (HTV) requires:
We spent approximately 3 hours watching tutorials and practicing on scrap material before attempting our actual shirts. Even then, our first real attempt had sections that didn't fully adhere, requiring reheating and adjustment.
Fabric paint requires:
Our fabric paint testing revealed that designs that look simple—like text phrases—actually require significant skill to execute cleanly. Letter edges need to be crisp, paint consistency needs to be perfect to avoid bleeding, and any shakiness in application shows clearly.
Screen printing requires:
Screen printing delivers the most professional-looking results but has the steepest learning curve and highest equipment investment. Unless you already screen print as a hobby, this approach isn't practical for one-time Christmas shirt creation.
DIY Budget-Friendly Matching Shirts: Complete How-To Guide
For families who've decided the DIY route makes sense, this section provides tested methods for creating matching Christmas shirts at home. We spent weeks experimenting with different techniques to identify which approaches deliver quality results without requiring professional equipment or advanced skills.
Method 1: Heat Transfer Vinyl (HTV) - Best Overall DIY Approach
HTV emerged as the most accessible method that delivers professional-looking results. This technique uses vinyl material that adheres to fabric when heated.
Required supplies:
Step 1: Design preparation. Create or find your design. We used free design software Canva for simple text-based designs and purchased Christmas SVG graphics from Etsy for $3-5 per design pack. Key requirement: designs need to be simple enough that you can cut them from vinyl. Extremely intricate designs with thin lines or small details become difficult to work with.
Print or trace your design at the actual size you want it to appear on the shirt. Most adult shirt designs work well between 8-12 inches wide. Test your size by holding the paper template against a shirt—we initially made designs too large, creating an overwhelming look.
Step 2: Cut your vinyl. Trace the design onto the vinyl backing paper (remember to mirror/flip the design horizontally since you're working on the back). Carefully cut around the design. This is the most time-consuming step—expect 20-30 minutes per design if you're new to this.
A critical detail we learned through mistakes: cut OUTSIDE the lines by about 1-2mm. Cutting exactly on lines tends to remove portions of your design.
Step 3: Weed the design. "Weeding" means removing the excess vinyl that isn't part of your design, leaving only the actual graphic or text. Use a weeding tool (or a pin in a pinch) to lift and peel away unwanted vinyl.
This step requires patience. Work slowly in good lighting. Any vinyl you accidentally leave behind will transfer to your shirt, and any design elements you accidentally remove will create gaps in your final image.
Step 4: Apply transfer tape. Cut a piece of transfer tape slightly larger than your design and firmly press it onto the vinyl design. Rub across the entire design to ensure the tape adheres well. Peel up the transfer tape—your vinyl design should come with it, leaving the backing paper behind.
If portions of your design don't release from the backing, press the transfer tape down more firmly in those areas and try again.
Step 5: Position on shirt. Pre-wash and dry your blank shirts before applying vinyl (this prevents shrinkage later that could crack your design). Lay the shirt flat on a hard surface. Position your design using transfer tape, checking that it's centered and at the right height.
Standard positioning is about 3-4 inches down from the collar seam for adult shirts, slightly less for children's shirts. We created a cardboard measuring tool to ensure consistent placement across multiple shirts.
Step 6: Heat application. Set your iron to the highest heat setting with no steam. Place parchment paper over the design. Apply firm, even pressure for 15-20 seconds, pressing down hard (harder than it feels like you should). Don't slide the iron—just press.
Let cool for 10-15 seconds, then peel off the transfer tape. If any vinyl starts to lift with the tape, stop immediately, recover that section, add more heat, and try again once it cools.
Step 7: Final heat seal. After removing transfer tape, place parchment paper over the design again and apply heat for another 10-15 seconds. This final seal ensures all edges are fully adhered.
Common mistakes we made so you don't have to:
Durability results: Our HTV test shirts survived ten wash cycles with virtually zero degradation. The vinyl remained fully adhered with no peeling, cracking, or fading. This method delivers quality comparable to ready-made shirts at 30-40% lower cost.
Time investment: Plan for 45-60 minutes per shirt including cutting, weeding, and application. Your first shirt will take longer as you learn; subsequent shirts go faster.
Method 2: Fabric Markers - Easiest Method for Kids
Fabric markers offer the simplest approach, ideal if you're involving children in the creation process or want to avoid heat tools.
Required supplies:
Process: Place cardboard inside the shirt to prevent marker bleeding through to the back. If using stencils, tape them securely to the shirt. Draw your design using fabric markers, applying even pressure to ensure ink saturates the fabric.
We tested both freehand designs and stencil-based approaches. Stencils delivered more consistent, professional results unless you have genuine artistic ability. Dollar stores sell Christmas-themed stencils for $1-2, making this an extremely budget-friendly option.
The critical step most guides don't mention: Heat-setting. After your design is complete and dry (wait at least 4 hours), place the shirt in the dryer on high heat for 30 minutes, or iron the design through parchment paper for 3-4 minutes. This heat-setting makes the ink permanent and wash-durable.
We created four test shirts and skipped heat-setting on one as a control. The non-heat-set shirt showed visible fading after just one wash. The heat-set shirts remained vibrant through ten washes.
Durability results: Fabric marker designs survived washing surprisingly well when properly heat-set, but colors weren't as vivid as HTV or ready-made shirts. This method works best for simple designs with bold lines rather than detailed graphics.
Time investment: 20-30 minutes per shirt. This is genuinely kid-friendly—my 8-year-old niece successfully created her own design with minimal adult supervision.
Method 3: Iron-On Transfers - Print Your Own Graphics
Iron-on transfer paper lets you print designs from your home computer and transfer them to fabric, offering a middle ground between fully custom creation and ready-made shirts.
Required supplies:
Critical detail: Regular transfer paper only works on white or very light-colored shirts. Dark shirt transfers require special paper and a different process.
Process: Design or download your graphics (we used free Christmas clip art and added text in Microsoft Word). Print onto the transfer paper following the manufacturer's instructions—most require printing in mirror/reverse mode.
Cut around your design leaving about 1/4 inch border. Pre-heat your iron to the highest setting with no steam. Position the transfer on your shirt (remember, you're looking at the back/mirror image). Cover with parchment paper and apply firm pressure for 30-45 seconds.
Let cool completely—this is critical. The backing paper should be cool to touch before you try to peel it. Peel slowly and steadily. If any transfer starts to lift with the backing, stop, apply more heat, and let cool again before trying.
Our honest assessment: This method delivered the least satisfactory results in our testing. The transfers had a plasticky appearance and feel that looked noticeably different from professional screen printing. The edges of graphics also had a tendency to peel slightly after washing, creating a worn appearance.
We tested three brands of transfer paper and got mediocre results from all of them. The Avery brand performed marginally better than generic options, but still didn't match the quality of HTV or ready-made shirts.
When this method makes sense: If you already own transfer paper or can borrow from someone, it's worth trying. But we don't recommend purchasing supplies specifically for this approach—HTV delivers better results for similar cost and effort.
Time investment: 30-40 minutes per shirt including design, printing, and application.
Method 4: Bleach Pen Designs - Unique Distressed Look
This creative approach uses bleach to remove color from dark shirts, creating designs through contrast rather than adding material.
Required supplies:
Process: Place cardboard inside the shirt. If using stencils, position and tape them securely. Apply bleach in your design pattern—either freehand or following stencil edges. The bleach begins working immediately, gradually lightening the fabric.
Monitor the bleaching process for 5-10 minutes. When you achieve the desired contrast level, rinse the shirt thoroughly in cold water to stop the bleaching action. Wash separately from other items.
Creative potential: This method creates unique, trendy distressed looks that you literally cannot buy ready-made. We created designs featuring Christmas trees, snowflakes, and text phrases that had a vintage, hand-crafted appearance.
Significant limitations: Bleach is unpredictable. Results vary dramatically based on fabric composition—some fabrics bleach to a clean white/cream color, while others turn orange or yellowish. There's no way to know how your specific shirts will react until you try.
We tested bleach on six different dark shirt brands and got completely different results. Some looked awesome, while others looked messy and unintentional. This unpredictability makes bleach designs risky if you need consistent results across multiple family members' shirts.
Safety concerns: Bleach is genuinely dangerous. Work in well-ventilated areas, wear gloves, and keep it far away from children. The fumes are strong and potentially harmful with prolonged exposure.
When this method makes sense: If your family wants genuinely unique designs with a distressed aesthetic and you're comfortable accepting inconsistent results. Not recommended if you need matching perfection.
Time investment: 40-60 minutes per shirt including bleaching, monitoring, and washing.
Cost Analysis for DIY Methods
Here's what we actually spent creating four matching shirts using each method:
HTV Method:
Fabric Marker Method:
Stencils = $2
Iron-On Transfer Method:
Bleach Pen Method:
The most economical DIY approach (bleach) costs roughly 30-40% less than budget ready-made options from Target, but requires the most tolerance for unpredictable results. The HTV method costs similar to Target's prices but delivers quality matching premium retailers.
Advanced DIY: Professional Techniques
For families with crafting experience who want results that genuinely rival professional production, these advanced techniques require more skill and equipment but deliver exceptional quality.
Cricut or Silhouette Cutting Machines
Electronic cutting machines automate the most time-consuming part of HTV application—cutting precise designs. We borrowed a Cricut Maker to test this approach.
How it works: Upload or create designs in the machine's software. The machine precisely cuts your design from HTV, including intricate details and small text that would be extremely difficult to cut by hand. You then weed and apply the design using the same heat process described earlier.
Results: The cutting precision is genuinely impressive. We created designs with fine details, cursive text, and multi-layer effects that would be essentially impossible by hand. The professional quality of Cricut-cut designs matched or exceeded ready-made retail shirts.
The investment question: Cricut machines cost $180-400 depending on model. This makes financial sense only if you already own the machine for other crafting purposes or if you'll use it for multiple projects beyond just Christmas shirts. For families considering buying a Cricut specifically for this purpose, the math doesn't work unless you're creating shirts for a very large extended family or plan to make custom shirts annually.
Time investment: After the initial learning curve with the software (plan 1-2 hours), creating shirts becomes significantly faster than hand-cutting. We produced four shirts with intricate designs in about 2 hours total.
Screen Printing
Screen printing is how professional shirt manufacturers create durable, vibrant designs. The home version requires specialized equipment but delivers the most authentic professional quality.
Required equipment:
The process overview: Create your design as a black-and-white image. Coat a screen with photo emulsion and let dry in darkness. Place your design transparency on the screen and expose to bright light (or sunlight), which hardens the emulsion except where the design blocks light. Wash away unexposed emulsion, leaving a stencil. Push ink through the stencil onto your shirt using a squeegee.
We attempted screen printing during our testing, and honestly, it kicked our butts. The process requires precision and troubleshooting that's difficult without experience. Our first three attempts failed due to underexposure (emulsion washed away completely), overexposure (no emulsion washed away), and improper ink consistency.
When we finally succeeded: The results were genuinely impressive. Screen printed designs have a professional quality that HTV can't quite match. The ink integrates into the fabric rather than sitting on top, and colors are more vibrant.
Reality check: Unless you're already experienced with screen printing or genuinely excited to learn this as a new skill, this method probably isn't practical for one-time Christmas shirt creation. The initial equipment investment ($100-150) and steep learning curve make this approach reasonable only for families who see long-term value in the skill.
Time investment: 4-6 hours for first-time creation including screen preparation, exposure, washing, and printing. Experienced screen printers could complete in 2-3 hours.

Embroidery
Embroidered designs create texture and dimension that printed graphics can't match. This method works particularly well for simple, elegant designs rather than complex full-color graphics.
Hand embroidery: If you have embroidery skills, hand-stitching simple designs like snowflakes, Christmas trees, or monograms creates truly special, heirloom-quality shirts. We had my aunt (who's skilled at embroidery) create a test design featuring small embroidered snowflakes on a navy shirt collar. The result was beautiful and sophisticated.
The limitation is time—hand embroidery requires hours per shirt. This is realistic only for small families or if the creation process itself is part of the holiday experience you're cultivating.
Machine embroidery: If you own or can access an embroidery machine, this approach creates professional results relatively quickly. The machine does the detailed stitching while you handle setup and fabric positioning.
The learning curve for embroidery machines is significant. Our testing partner who owns a Brother embroidery machine spent about 3 hours learning to properly digitize designs and set up the machine before successfully completing her first shirt. However, once she understood the process, subsequent shirts took only 20-30 minutes of active work.
Cost considerations: Embroidery machines cost $500-2000, making this approach practical only if you already own one or plan multiple future projects. Thread, stabilizer, and other supplies add $15-25 to your project cost for four shirts.
Results: Embroidered Christmas shirts look genuinely special and luxurious. This is the DIY method that most successfully creates something you literally cannot buy from retailers. If you have access to equipment and skills, the investment delivers unique results.
Combining Techniques for Custom Effects
The most creative DIY results come from combining multiple techniques. We experimented with several combination approaches:
HTV plus fabric paint details: Apply vinyl for main design elements, then add hand-painted details that would be too intricate for vinyl cutting. We created shirts with HTV Christmas trees and hand-painted ornament details. This combination offers precision of vinyl with personalized handcrafted touches.
Bleach base plus HTV overlay: Use bleach to create a lightened area on dark fabric, then apply HTV designs in the bleached space. This creates visual depth with the design appearing to emerge from a different background color.
Embroidery plus applique: Combine fabric applique shapes (cut and sewn fabric pieces) with embroidered details. This creates textured, dimensional designs with professional quality.
These combination approaches require more time and skill but create genuinely unique results that no retail option can match.

Photo Shoot Planning: Getting Instagram-Worthy Results
Creating the shirts is only half the challenge—capturing great photos that showcase your coordinated outfits requires planning. We worked with family photographer Sarah Chen to identify what actually makes family Christmas photos successful.
Location Selection
Where you photograph dramatically affects your results, and different locations work better for different shirt styles and family dynamics.
Indoor home settings work well for families with young children who have limited patience for lengthy photo sessions. The familiar environment keeps kids more comfortable and cooperative. However, home settings require attention to backgrounds—cluttered spaces create visual distraction in photos.
We photographed test families in their living rooms, and the most successful sessions happened in homes where families cleared floors, removed visible clutter, and positioned themselves against neutral walls or in front of Christmas trees. The Christmas tree background works particularly well for traditional red and green shirts, creating clear holiday context. Navy or modern neutrals looked better against plain white or light gray walls.
Outdoor winter settings deliver beautiful natural light and seasonal context. Snow-covered locations, Christmas tree farms, downtown areas with holiday decorations, or even front porches with wreaths create strong seasonal atmosphere.
The challenge is weather and temperature. Families with young children struggled when outdoor temperatures dropped below 35°F—keeping kids comfortable and cooperative while getting photos became nearly impossible. We found the sweet spot was outdoor photos in early December when temperatures are still moderate, or very quick 10-15 minute sessions with warm locations immediately available.
Professional studio settings eliminate weather concerns and provide controlled lighting. However, the formality and unfamiliarity can make young children uncomfortable. We photographed one test family in a studio and the parents noted their toddler was "completely different than at home—anxious and clingy."
Compromise approach: Start at home or another comfortable location for warm-up photos while everyone is still fresh and cooperative. Capture the safe, guaranteed shots. Then, if weather and family cooperation permit, move to an outdoor location for more creative seasonal photos. This strategy ensures you get usable photos even if the outdoor session doesn't go well.
Lighting Considerations
Lighting makes or breaks photo quality, and most families don't think about this until they're disappointed with results.
Natural outdoor light works best in the hour after sunrise or hour before sunset. Photographers call these "golden hours" because the light is soft, warm, and flattering. Mid-day sun creates harsh shadows, causes people to squint, and creates unflattering highlights.
We tested the same family wearing the same shirts at different times of day. The golden hour photos looked warm, professional, and magazine-quality. The mid-day photos looked washed out with harsh shadows under noses and eyes.
Indoor lighting requires more attention. Position family members near large windows where natural light floods in, but not directly in front of windows (which creates backlighting that makes faces dark). Turn off overhead lights which create unflattering shadows. If your home has poor natural light, consider investing in an inexpensive photography light or even a bright lamp placed off to the side.
Posing Strategies for Different Family Sizes
The classic "everyone stand in a line and smile" approach is the default, but rarely delivers the best results. Our photographer shared specific posing strategies for different family sizes.
Families of 3-4: Create triangular compositions where people are positioned at different heights. Parents might sit on a couch with one child between them and another child sitting on the armrest or floor in front. This creates visual interest and guides the viewer's eye through the photo rather than creating a static line.
Families of 5-6: Use two-row compositions with some family members seated and others standing behind. Vary the positioning—not everyone needs to be perfectly aligned. Slight staggering creates depth and natural appearance.
Large families (7+): Create multiple levels using stairs, benches, or by having some people sit, some kneel, some stand. The key is ensuring every face is visible and that people overlap slightly rather than leaving gaps between bodies. Those gaps create dead space that makes photos feel scattered.
With young children: Position the most unpredictable family members (typically toddlers) in the center where parents or older siblings can gently manage them. Having a wiggly child on the end creates composition problems if they're constantly moving out of frame. Central positioning also means if you need to crop slightly, the important faces remain in the shot.
The Technical Details
These specific technical considerations separate decent photos from great ones.
Camera settings: If using a dedicated camera rather than a phone, use aperture priority mode (Av or A on the dial) and set aperture to f/4-f/8. This creates some background blur while keeping all family members' faces sharp. If the background is distracting, use f/2.8-f/4 for more blur. If you want the background clearly visible, use f/8-f/11.
For phone cameras, use Portrait mode which simulates this effect. However, be aware that software bokeh (blur) can look artificial around hair and edges. Regular photo mode might deliver better results if the background is already clean.
Focus point: Ensure the camera focuses on eyes, not noses or shoulders. Most modern cameras and phones let you tap the screen to set focus point. Tap on someone's eyes. If depth of field is shallow (blurry background), focus on the person in the middle row so front and back rows remain acceptably sharp.
Composition: Use the rule of thirds—imagine your frame divided into a 3x3 grid. Position important elements along these lines or at intersection points rather than dead center. For family photos, this often means positioning faces along the upper third line.
Don't cut off at natural joints (ankles, knees, waist). If you're cropping closer than full-body, come in tighter to mid-torso rather than cropping exactly at the waist, which creates an awkward appearance.
Getting Natural Expressions
The biggest challenge in family photos is getting everyone to look natural and genuinely happy simultaneously, especially with multiple children involved.
Avoid the countdown approach. Saying "okay, everyone smile on three!" universally produces forced, fake smiles. Instead, engage the family in conversation or activities during shooting. Tell a joke, ask questions, have family members interact with each other. Capture expressions during these natural moments.
Work quickly with young children. You have approximately 15 minutes of cooperation from toddlers and preschoolers before meltdowns happen. Do warm-up shots first to get everyone comfortable, then capture your must-have shots efficiently before fatigue and crankiness set in.
Take many shots. In group photos, the statistical challenge is significant—if each person has a 90% chance of looking good in any single photo, the probability of all four family members looking good simultaneously is 0.9^4 = 65%. As family size increases, this probability drops. The solution is volume. Take 50-100 shots across different poses and moments. At least a few will capture everyone looking good simultaneously.
The "chaos strategy" for young kids. Sometimes abandoning the formal approach works better. Let kids play, run around, interact naturally. Capture candid moments of genuine joy and connection rather than forced poses. Some of our most beloved test photos happened when families stopped trying to pose perfectly and just enjoyed being together.
Styling Tips: Creating Cohesive Looks Beyond Just Shirts
Matching shirts create visual coordination, but attention to other clothing elements and accessories elevates photos from "we're wearing matching shirts" to "we look like a professionally styled family."
Bottom Half Coordination
Your pants, skirts, or leggings choices significantly affect overall photo cohesion.
The safe default: Everyone wears denim jeans in similar washes (all light wash, all dark wash, or all medium wash—not mixed). Jeans are universally flattering, comfortable, and appropriately casual for most Christmas photo contexts. This approach works especially well with traditional Christmas shirts because the denim provides neutral grounding that lets the shirts be the visual focus.
Alternative coordination: Choose a specific color for everyone's bottoms that complements the shirt design. Navy bottoms work beautifully with red, cream, or white Christmas shirts. Black bottoms create sharp contrast with bright colors. Khaki or cream bottoms soften the overall look and work particularly well with modern, muted shirt palettes.
The key is consistency—if you're choosing a specific bottom color, everyone should match. Mixed bottom colors (some people in jeans, others in khaki, others in black) creates visual confusion that undermines the intentional coordination of matching shirts.
For women and girls who want more variety: Coordinate within a narrow range. If some family members are wearing jeans, others could wear denim skirts or dark leggings. These all read as "similar" in photos despite being different garments.
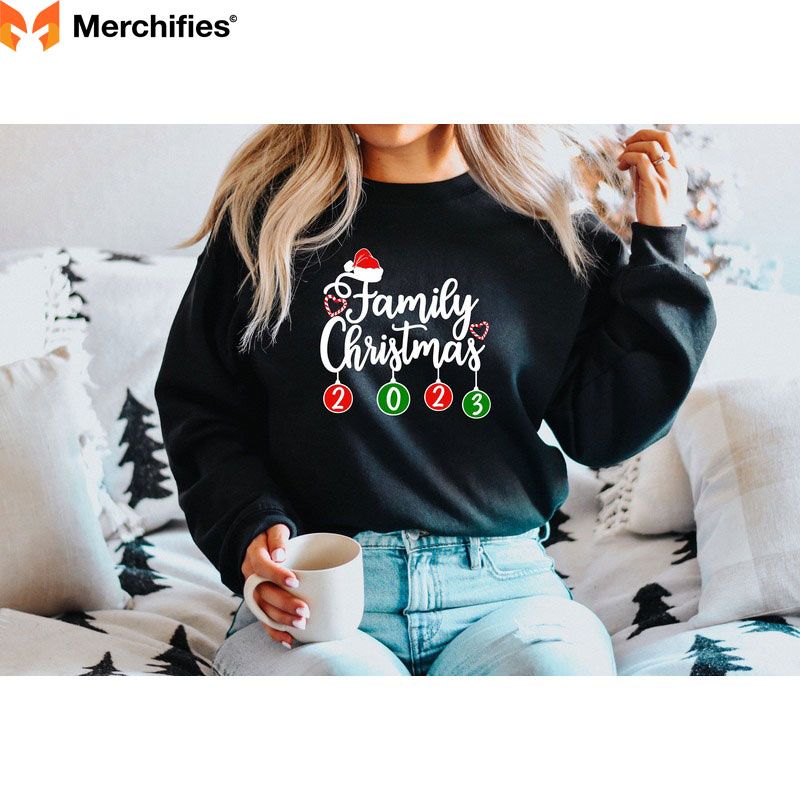
What to avoid: Patterned bottoms compete visually with shirt graphics. Busy prints, stripes, or patterns on pants create too much visual information. The exception is subtle patterns like small checks or pinstripes that read as solid from a distance.
Shoe Choices Matter More Than You Think
Shoes are often overlooked in planning, but they're visible in full-body photos and affect the overall polished appearance.
Coordination not matching: Shoes don't need to be identical, but they should coordinate. Avoid a scenario where one family member wears sneakers, another wears boots, another wears dress shoes—this looks unintentional.
Smart coordination approaches:
Color considerations: If your shirts are traditional red and green, avoid shoes in these colors—you don't want a foot competing with the shirt for attention. Neutral shoes (white, black, brown, gray) work with any shirt palette.
Practical reality check: Shoes must be appropriate for your photo location. Beautiful dressy shoes don't work in snow or muddy Christmas tree farms. Let your location guide shoe choices—boots for outdoor winter settings, casual clean sneakers for home photos, dressier options for studio sessions.
Accessories: Adding Visual Interest
Strategic accessories enhance photos without competing with the coordinated shirts.
Hats for outdoor winter photos: Matching or coordinated beanies, knit caps, or winter hats add coziness and seasonal context. These don't need to be identical—coordinating colors work well. If shirts are red, mix red, cream, and gray beanies across family members.
Scarves in complementary colors: Long scarves draped around necks add visual interest and color variation. Choose scarves in colors that appear in your shirt design or complement the base shirt color.
Hair accessories for girls: Simple headbands, bows, or clips in coordinating colors create polish. Avoid oversized accessories that draw attention away from faces.
Minimal jewelry: Simple pieces work; statement jewelry competes for attention. Small earrings, simple necklaces, and watches are fine. Large, bold, or colorful jewelry pieces create visual distraction.
What to avoid: Competing Christmas accessories like jingle bell necklaces, holiday-themed ties, or novelty glasses. The matching shirts already establish the Christmas theme—additional accessories create visual overload.
For Mixed Weather Situations
Outdoor December photos often require balancing cold weather clothing with wanting to show the matching shirts.
The layering strategy: Coordinate jackets or cardigans that everyone wears open, showing the shirts underneath. This keeps people warm during positioning and setup, with everyone removing or opening jackets for actual photos.
Matching flannels: Some families wore matching Christmas shirts with coordinating flannel shirts layered on top, worn open. This creates a casual, cozy aesthetic while solving the cold weather challenge.
Quick outdoor sessions: Bundle in coats for the walk to photo location, take coats off just for the 10-15 minutes of actual shooting, then bundle back up immediately. Have warm drinks and heated cars ready to retreat to between shots.

Shopping Strategy: Timing, Budgets & Where to Find Deals
Strategic shopping significantly reduces costs and stress. Here's what we learned from testing purchases across different times and retailers.
The Christmas Shirt Calendar
Matching Christmas shirt inventory follows predictable patterns throughout the fall and winter.
Late September/Early October: Retailers begin stocking Christmas clothing, often with full inventory and complete size ranges. Prices are regular retail with minimal sales, but selection is best. If your family includes hard-to-fit sizes (very small children, plus sizes, tall sizes), shop during this window when inventory is complete.
November (before Thanksgiving): Retailers maintain full selection and begin offering early promotional discounts. This is the sweet spot for strategic shopping—good selection with moderate sales. We found 15-25% off promotions common during this period.
Black Friday through Cyber Monday: Expect 30-40% off sales from most retailers. However, popular sizes begin selling out, especially in trending designs. If you're shopping during this window, buy immediately when you see the right combination of design and sizes—don't wait thinking sales might get better.
Early December: Significant sales continue (25-40% off) but inventory becomes spotty. You'll find good availability in some sizes and complete sell-outs in others. Plan flexible sizing (willingness to adjust who wears what size) if shopping this late.
Mid-December (10 days before Christmas): Deep clearance pricing (40-60% off) but extremely limited selection. Only stragglers and unpopular designs remain. This timing works only if you're flexible about design and willing to piece together coordination rather than buying matching sets.
After Christmas: Deepest discounts (60-75% off) for next year's planning. If you're organized enough to shop a full year ahead and confident about next year's sizing, this delivers maximum value. We purchased backup test inventory during post-Christmas clearance at $4-7 per shirt—compare to $15-20 regular pricing.
Budget Tiers & What You Get
Understanding what different price points actually deliver helps align spending with priorities.
Budget Tier ($10-15 per person):
Mid-Range ($18-28 per person):
Premium ($30-45 per person):
Custom/Specialty ($40-60+ per person):
Stacking Discounts & Deals
Strategic shopping combines multiple discount opportunities to maximize savings.
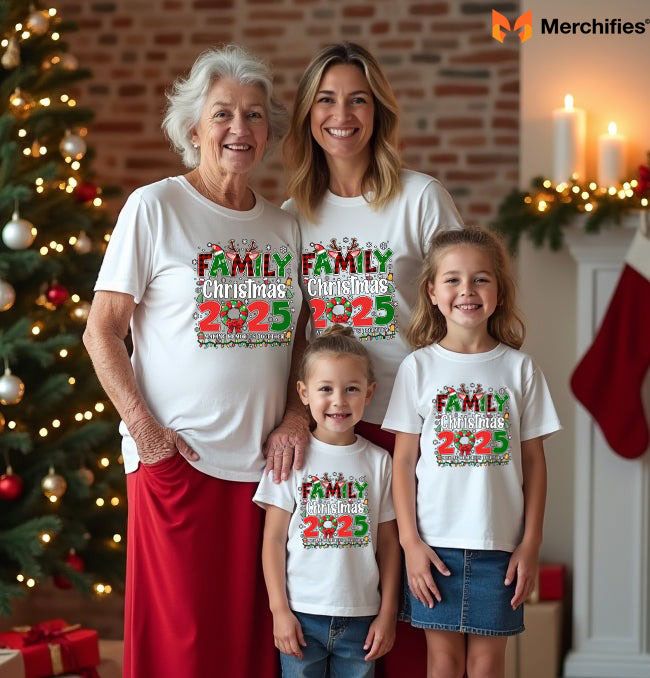
Email signup discounts: Most retailers offer 10-15% off first orders when you sign up for emails. Create an email specifically for shopping subscriptions to avoid inbox clutter while accessing these deals.
Credit card offers: Stores like Target and Old Navy offer store-specific credit cards with 5-10% additional discounts. If you're already planning a purchase large enough to justify opening the card, this stacks with other sales. However, we don't recommend opening credit cards solely for this purpose—the financial complexity often isn't worth the modest savings.
Cash-back apps and browser extensions: Rakuten, Honey, and similar services offer cash back on purchases from major retailers. We routinely found 2-10% cash back offers that stack on top of existing sales. During holiday periods, cash back rates often increase.
Student and teacher discounts: Many retailers offer 10-15% discounts to students and teachers year-round. This typically requires verification through services like ID.me but stacks with regular sales.
Combination strategy we used: During Black Friday, we purchased from Primary using a 30% off site-wide sale, plus 15% first-order discount from email signup, plus 5% cash back through Rakuten. This combination reduced the $26 per shirt price to approximately $16—matching budget retailer pricing while getting premium quality.
Smart Shopping for Large Families
When you're buying for 7+ people, costs escalate quickly, making strategic approaches essential.
Split across retailers: Don't feel obligated to buy matching sets from one retailer. We coordinated across two different retailers—adults bought from one source while kids' shirts came from another—choosing similar colors and complementary designs rather than identical items. This approach let us capitalize on better per-person pricing from each retailer's strengths.
Mix budget and premium: Prioritize quality for adults who might rewear shirts to holiday parties and events. Buy budget options for rapidly growing children who'll only wear shirts once or twice. We purchased $26 Primary shirts for adults and $13 Target shirts for kids in coordinated designs, significantly reducing total costs while maintaining quality where it mattered.
DIY for some, buy for others: Create simple DIY shirts for adults who can appreciate the homemade aesthetic, while purchasing ready-made shirts for children who are harder to fit and need durability. This balances time investment with budget constraints.
Consider pajamas instead of shirts: Matching Christmas pajamas often cost less than day shirts while still achieving coordinated photos. Families also get more value since everyone wears pajamas regularly throughout the season. Target and Old Navy's pajama sets cost $15-20 per person—comparable to shirt prices but with extended usability.
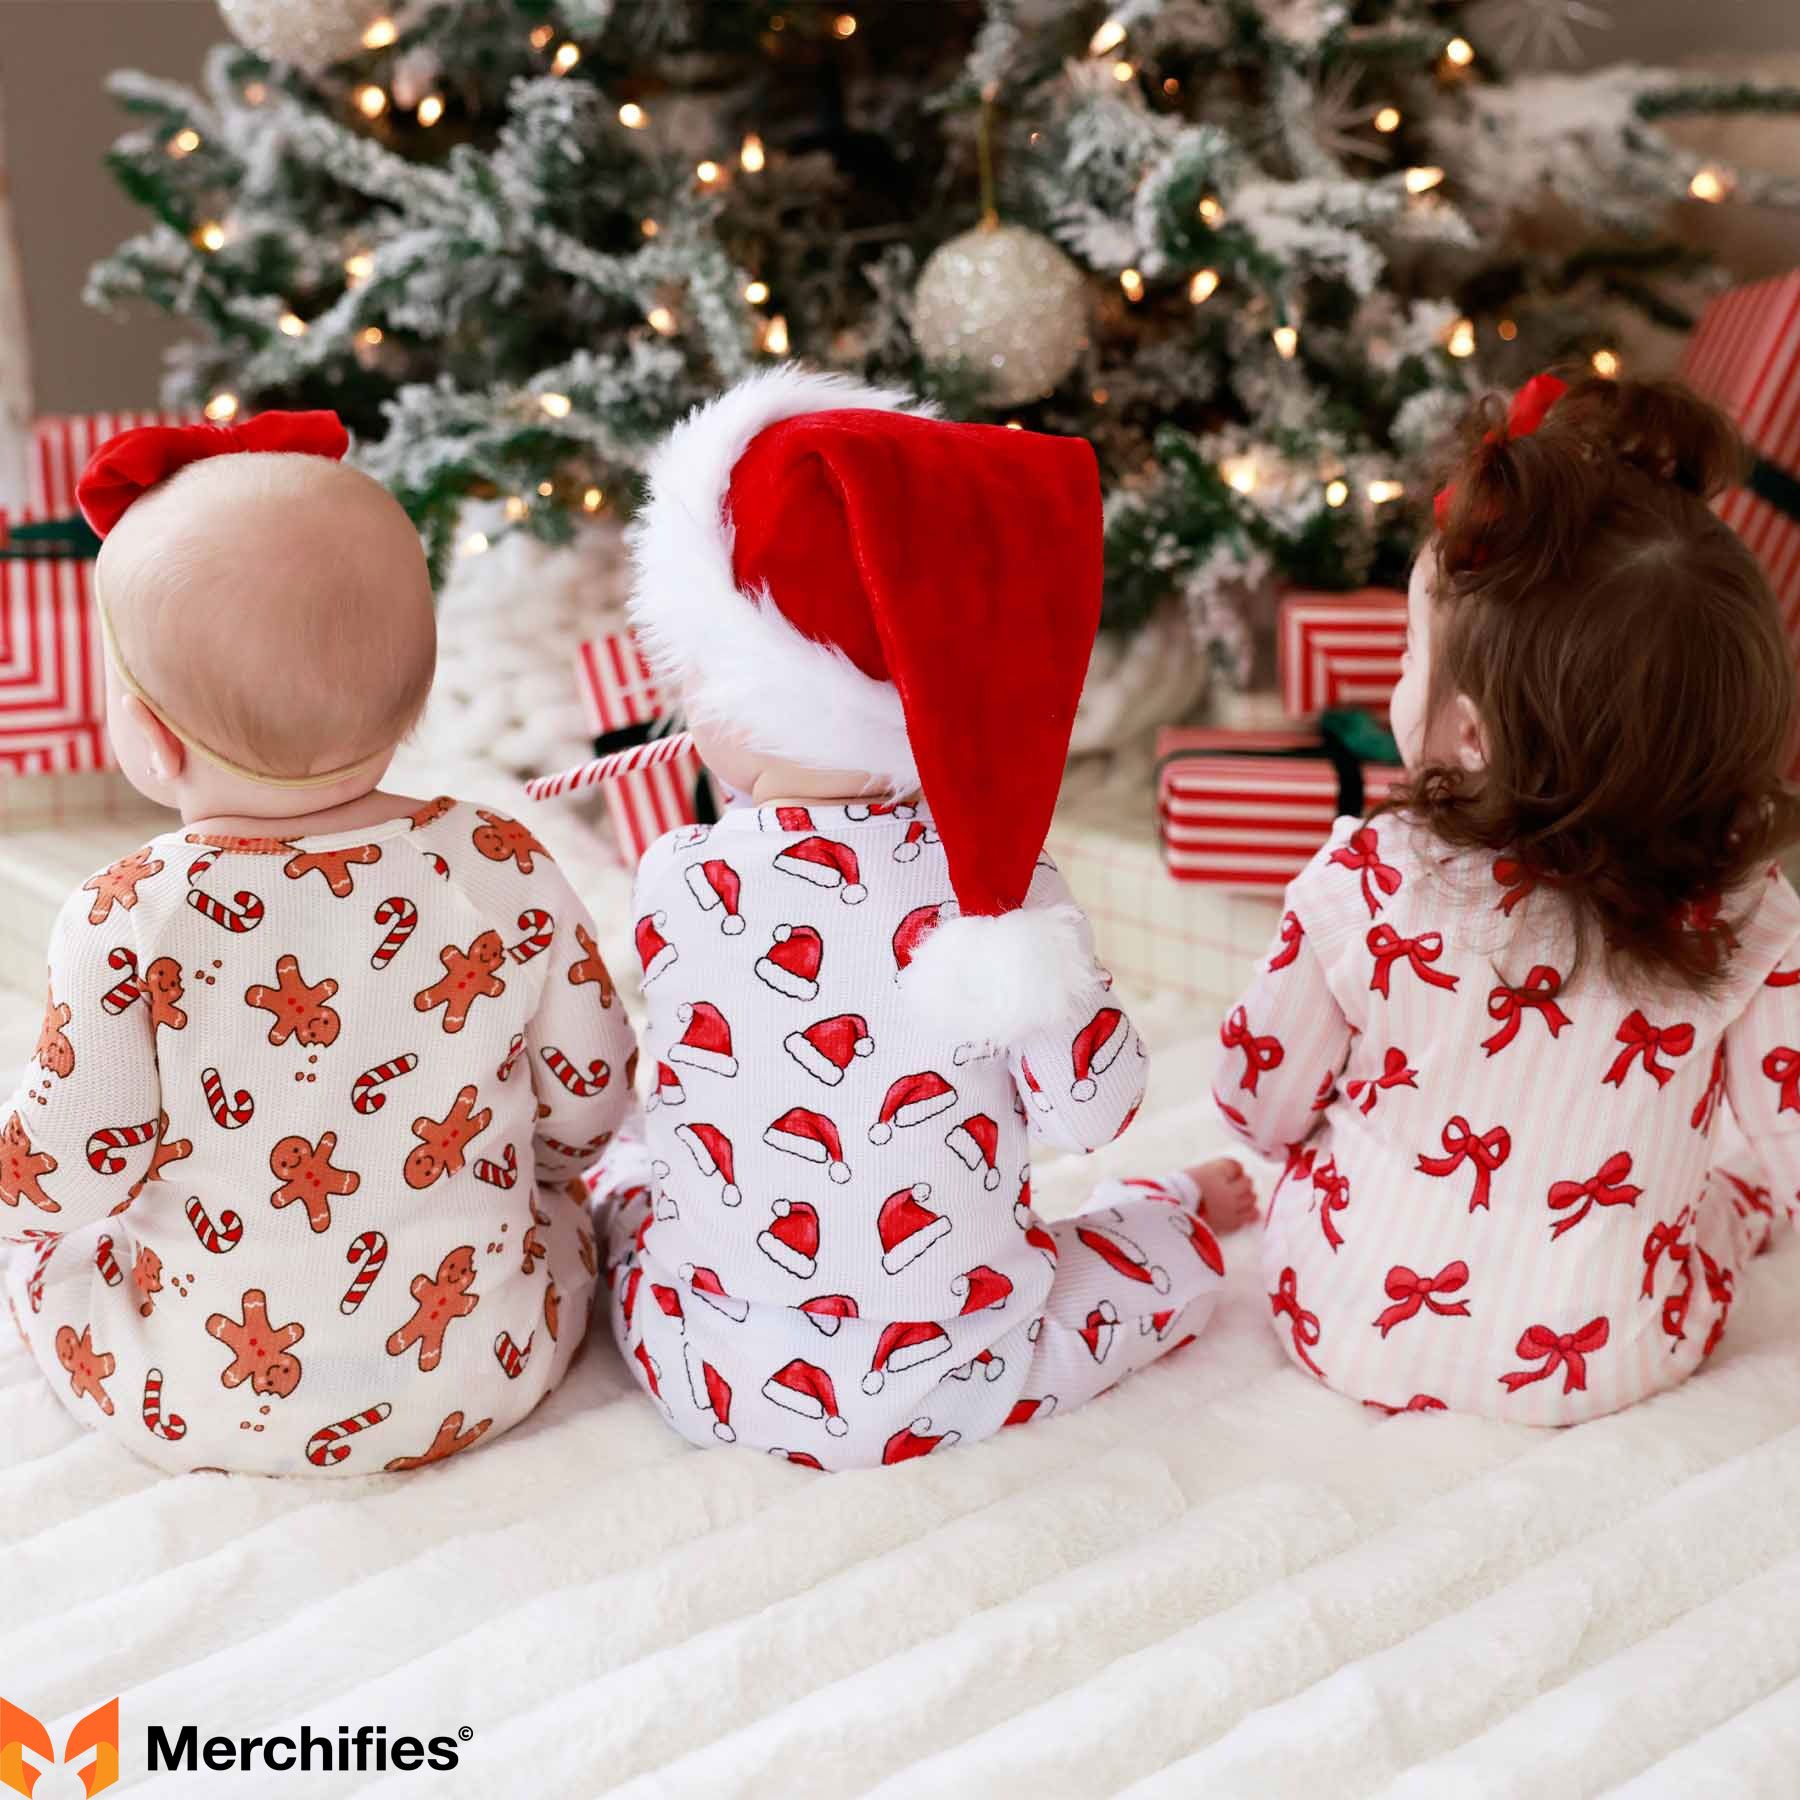
Quality Assessment: How to Evaluate Before & After Purchase
Understanding quality indicators helps you make informed decisions when shopping and identify problems that warrant returns.
Pre-Purchase Quality Indicators
Certain signals suggest higher quality before you even handle the physical product.
Detailed product descriptions that include fabric weight (GSM), specific fabric composition percentages, and care instructions suggest manufacturers who care about quality. Vague descriptions like "soft cotton blend" without specifics are red flags.
Multiple detailed product photos showing close-ups of printing, neck construction, seams, and fabric texture indicate retailers confident in their quality. Single photos showing only the front design should raise skepticism.
Size charts with actual measurements rather than generic S-M-L-XL labels indicate better manufacturing consistency. Quality retailers provide chest width, length, and sleeve measurements for each size.
Customer reviews mentioning specific details like shrinkage percentages, print durability after X washes, and sizing accuracy provide valuable crowdsourced quality data. Look for reviews with photos showing shirts after washing.
Return policies: Generous return windows (30+ days) and free return shipping indicate retailer confidence in quality. Restrictive return policies (final sale, restocking fees, customer pays return shipping) suggest quality concerns.
Upon Arrival: Inspection Checklist
When your shirts arrive, inspect them immediately while returns are still straightforward.
Fabric feel and weight: Quality shirts feel substantial when you handle them. Thin, flimsy fabric that you can see through is a warning sign. If the fabric feels significantly thinner than expected, measure it using a fabric weight scale or GSM meter if you have access. Anything under 150 GSM is notably thin.
Print quality examination: Look closely at the printed or applied graphics. Edges should be clean and precisely defined. Vinyl should be fully adhered with no lifting corners. Screen-printed designs should have even ink coverage without thin spots or blotchiness.
Run your hand across the design—it should feel smooth and well-integrated with the fabric. If graphics feel stiff, plasticky, or create rigid areas in the fabric, expect those designs to crack with washing and wear.
Stitch quality: Check all seams for consistent, straight stitching with no loose threads, skipped stitches, or puckering. Examine the neck ribbing—it should lie flat and smooth with no waviness or stretching.
Color consistency: If you ordered multiple shirts in the same color, lay them side by side in good lighting. They should match exactly. Color variations between items suggest quality control issues and may indicate photos will look mismatched.
Smell test: New shirts should smell like clean fabric or possibly slight dye smell. Strong chemical odors, musty smells, or gasoline-like scents indicate poor quality or contamination. We received one order that smelled strongly of chemicals—immediate return.
Try-on before washing: Have family members try shirts on before washing to verify sizing and comfort while easy returns are still possible. Check that neck openings are comfortable, sleeve length works, and overall fit matches expectations.
After Washing: Durability Assessment
The first few washes reveal whether shirts will maintain appearance or deteriorate quickly.
Shrinkage measurement: Before washing, measure shirts from shoulder seam to bottom hem and from armpit to armpit across the chest. Measure again after washing and drying. Quality shirts should shrink less than 5%. Anything over 7-8% shrinkage is problematic—family members may no longer fit their shirts.
Print durability: Examine graphics after each wash. Look for cracking (small lines appearing in the print), peeling (edges lifting from fabric), or fading (colors appearing washed out). Quality prints show no degradation through at least 5-10 washes.
Fabric pilling: After 3-5 washes, check for pilling (those small fabric balls that form on cotton-poly blends) in friction areas like underarms and across the stomach. Some pilling is normal for budget shirts, but extensive pilling after just a few washes indicates poor quality fabric.
Color fastness: Colors should remain true through multiple washes. If bright colors fade to pale versions or white/cream areas develop grayish tones, the dyeing quality is poor.
Neck and hem integrity: Ribbed necklines should maintain shape without stretching out or becoming wavy. Hems should stay flat and even. If these areas lose structure, the shirt will look worn and sloppy in photos.

When to Return vs. Accept
Not every imperfection warrants a return during the busy holiday season. Here's our practical framework.
Definitely return:
Probably return:
Accept and work with:
The time value of returns matters during the holiday season. If you're two weeks from your photo date and need to order replacements, accept minor imperfections. If you're shopping in October with time to reorder, be more selective.
Real Family Stories: What Actually Worked in Practice
Theory and testing are valuable, but hearing from real families about their experiences provides practical perspective. We interviewed five families about their matching Christmas shirt experiences.
The Martinez Family: Traditional Shirts & Three Generations
Maria Martinez coordinated matching shirts for her three-generation family of 12 people ranging from age 2 to 72 for their annual Christmas photo.
Their approach: Maria purchased from Target's Wondershop collection, choosing complementary designs rather than identical. Adults wore "Merry & Bright" text shirts in red, kids wore character designs (reindeer, penguins) in the same red base color, and grandparents wore simple "Merry Christmas" text shirts.
What worked: The coordination rather than identical matching addressed comfort concerns from her elderly parents who found graphic tees too casual for their taste. The simple text design felt acceptable to them. Shopping at Target provided convenient sizing across all ages and let Maria handle exchanges easily when one shirt arrived in the wrong size.
Unexpected challenge: Getting everyone to the photo location on time proved harder than shirt coordination. "We spent weeks planning shirts," Maria laughed, "then the actual photo day, half the family was late and we ended up rushing through pictures because the photographer had another session scheduled."
Their advice: Plan extra buffer time for gathering everyone, especially with young children. Build in time for bathroom breaks, outfit adjustments, and last-minute problems.
Results: Despite the timing stress, Maria's family captured beautiful photos that she printed as canvas wall art and used for Christmas cards. "When people complimented the photos, they specifically mentioned the coordinated shirts—it clearly elevated the pictures."
The Chen Family: Modern Minimalist Aesthetic
Kevin and Sarah Chen wanted matching shirts that reflected their modern, minimalist home aesthetic rather than traditional Christmas colors. They have two children, ages 5 and 7.
Their approach: They ordered custom shirts from Etsy seller "ThreadAndMaple" featuring simple line-drawn Christmas trees on cream-colored shirts. Total cost was $120 for the family of four, significantly more than Target but aligned with their quality priorities.
What worked: The modern aesthetic matched their home decor and personal style, making them actually want to wear the shirts beyond just photo day. "We wore these to three different holiday events," Sarah noted, "unlike traditional Christmas shirts that feel too costume-like for us."
The Etsy seller provided excellent customer service, responding to questions about sizing and customization within hours. The quality exceeded their expectations—shirts survived multiple washes with zero deterioration.
Unexpected challenge: The cream color showed stains easily. Their 5-year-old spilled cranberry juice during Thanksgiving dinner, requiring immediate pre-treatment to prevent permanent staining. "Next time, I'd choose a slightly darker neutral color," Sarah reflected.
Their advice: If choosing light-colored custom shirts, order them close to your photo date rather than weeks in advance. The longer you have them, the more opportunities for stains before the photo session.
Results: The Chens' photos looked distinctly different from typical Christmas photos—sophisticated and modern while still clearly seasonal. They received numerous compliments on Instagram and inquiries about where they got the shirts.
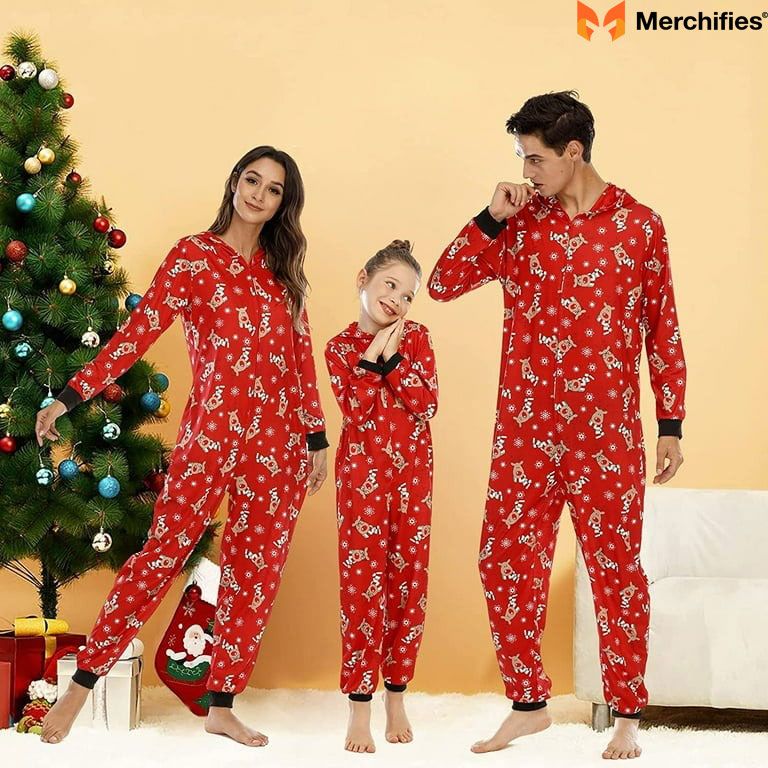
The Thompson Family: Budget Reality
Jessica Thompson is a single mother with three children ages 3, 6, and 9. Budget constraints meant keeping costs under $50 for all four shirts.
Her approach: Jessica purchased from Walmart during Black Friday sales, spending $42 total for matching "Ho Ho Ho" graphic shirts. She accepted that quality would be limited but prioritized getting coordinated photos over shirt longevity.
What worked: The price point made coordinated photos possible despite financial limitations. "I almost skipped matching shirts entirely because I thought I couldn't afford it," Jessica shared. "Finding options under $45 meant we could still participate in this tradition."
The simple shopping process—quick in-store purchase without worrying about shipping times—reduced stress during an already overwhelming season.
Unexpected challenge: The quality was noticeably poor. After just two wears and washes, the shirts looked worn and faded. Jessica's 3-year-old's shirt developed a hole after getting caught on a playground structure.
Their advice: "If you're on a really tight budget, consider whether you'll realistically wear these shirts more than once or twice," Jessica reflected. "I would have been smarter to buy slightly better quality and accept that we could only afford shirts for the kids, not for me. Three nice kids' shirts are better than four cheap shirts that don't last."
Results: Despite the quality limitations, Jessica got the coordinated family photo she wanted. She noted that quality issues don't show in the actual photos—only in person. "The pictures look great, which was the main goal. The shirts falling apart later doesn't change that."
The Patel Family: Long-Distance Coordination
The Patel family spans three states—parents in Texas, one adult son's family in Colorado, and another adult daughter's family in Washington. They wanted coordinated Christmas photos despite geographic separation.
Their approach: They coordinated through Amazon, with each family ordering matching pajama sets directly to their own addresses. They chose identical sets to ensure consistency across locations and planned to combine photos digitally.
What worked: The logistics were surprisingly straightforward. Amazon Prime ensured everyone received their orders within 48 hours. Each family took their own photos over Thanksgiving weekend, then one tech-savvy family member combined images into a single collage displaying all three families in coordinated outfits.
Unexpected challenge: Despite ordering the same product, different fulfillment centers sent slightly different products—the pajama shades varied by one or two tones. When combined in a digital photo collage, the color inconsistency was noticeable. They adjusted by converting all photos to black-and-white, which actually created a cohesive, sophisticated look.
Their advice: If coordinating remotely, over-communicate about which specific products you're ordering and compare photos of items upon arrival before photo sessions. Build in time to troubleshoot if products don't match expectations.
Results: The Patel family created a beautiful combined photo that hangs in each of their homes. "It helped us feel connected despite the distance," the family patriarch noted. "Seeing all three families coordinated made us feel like one unit even though we're spread across the country."
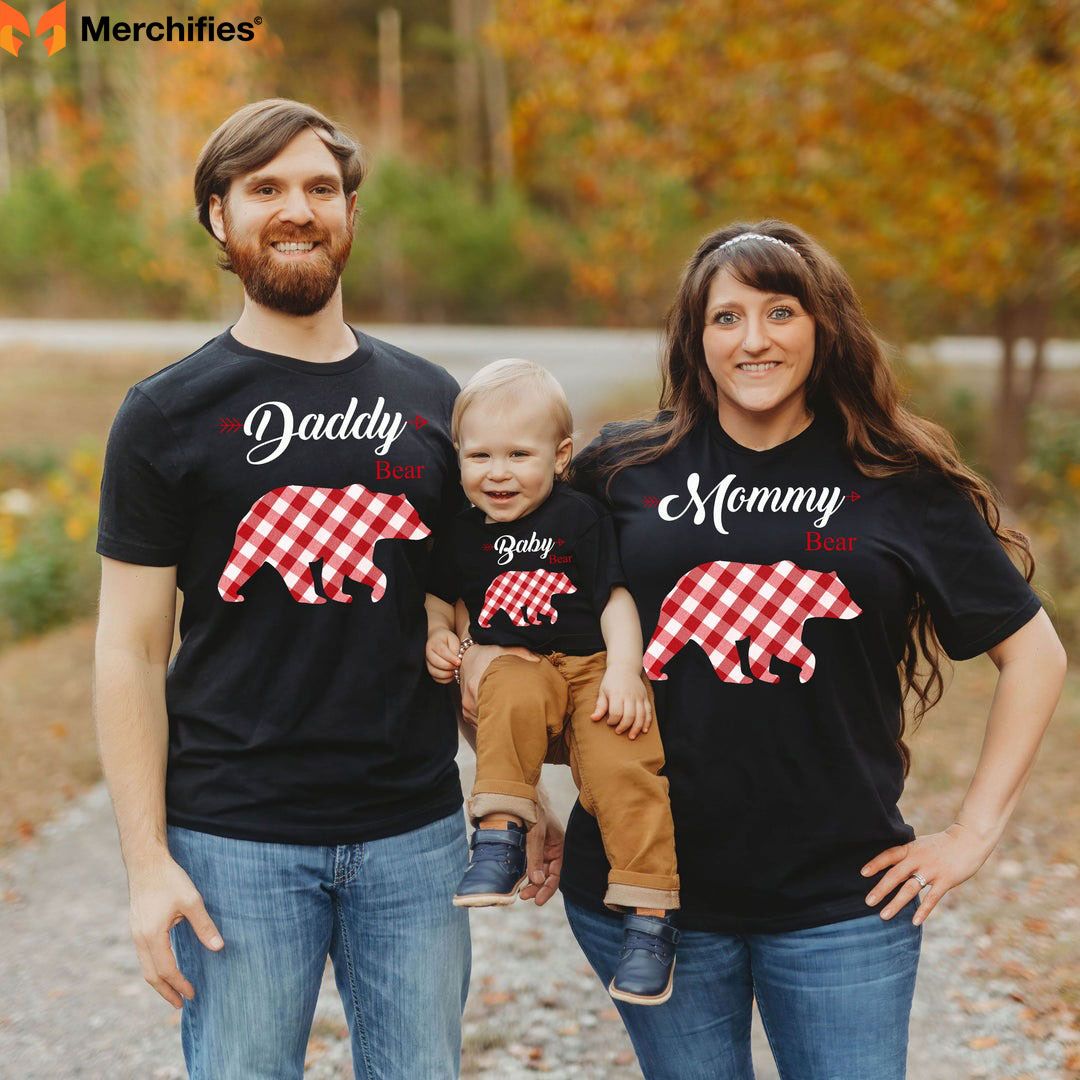
The Williams Family: DIY Adventure
Tom and Rebecca Williams decided to make their own matching shirts as a family activity with their two teenagers, ages 13 and 15.
Their approach: They purchased blank navy shirts and supplies for the HTV method, spending $55 on materials. Over one Saturday afternoon, the family designed and created custom shirts with inside jokes and references specific to their family.
What worked: The creation process became a meaningful family experience rather than just a shopping transaction. "Our teenagers actually participated enthusiastically, which is rare these days," Rebecca laughed. The custom designs incorporated family references that made the shirts genuinely special to them.
The quality of their DIY shirts exceeded budget ready-made options. After weeks of wear and washing, the shirts looked as good as when created.
Unexpected challenge: The time investment was significant—what they estimated would take 2 hours actually took 5 hours including setup, creation, and cleanup. The first attempts had mistakes that required starting over.
Their advice: "Be realistic about time commitment," Tom advised. "DIY is great if you genuinely enjoy crafting, but if you're doing it solely to save money, calculate whether your time is worth more than the $20-30 you'll save."
Results: The Williams family's shirts became favorites that everyone wore throughout December, not just for photos. The meaningful creation experience made the shirts more valuable than store-bought options would have been.
Learning from others' errors saves you time, money, and frustration. Here are the most common mistakes families make with matching Christmas shirts.
Ordering Too Late
The single most common mistake is underestimating how quickly inventory sells out and how long shipping takes.
The problem: Families start thinking about holiday photos in mid-December, then discover that popular designs are sold out in key sizes, shipping takes 5-7 business days, and they're cutting it extremely close to their photo date or Christmas timeline.
Real consequence: We heard multiple stories of families settling for suboptimal designs because their first choices weren't available, or paying expedited shipping fees that doubled their costs, or receiving orders after Christmas and missing the intended photo opportunity entirely.
The solution: Shop by early November at the latest, mid-October ideally. Yes, this feels absurdly early when Halloween hasn't happened yet, but inventory and size availability are best during this window. If you're ordering custom items from Etsy or similar sellers with production times, add an extra week to whatever timeline they quote—production delays are common during holiday rushes.

Ignoring Size Charts
Many families order based on what sizes they usually wear rather than checking specific measurements for the retailer.
The problem: Sizing varies dramatically between brands. Your child's "6" size at one retailer might fit like a "5" or "7" at another retailer. Assuming your usual sizes will work leads to ill-fitting shirts that look awkward in photos.
Real consequence: During our testing, we interviewed a family who ordered based on typical sizes and received shirts that were drastically too small for two family members and too large for another. The exchange process took two weeks, pushing them past their photo date.
The solution: Measure a well-fitting shirt at home (width across chest from armpit to armpit, length from shoulder to hem). Compare these measurements to the retailer's size chart dimensions. When between sizes, order up for children (who grow quickly) and down for adults (if you prefer fitted rather than loose styles).
Choosing Designs That Don't Match Your Family's Style
Families sometimes choose designs based on what's trendy or popular rather than what actually matches their preferences and comfort level.
The problem: A family whose normal style is modern and minimalist orders traditional red-and-green graphic shirts because "that's what Christmas shirts are supposed to look like." The resulting photos feel inauthentic, and family members are uncomfortable wearing shirts that don't match their identity.
Real consequence: Photos look forced, family members make comments about disliking their shirts, and the photos end up feeling like a costume rather than a genuine family representation.
The solution: Choose designs that align with how your family normally dresses and decorates your home. If you favor modern neutral aesthetics, choose matching shirts in those palettes. If you're traditional and love classic Christmas, embrace traditional designs. Authentic photos happen when people feel comfortable and look like themselves.
Not Coordinating the Complete Outfit
Focusing exclusively on the shirts while ignoring pants, shoes, and accessories undermines the coordinated look.
The problem: Everyone's wearing matching shirts, but one person's in jeans, another's in khakis, someone else is in sweatpants, and shoes range from sneakers to boots to dress shoes. The resulting photos look accidentally mismatched despite the intentional shirt coordination.
Real consequence: The overall photo lacks the polished, cohesive appearance you were trying to create. The matching shirts don't have the impact they should because other elements distract from the coordination.
The solution: Create a complete outfit plan, not just a shirt plan. Specify what everyone should wear on the bottom (typically "dark jeans" or "khaki pants" or "black leggings"). Discuss shoe options and agree on general style (casual sneakers, boots, dress shoes). Send the complete outfit plan to all family members, especially if coordinating across multiple households.
Forgetting About Comfort
Prioritizing how shirts look in product photos over how they'll feel during actual wear creates problems on photo day.
The problem: A shirt that looks cute online has a tight neckline, scratchy fabric, or restrictive fit that makes family members uncomfortable during the extended time needed for photos.
Real consequence: Discomfort shows in photos. People who are uncomfortable naturally display closed body language, forced smiles, and visible tension. This is especially problematic with young children who might refuse to participate if their shirt is bothering them.
The solution: Prioritize comfort equally with appearance. If a family member has known sensitivities about necklines, fabric texture, or fit, pay extra attention to those factors when choosing shirts. Order early enough that family members can try shirts on and you still have time to exchange if comfort is an issue.
Not Planning for Weather
Outdoor winter photo sessions require weather considerations that many families overlook.
The problem: Planning outdoor photos in December without accounting for cold temperatures, wind, or precipitation. Family members are either freezing in just t-shirts or bundled in coats that hide the carefully coordinated outfits.
Real consequence: Photos get rushed because people are cold and uncomfortable. Children become cranky. The matching shirts you purchased aren't visible because everyone's wearing jackets.
The solution: Check weather forecasts and have contingency plans. If temperatures will be very cold, plan for quick 10-15 minute outdoor sessions with warm cars or indoor spaces immediately accessible. Have coordinated jackets or flannels that everyone can wear open. Or choose indoor locations if weather will be prohibitive.
Starting Too Ambitious with DIY
Families who've never done heat transfer vinyl, screen printing, or other DIY techniques sometimes choose complex designs for their first attempt.
The problem: Complex multi-color designs, intricate cutting, or advanced techniques have steep learning curves. First attempts often fail, requiring starting over and wasting materials.
Real consequence: The DIY project that was supposed to save money actually costs more after accounting for wasted materials. The time investment explodes beyond initial estimates. Stress increases as the photo date approaches and shirts aren't complete.
The solution: Start simple if you're new to DIY. Choose single-color designs with simple shapes and text. Practice on scrap fabric before attempting actual shirts. Watch multiple tutorials demonstrating the technique you've chosen. Don't make your first DIY attempt be the high-pressure Christmas shirts needed for photos—gain experience on lower-stakes projects first.

Matching family Christmas shirts solve a simple problem—creating cohesive, coordinated holiday photos that actually represent your family while looking intentional and polished. But as we've discovered through weeks of testing, real-world family experiences, and photography expertise, the execution involves more decisions than initially obvious.
The families who reported the most satisfaction shared common approaches: they shopped early enough to have real choices rather than settling for whatever remained available, they chose designs that matched their actual aesthetic preferences rather than generic Christmas expectations, they coordinated complete outfits beyond just the shirts, and they planned photo sessions with realistic expectations about time, weather, and family cooperation.
The key insight from all our research is that there's no single "right" approach. Budget-conscious families genuinely succeed with $12 Target shirts. Families prioritizing premium quality find value in $40 Hanna Andersson options. DIY enthusiasts create meaningful experiences through the creation process itself. Remote families coordinate across states using Amazon's logistics. Each approach works when it's aligned with that specific family's priorities, budget, timeline, and values.
What doesn't work is approaching this without intention—buying random Christmas shirts at the last minute, failing to coordinate beyond the shirts themselves, choosing designs that don't match your family's authentic style, or ignoring practical realities about comfort, weather, and photo logistics.
As you plan your own family's matching Christmas shirts, start by asking yourself what actually matters most to your family. Is budget the primary constraint? Is unique design essential? Do you want these shirts to become multi-year traditions or one-time photo props? Is the creation process itself valuable, or do you need the most efficient purchasing path? Your answers to these questions should guide every subsequent decision.
The coordinated family Christmas photo has become a widespread tradition because it creates a tangible representation of family unity and celebration during a season focused on togetherness. When you look back at these photos in five or ten years, you'll remember not just the shirts but the experience of gathering everyone together, the negotiations over who wore what, and the shared moment of creating something as a family. That's the real value—the shirts are just the tool that makes it happen.
-d4c38c342cdf20ca.jpeg)


-b555fcc6b204c456.jpeg)


