How to Print on Fabric: The Ultimate DIY Guide to Beautiful Custom Designs
This ultimate DIY guide teaches you how to print on fabric to create beautiful, custom designs at home. Learn different printing methods, required tools, fabric preparation tips, and techniques to achieve long-lasting, vibrant results—perfect for clothing, crafts, and personalized gifts.
Blog Post Contents
Have you ever dreamt of transforming a plain piece of fabric into a canvas for your unique designs? The world of fabric printing is a vibrant realm where creativity knows no bounds, allowing you to personalize everything from T-shirts and tote bags to home decor and unique gifts. It’s an incredibly rewarding craft that offers endless possibilities for self-expression and practical applications. In this comprehensive guide, we're diving deep into the exciting process of how to print on fabric right from your own home. As Mason Ellis Grant, a seasoned textile artist and DIY enthusiast, often emphasizes, "There's an immense satisfaction in wearing or using something you've designed and printed yourself."
Whether you're a complete beginner eager to experiment with your first fabric design or an experienced crafter looking to expand your repertoire of DIY fabric printing techniques, this guide has you covered. We'll explore various methods, detail the essential tools and materials you'll need, provide clear step-by-step instructions, and share expert tips for success. From quick iron-on transfers to more artistic block printing, you'll learn everything required to bring your visions to life on cloth. Printing on fabric isn't just a hobby; it's a way to create unique gifts, embrace sustainable fashion by upcycling, brand your small business, or simply engage in artistic expression that truly reflects your personal style.
Essential Preparations: Before You Start Printing on Fabric
Before you dive into the exciting world of custom fabric designs, a bit of preparation can make all the difference in achieving professional-looking results. Getting your materials and workspace ready ensures a smooth and enjoyable printing experience.
Essential Preparations Before You Start Printing on Fabric
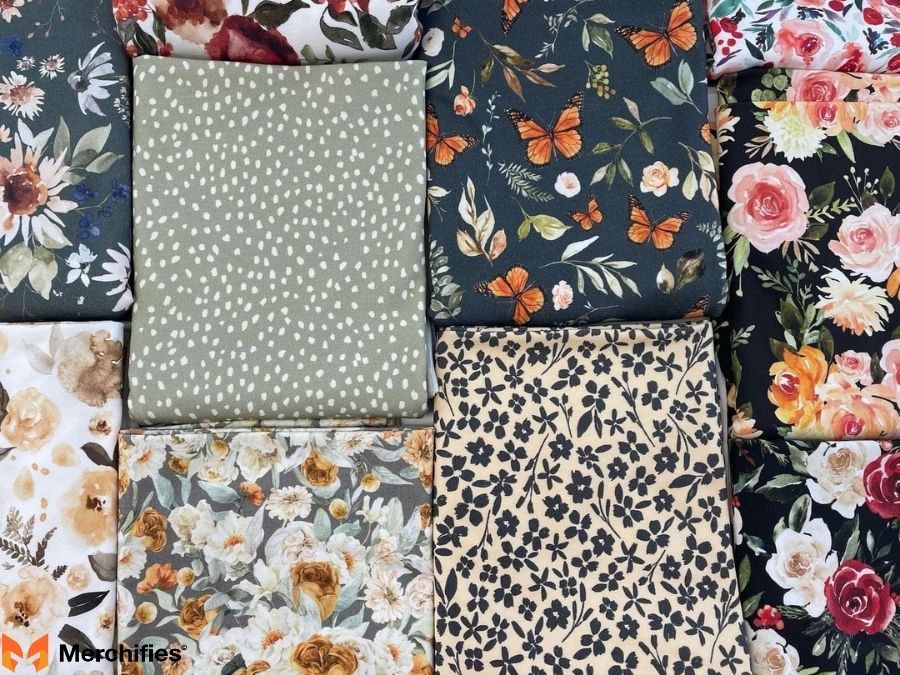
Choosing the Right Fabric for Your Project
The type of fabric you select is paramount, as it directly impacts print quality, ink absorption, and durability.
Natural Fibers: Cotton (jersey knit, canvas, muslin), linen, and silk are often preferred for fabric printing due to their absorbency. Cotton, especially jersey knit, canvas, and muslin, is versatile and forgiving for beginners, offering a great surface for various inks and paints. Consider the weave and weight for optimal results.
Synthetic Fibers: Polyester and synthetic blends generally require specific methods like sublimation or certain heat transfer papers, as they react differently to inks and heat. While natural fibers absorb ink into their weave, synthetics often require the ink to bond or transfer to the surface.
Fabric Weight & Weave: A medium-weight, tightly woven fabric typically provides the best surface for printing, preventing inks from bleeding and ensuring crisp details. Heavier fabrics might require more pressure during printing, while very light fabrics could show through the reverse.
Tip: Always pre-wash and iron your fabric before printing. Mason Ellis Grant highly recommends this crucial step to remove any sizing or chemicals that could interfere with ink adhesion, and to prevent any post-printing shrinkage that might distort your design. This simple pre-washing fabric for printing routine ensures a clean, smooth, and predictable surface for your artwork.
Design Selection & Preparation
Your design is the heart of your project, so careful preparation is key.
Digital vs. Hand-Drawn: Decide whether you'll be working with a digital graphic created on a computer or a design drawn by hand. Each approach has its own benefits and suitable printing methods. Digital designs offer precision, while hand-drawn designs provide a unique, organic aesthetic.
Image Resolution & Sizing: For digital designs, ensure your image has a high enough resolution (at least 300 DPI for best print quality) and is sized correctly for your fabric piece. Blurry or pixelated images will lead to disappointing prints.
Mirroring Designs: For certain heat transfer methods, like iron-on transfers or sublimation, it's crucial to mirror your design horizontally before printing. This ensures that when the design is flipped onto the fabric, it appears in the correct orientation. Failing to mirror your design is a common oversight that can lead to frustration.
Design Selection and Preparation to Print on Fabric
Workspace Setup & General Supplies
A well-organized workspace contributes to a successful and less messy printing session.
Protecting Your Area: Always lay down drop cloths, old newspapers, or cardboard to protect your work surface from spills and ink bleed-through. Placing a piece of cardboard inside items like T-shirts or tote bags is essential to prevent the ink from seeping to the other side.
Basic Tools: Have essential craft tools handy, such as measuring tape, scissors, masking tape, and a ruler. These will assist with positioning, trimming, and securing your fabric and stencils.
Safety First: Depending on the inks and paints you're using, wear gloves to protect your hands, and ensure you have good ventilation in your workspace. Some aerosols or chemical-based inks may require extra precautions.
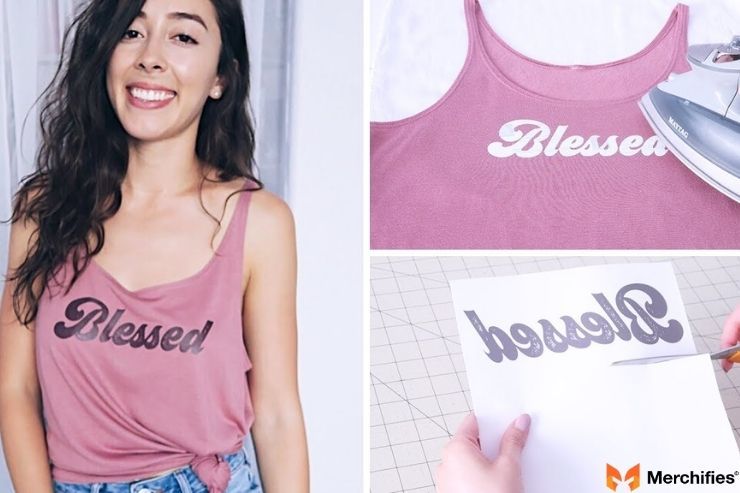
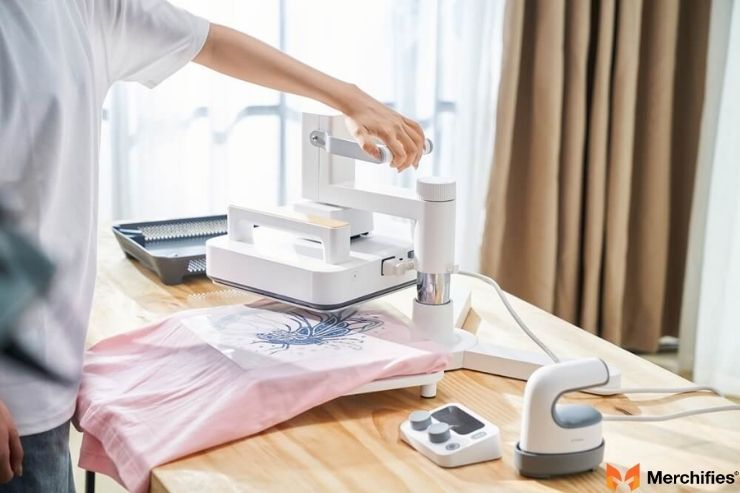
How to Print on Fabric with Iron: Easy Heat Transfer Methods
One of the most accessible and popular ways for beginners to print on fabric involves using an iron or heat press. This method is incredibly versatile for creating personalized items quickly and efficiently.
How to Print on Fabric with Iron Easy Heat Transfer Methods
Iron-on transfers are a fantastic way to print designs on fabric, offering a quick and relatively simple process for adding custom graphics to almost any textile. This category broadly covers both Heat Transfer Vinyl (HTV) and printable inkjet transfer papers.
Overview: This method utilizes heat to adhere a design, either cut from a special vinyl material or printed onto a specific paper, directly onto your chosen fabric. It's often the go-to for custom apparel printing projects like T-shirts.
Pros & Cons: The advantages include speed, the ability to achieve fine detail, and its beginner-friendly nature. However, the "feel" of the design on the fabric can sometimes be slightly stiff, and durability varies depending on the quality of the transfer material and proper application.
Key Materials Needed:
For HTV: Heat Transfer Vinyl rolls (various colors/finishes), a vinyl cutting machine (like Cricut or Silhouette), weeding tools (for removing excess vinyl), fabric, an iron or heat press, and parchment paper or a Teflon sheet.
For Inkjet Transfer Paper: Inkjet Transfer Paper (for light or dark fabrics), an inkjet printer, fabric, an iron or heat press, and parchment paper.
Step-by-Step Guide:
Design/Print/Cut: Create your design. If using HTV, cut it using your vinyl cutter (remember to mirror your design!). If using inkjet transfer paper, print your mirrored design onto the paper with your inkjet printer.
Weed (for HTV): Carefully remove all the excess vinyl that isn't part of your design using weeding tools. This leaves only your desired graphic on the clear carrier sheet.
Position: Place your fabric on a clean, hard, heat-resistant surface. Position your design (still on its carrier sheet or transfer paper) onto the fabric exactly where you want it.
Heat Press: Cover the design with parchment paper or a Teflon sheet. Apply heat and pressure using your iron or heat press according to the manufacturer's instructions for your specific transfer material. Ensure even heat and consistent pressure.
Peel: Once the pressing is complete and depending on whether it's a "hot peel" or "cold peel" material, carefully peel away the carrier sheet or transfer paper.
Best For: Creating custom T-shirts, hoodies, tote bags, and other apparel. It's excellent for intricate text, logos, or solid color graphics.
Internal Link Suggestion: Discover more about "Choosing the Best Heat Transfer Vinyl for Beginners" for your next project.
How to Print on Fabric by Hand: Artistic & Traditional Techniques
For those who enjoy a tactile, hands-on approach, printing fabric by hand offers a unique artistic quality that can't be replicated by machines. These methods are perfect for creating rustic, artisanal, or truly one-of-a-kind pieces. DIY fabric printing offers a hands-on approach to creating custom designs.
How to Print on Fabric by Hand Artistic & Traditional Techniques
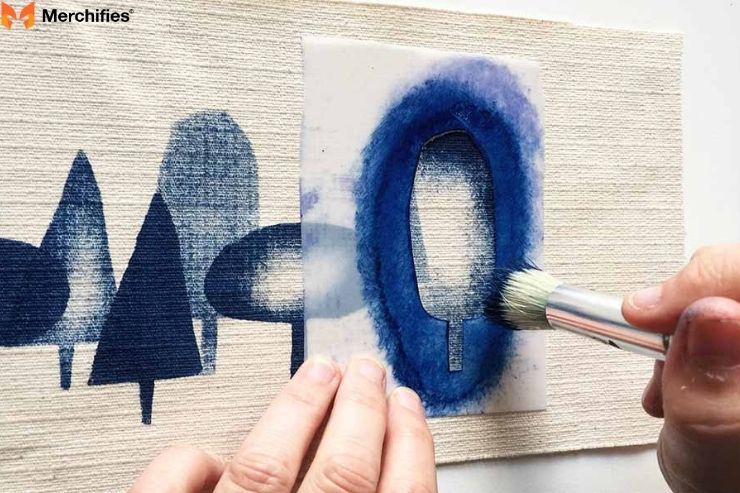
Method 2: Classic Stenciling on Fabric
Stenciling is one of the easiest and most versatile ways to decorate fabric, perfect for creating repeating patterns or simple, bold graphics.
Overview: This technique involves applying paint or ink through a cut-out design (a stencil) onto the fabric below. It's a fantastic method for beginners and can achieve beautiful results with minimal supplies.
Pros & Cons: Stenciling is highly affordable, simple to execute, and allows for unique textural effects. However, it can be limited in producing very fine details, and there's a risk of paint bleeding under the stencil if not properly secured.
Key Materials Needed: Stencil material (pre-made Mylar stencils, freezer paper, or vinyl you cut yourself), fabric paint or spray fabric paint, stencil brushes or sponges, masking tape or temporary fabric adhesive, and a protective barrier (cardboard) inside the fabric.
Step-by-Step Guide:
Prepare Stencil: If making your own, cut your design into your chosen stencil material. Ensure edges are crisp.
Secure Fabric & Stencil: Place cardboard or a protective sheet inside your garment/fabric. Position your stencil precisely on the fabric. Secure it firmly with masking tape around the edges or a light spray of temporary fabric adhesive underneath to prevent movement and fabric paint bleeding prevention.
Apply Paint: Dip your stencil brush or sponge lightly into the fabric paint, dabbing off any excess. Using an up-and-down pouncing motion (not brushing), apply the paint evenly over the stencil openings. For spray paint, apply light, even coats from a consistent distance.
Remove Stencil: Carefully lift the stencil away from the fabric immediately after applying the paint, before it dries completely, to avoid smudging or pulling up paint.
Cure: Allow the paint to dry completely, then cure it according to the fabric paint manufacturer's instructions (usually by ironing or heat setting).
Best For: Home decor items like pillows, curtains, or tea towels; large, bold patterns; adding text or simple graphics to apparel; and stenciling on fabric crafts for all skill levels.
Classic Stenciling on Fabric
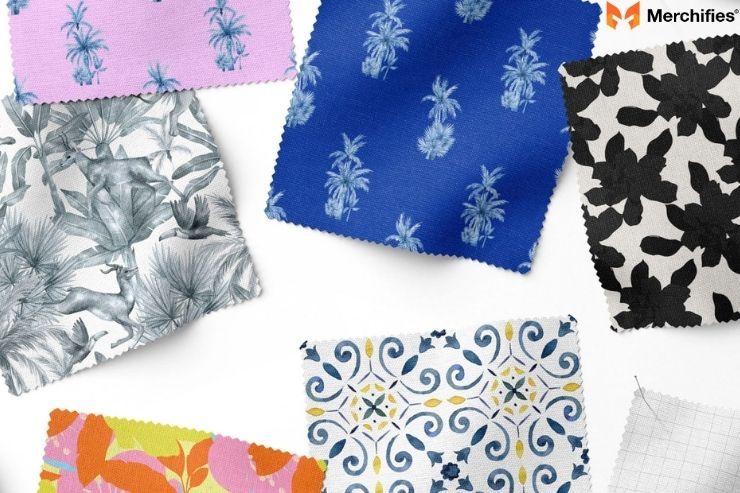
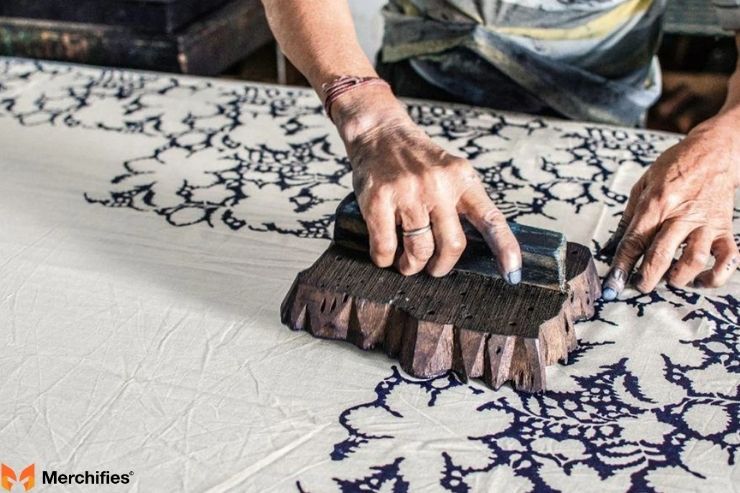
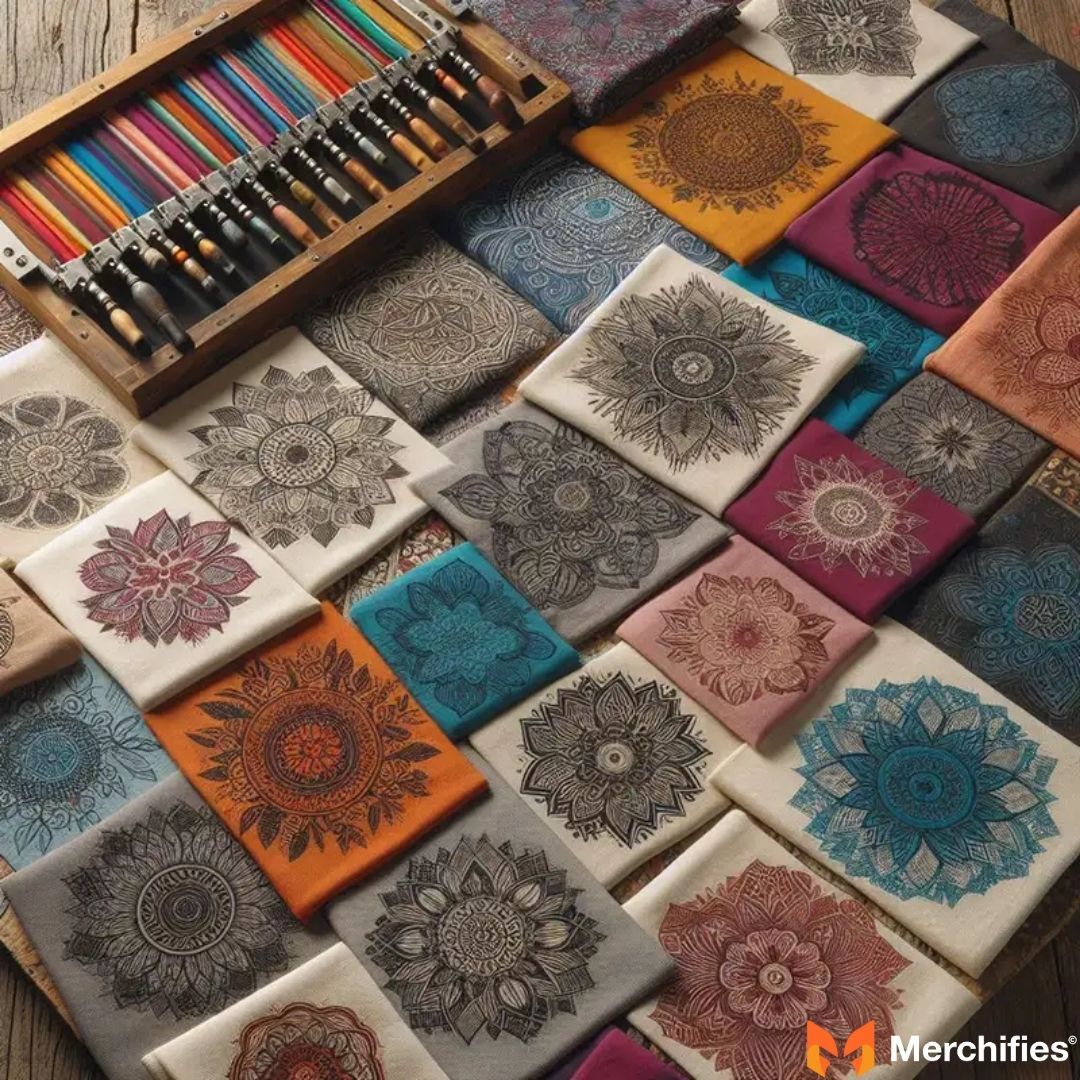
Method 3: Artistic Block Printing for Fabric
Block printing is a traditional art form that offers a wonderfully tactile and handcrafted feel to your fabric designs, allowing for unique, repeatable patterns.
Overview: This method involves carving a design into a block of material (like linoleum or rubber), inking the raised surface, and then pressing the block onto the fabric to transfer the design. It's an ancient technique that produces beautiful, artisanal results.
Pros & Cons: Block printing yields a distinctive handcrafted aesthetic and allows for easy repetition of patterns. It's very satisfying creatively. However, it requires some carving skills and tools, and designs tend to be less detailed than digital methods.
Key Materials Needed: Carving blocks (linoleum, rubber, or soft-cut blocks), carving tools (gouges and knives), fabric ink or specific block printing fabric paint, a brayer (rubber roller), an inking plate (a flat, non-absorbent surface), and your chosen fabric.
Step-by-Step Guide:
Carve Design: Transfer your design onto the block (either by drawing directly or using carbon paper). Using carving tools, carefully carve away the areas you don't want to print, leaving your design raised. Mason Ellis Grant suggests practicing on a scrap block first to get a feel for the tools.
Roll Ink onto Block: Squeeze a small amount of fabric ink onto your inking plate. Use the brayer to roll the ink evenly across the plate, then roll it onto the raised areas of your carved block. Ensure consistent, thin coverage.
Press Block onto Fabric: Carefully position the inked block onto your fabric. Apply firm, even pressure across the entire block, either by hand or using a clean, soft mallet.
Repeat: Lift the block straight up from the fabric. Re-ink the block and repeat the pressing process to create a pattern or multiple prints.
Cure: Allow the ink to dry completely, then heat set it according to the fabric ink manufacturer's instructions to ensure durability and wash-fastness.
Best For: Artisan goods, unique scarves, home linens, greeting cards on fabric, and crafting distinctive block printing fabric designs with a personal touch.
How to Print on Fabric at Home: Advanced & Direct Methods
For those ready to delve into more sophisticated or precise fabric printing, these methods offer enhanced quality and capabilities, often bridging the gap between home crafting and professional results.
How to Print on Fabric at Home Advanced & Direct Methods
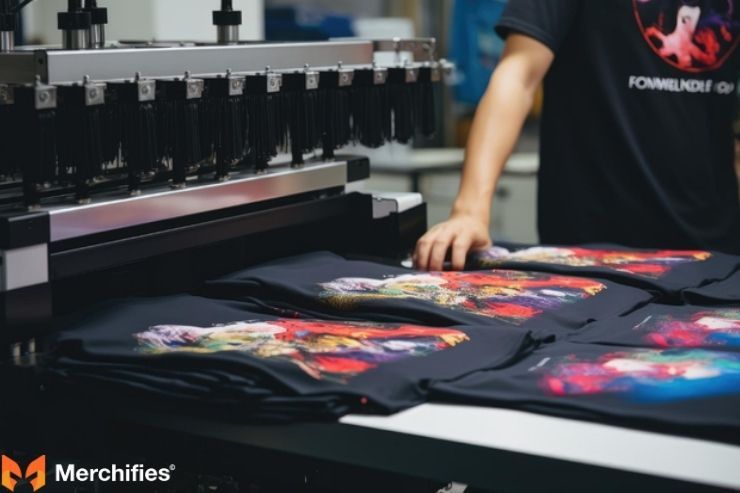
Method 4: DIY Screen Printing at Home
Screen printing allows you to create vibrant, durable, and professional-looking prints, especially useful when you want to print multiple items with the same design.
Overview: This technique involves forcing ink through a mesh screen, which has a stencil-like design emulsion applied to it, onto the fabric below. Only the unblocked areas allow the ink to pass through, creating your design.
Pros & Cons: Screen printing produces high-quality, long-lasting prints with excellent color vibrancy. It's efficient for printing batches of items. However, it has a steeper learning curve, requires more setup, and involves specific supplies like photo emulsion and a screen.
Key Materials Needed: A screen (with mesh count suitable for fabric printing), photo emulsion kit (emulsion and sensitizer), squeegee, fabric ink (water-based or plastisol), transparency film (for printing your design), exposure unit (or strong sunlight/UV light), washout area, and your fabric.
Step-by-Step Guide:
Prepare Screen (Expose Design): Mix and apply photo emulsion evenly to your screen in a darkroom. Once dry, place your transparency design (inkjet side touching the emulsion) onto the screen and expose it to a light source (UV lamp or sun) to harden the emulsion around the design. Wash out the unexposed emulsion, creating your stencil on the screen.
Register Screen: Secure your fabric on a flat surface. Position your screen over the fabric, ensuring the design is exactly where you want it. For multiple prints, you might use a hinged screen press.
Apply Ink: Pour a bead of fabric ink across the top of your screen, above your design.
Print: Using the squeegee, pull the ink firmly and evenly across the screen, pushing it through the mesh onto the fabric. Use consistent pressure and angle.
Lift Screen: Carefully lift the screen straight up from the fabric to reveal your print.
Cure: Allow the print to air dry, then heat set it thoroughly with a heat press, flash dryer, or iron (following ink instructions) to make it wash-fast.
Best For: Custom T-shirts, band merchandise, posters, art prints on fabric, and producing larger quantities of items with consistent quality. It's the most common method for home screen printing enthusiasts aiming for professional results.
Internal Link Suggestion: Dive deeper with our "Beginner's Guide to Screen Printing Supplies."
DIY Screen Printing at Home
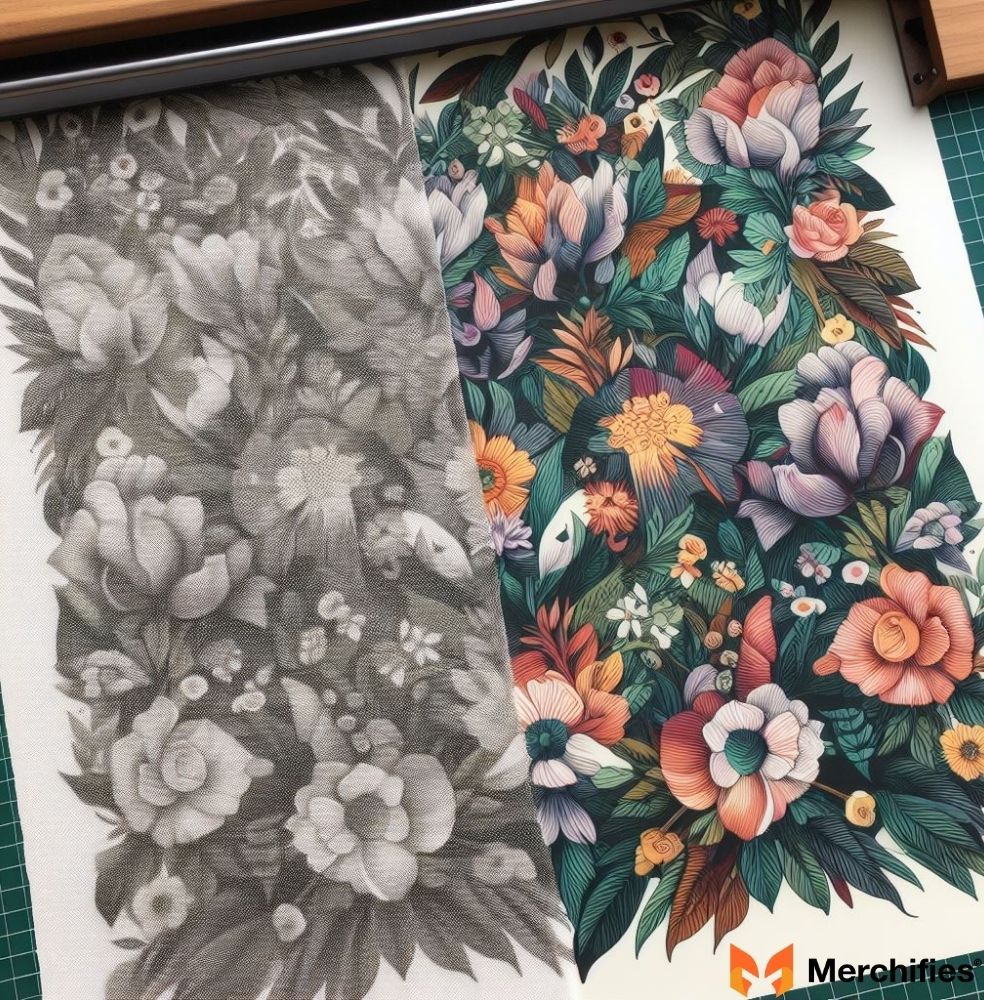
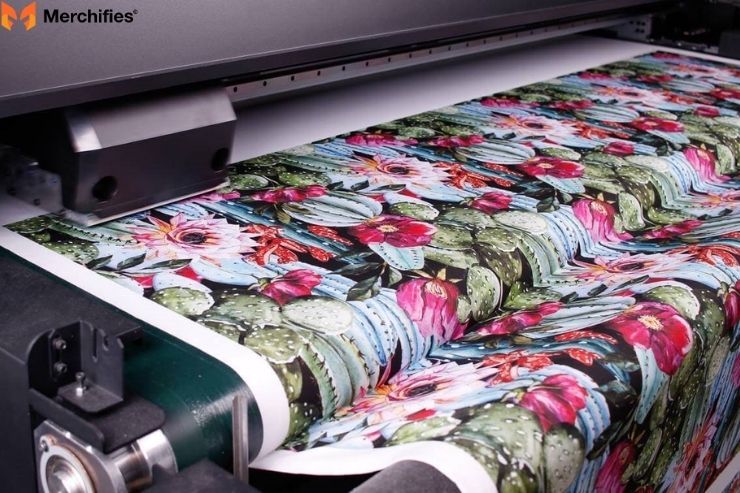
Method 5: Direct-to-Fabric Printing with Specialized Inkjet Sheets
For photo-realistic images or highly intricate, multi-color designs, specialized printable fabric sheets used with a standard inkjet printer offer an incredibly easy solution.
Overview: This method allows you to print directly onto a sheet of fabric that has been treated for inkjet printers, much like printing on paper. The printed fabric sheet can then be cut, sewn, or adhered to your project.
Pros & Cons: This method offers photo-realistic quality and intricate detail with remarkable ease, using equipment you likely already own (an inkjet printer). There's no special skill required beyond operating a printer. The main drawbacks are the cost of specialized printable fabric sheets and the limitation to fabric types that can be pre-treated this way.
Key Materials Needed: Printable fabric sheets (e.g., Jacquard Inkjet Fabric, June Tailor Colorfast Fabric Sheets), a standard inkjet printer, and your final fabric project.
Step-by-Step Guide:
Print onto Fabric Sheet: Load the printable fabric sheet into your inkjet printer according to the manufacturer's instructions. Print your desired design or photo directly onto the fabric sheet. Ensure your printer settings are optimized for photo or high-quality printing.
Peel Backing: Once printed and dry, carefully peel away the paper backing from the fabric sheet.
Adhere/Sew to Project: The fabric piece is now ready. You can cut it to size, iron it onto a project (some sheets are iron-on), or sew it directly onto quilts, bags, or garments as an appliqué or label.
Cure (if specified): Some fabric sheets may require a final rinse or heat-setting step to ensure colorfastness; always check the specific product instructions.
Best For: Creating photo quilts, detailed appliqués, personalized fabric labels, memory keepsakes, and complex, colorful designs where printing photos on fabric with precision is key.
Direct-to-Fabric Printing with Specialized Inkjet Sheets
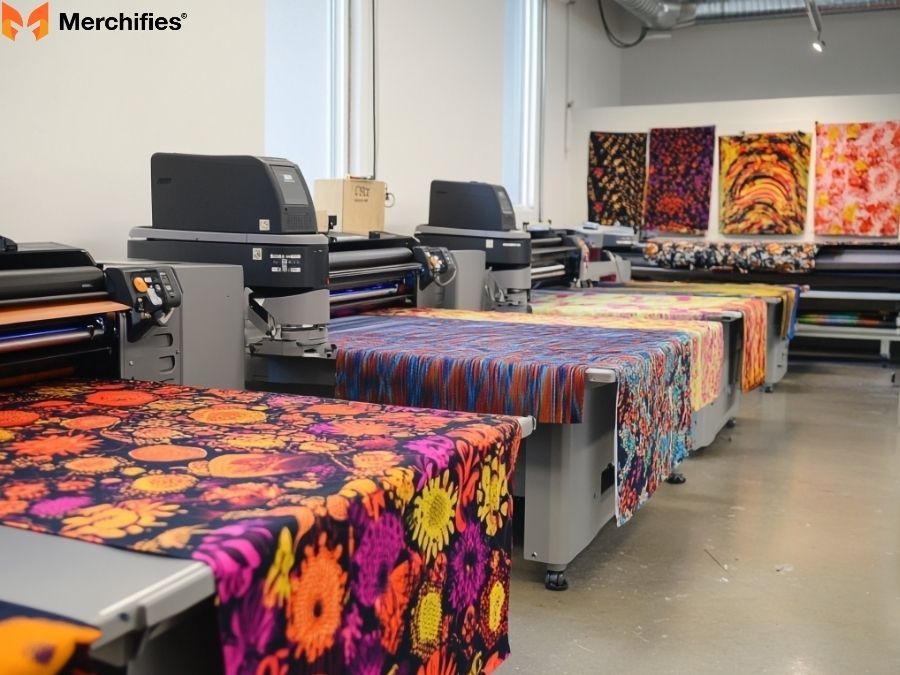
How to Print on Fabric Professionally: Understanding Commercial Approaches (and DIY Alternatives)
While the methods above are fantastic for home crafters, the term "professionally" often refers to large-scale, commercial production using industrial equipment. However, with the right techniques and dedication, home printers can achieve remarkably professional-looking results.
Understanding what makes a print "professional" typically involves factors like high durability, consistent color reproduction across thousands of items, and efficiency in large batch production. Commercial screen printing, Direct-to-Garment (DTG) printing, and sublimation are prominent professional methods. DTG printers are essentially specialized inkjet printers for fabric, offering full-color, photographic prints directly onto garments without screens or transfers, but they come with a hefty price tag.
For the ambitious home crafter or small business owner, DIY screen printing (Method 4) is often the closest you can get to how to print on fabric professionally without industrial investment. By mastering screen preparation, ink application, and proper curing, you can produce prints that rival those from professional shops, especially for multi-item orders. Utilizing a high-quality heat press instead of an iron for any heat-set method (HTV, inkjet transfers, screen print ink curing) also significantly elevates the durability and finish to a more professional standard. The key takeaway, as Mason Ellis Grant notes from her own journey, is that "professional quality often stems from meticulous preparation, precise execution, and investing in the right tools, even if they're scaled for home use."
Troubleshooting Common Fabric Printing Issues & Expert Tips
Even with the best preparation, you might encounter a few hiccups along the way. Knowing how to troubleshoot common problems can save your project and your sanity.
Avoiding Bleeds and Smudges:
Proper Paint Consistency: If your fabric paint is too thin, it's more likely to bleed. Aim for a creamy, workable consistency.
Securing Fabric: Always secure your fabric tautly to your work surface and use temporary adhesive or tape to hold stencils or blocks firmly in place.
Allowing Drying Time: Don't rush the drying process between layers or before handling. Partial drying is a common cause of smudges. For stenciling, remove the stencil before the paint is fully dry, but ensure it's not wet enough to smear.
As Mason Ellis Grant frequently advises her students, "Fabric paint bleeding prevention starts with patience and a firm hand."
Troubleshooting Common Fabric Printing Issues & Expert Tips
Ensuring Durability and Wash-Fastness:
Importance of Proper Curing/Setting: This is perhaps the most critical step for making your prints last. Most fabric inks and paints require heat setting (with an iron, heat press, or oven, following product instructions) to chemically bond the pigment to the fibers. Air drying alone is often insufficient for longevity.
Using Appropriate Fabric Inks for Washing: Always use inks specifically formulated for fabric and designed to be permanent and washable once cured. Regular craft paints will likely wash out.
Achieving Crisp Edges and Fine Details:
Sharp Stencils: Ensure your stencils have clean, sharp edges. A dull craft knife can lead to fuzzy lines.
Adequate Pressure: Apply firm, even pressure when using blocks or screen printing squeegees. For stenciling, a pouncing motion helps prevent paint from seeping under edges.
Not Overloading with Ink: Too much ink on your stencil, block, or screen can cause squishing and bleeding. Less is often more; apply thin, even layers.
Test fabric printing on a scrap piece of the same fabric first. This allows you to fine-tune your technique, ink consistency, and pressure before committing to your final project.
General Tips for Success:
Work in a clean, well-lit, and well-ventilated area.
Patience and practice are key to mastering any fabric printing method. Don't be discouraged by initial imperfections.
If layering colors, ensure each layer is dry and properly cured before applying the next.
Caring for Your Custom Printed Fabric Creations
Once you've poured your creativity into a custom fabric print, proper care is essential to ensure its longevity and keep your design looking fresh.
Caring for Your Custom Printed Fabric Creations
Washing Instructions for Printed Fabric:
Cold Water, Gentle Cycle: Always wash printed fabric in cold water on a gentle cycle. Hot water can cause inks to fade or crack prematurely.
Turning Garment Inside Out: Before washing, turn apparel and other fabric items inside out. This protects the printed design from abrasion with other clothing or the washing machine drum.
Avoiding Harsh Detergents and Bleach: Use a mild detergent and avoid any products containing bleach or harsh chemicals, as these can strip or damage your print.
Drying and Ironing:
Air Drying Whenever Possible: Air drying is the gentlest method for printed fabrics. Hang them to dry or lay them flat.
Low-Heat Tumble Dry: If using a dryer, select a low-heat setting. High heat can cause prints to crack, peel, or fade. Again, turning the item inside out is beneficial.
Ironing on the Reverse Side: If ironing is necessary, always iron on the reverse side of the fabric. If you must iron the printed side, place a pressing cloth or parchment paper over the design to protect it from direct heat.
Longevity Tips:
Proper storage, away from direct sunlight, can prevent premature fading.
Understand that while well-cured prints are durable, no print lasts forever. Gentle care will maximize the lifespan of your custom creations.
Inspiring Project Ideas for Your Printed Fabric
Now that you're equipped with the knowledge of how to print on fabric, let your imagination run wild! The possibilities for custom creations are truly endless.
Inspiring Project Ideas for Your Printed Fabric
Apparel & Accessories:
Custom T-shirts, Hoodies, & Jackets: Design unique graphic tees for yourself, a group, or as gifts. Personalize denim jackets with intricate stencils or vibrant screen prints.
Canvas Shoes: Transform plain canvas sneakers into wearable art.
Tote Bags: Create stylish, eco-friendly shopping bags or personalized book bags.
Home Decor & Gifts:
Pillows & Cushions: Print matching or eclectic designs for throw pillows that enhance any room.
Tea Towels & Table Runners: Add a personal touch to your kitchen or dining area with custom patterns.
Wall Hangings & Banners: Create unique textile art pieces for your home or special occasions.
Personalized Gifts: From baby onesies to aprons, custom fabric prints make thoughtful, one-of-a-kind presents.
Craft & Art Applications:
Quilt Blocks: Print individual squares with photos or designs for a truly personal quilt.
Fabric Labels: Create bespoke fabric labels for your handmade garments, crafts, or small business products.
Textile Art Pieces: Experiment with layering techniques and mixed media for intricate art projects.
Memory Keepsakes: Print significant dates, names, or images onto fabric to create cherished heirlooms.
Your Journey into Fabric Printing Begins Now
Conclusion: Your Journey into Fabric Printing Begins Now!
You've now explored the exciting world of how to print on fabric, from essential preparations and various printing methods to troubleshooting tips and caring for your creations. The versatility and creative potential of textile art are truly boundless, offering a unique avenue for personal expression and crafting thoughtful, custom items. As we've learned through this guide, with a little patience, practice, and the right techniques, you can transform ordinary fabric into extraordinary pieces of art.
We encourage you to confidently embark on your first fabric printing project. Don't be afraid to experiment, make mistakes, and discover your unique style. The rewarding nature of creating something with your own hands, seeing your design come to life on cloth, is an unparalleled experience. According to textile artist Mason Ellis Grant, who has guided countless individuals through their creative journeys, "The beauty of fabric printing is that it invites you to tell your story, one custom design at a time." So, grab your supplies, unleash your imagination, and start creating beautiful custom designs today. We can't wait to see what you'll make!
-da0801079a650a2e.jpeg)

-d4c38c342cdf20ca.jpeg)


-b555fcc6b204c456.jpeg)


