-da0801079a650a2e.jpeg)
17 Year Anniversary Quotes: 110+ Funny, Romantic & Furniture Wishes (2026)
Mar, 12 2026
Gift wrapping mastery involves more than just folding paper—it's about creating memorable experiences that show genuine care. Whether you're preparing birthday surprises, holiday presents, or special occasion gifts, handmade gift bags offer unlimited customization while saving money and reducing waste.
The secret to professional-looking results lies in proper preparation, quality materials, and attention to detail. Let's explore how to create stunning gift bags that rival expensive boutique presentations.
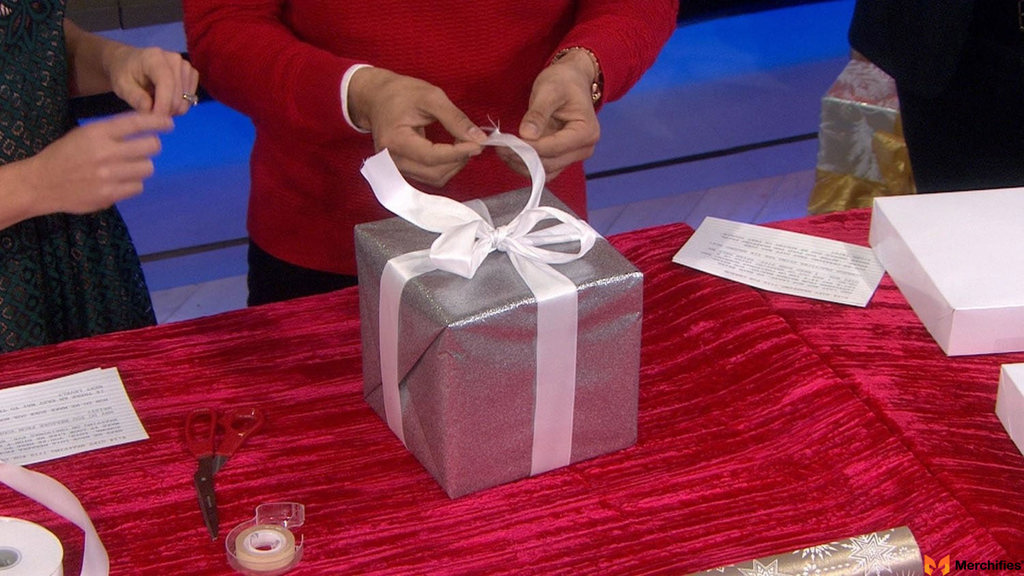
Beautiful presentation elevates any gift from ordinary to extraordinary. During my years as a crafting instructor, I've watched countless faces light up when receiving thoughtfully wrapped presents—the packaging itself becomes part of the gift experience.
Emotional Impact: Handmade gift bags communicate effort, thoughtfulness, and personal investment in the recipient's happiness. This emotional connection strengthens relationships and creates lasting memories that extend far beyond the actual gift.
Cost Effectiveness: Creating your own gift bags significantly reduces wrapping expenses while offering unlimited design possibilities. A single roll of quality paper can produce multiple custom bags for various occasions.
Environmental Benefits: Homemade gift bags support sustainable practices by utilizing recyclable materials and reducing commercial packaging waste. Plus, recipients often reuse beautiful handmade bags for their own gift-giving needs.
Creative Expression: Gift wrapping mastery allows personal style to shine through unique color combinations, texture mixing, and customized embellishments that reflect both giver and receiver personalities.
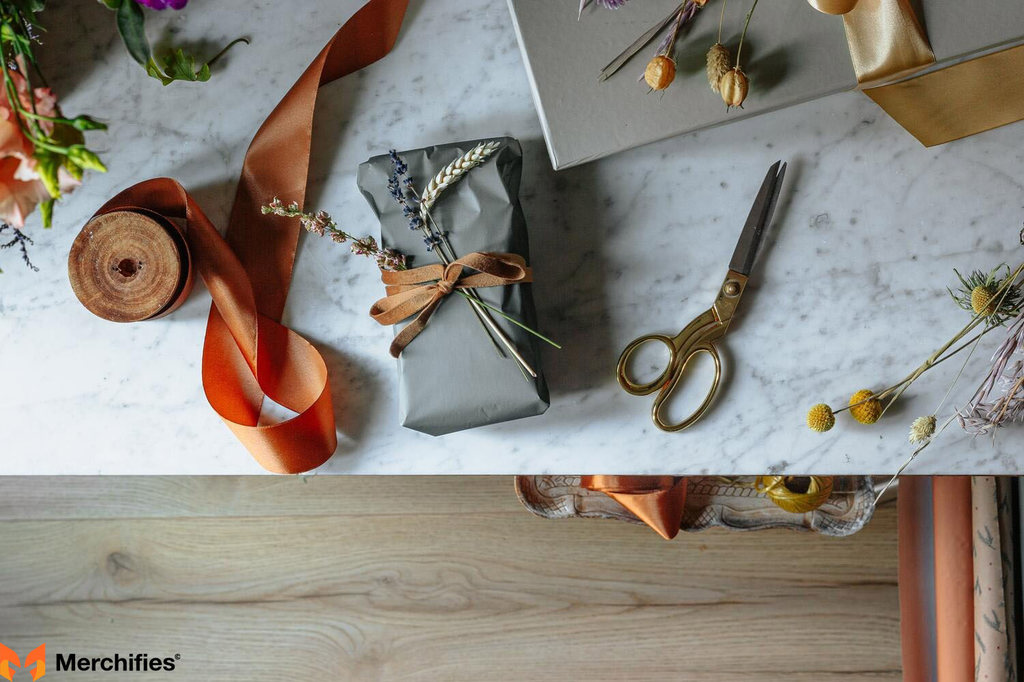
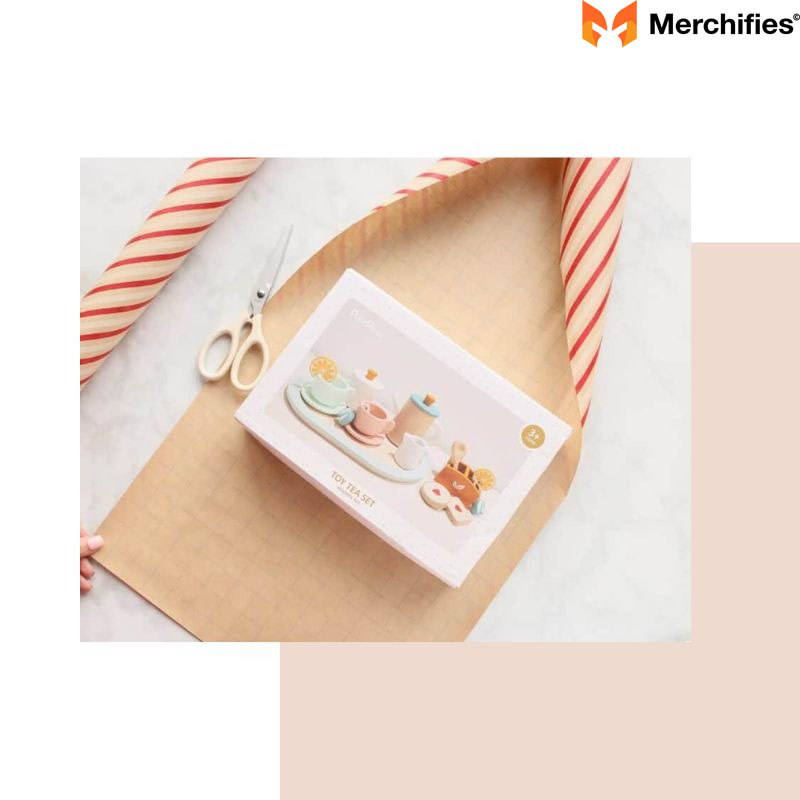
Paper choice forms the foundation of successful gift wrapping mastery. Different materials create distinct aesthetic effects while offering varying levels of durability and workability.
"Think about variety. For instance, kraft paper gives a rustic vibe, while fabric-backed paper adds a touch of class. And hey, old magazine pages? Total game changer."
Kraft Paper: This versatile option provides natural, eco-friendly appeal perfect for casual occasions or rustic themes. Kraft paper handles well, folds cleanly, and accepts various decorative treatments from stamps to hand-drawn designs.
Fabric-Backed Paper: Premium option offering enhanced durability and sophisticated appearance. The fabric backing prevents tearing during construction while providing rich texture that elevates any presentation.
Recycled Materials: Creative gift wrapping mastery embraces unconventional materials like magazine pages, sheet music, or newspaper for unique, conversation-starting presentations that demonstrate environmental consciousness.
Quality tools ensure clean, precise results that distinguish amateur attempts from professional-level gift wrapping mastery. Investment in proper equipment pays dividends through improved efficiency and consistent results.
"You'll also need sharp scissors or a paper cutter, a ruler or measuring tape, and some good adhesives. Double-sided tape is your friend for clean edges, and clear tape reinforces those seams."
Cutting Implements: Sharp scissors or rotary cutters create clean, straight edges essential for professional appearance. Dull blades cause ragged edges that compromise overall presentation quality.
Measuring Equipment: Accurate measurements prevent material waste while ensuring proper proportions. Metal rulers provide straight cutting guides while flexible measuring tapes accommodate curved surfaces.
Adhesive Selection: Double-sided tape creates invisible seams for polished appearance, while clear tape provides structural reinforcement. Washi tape adds decorative elements while serving functional purposes.
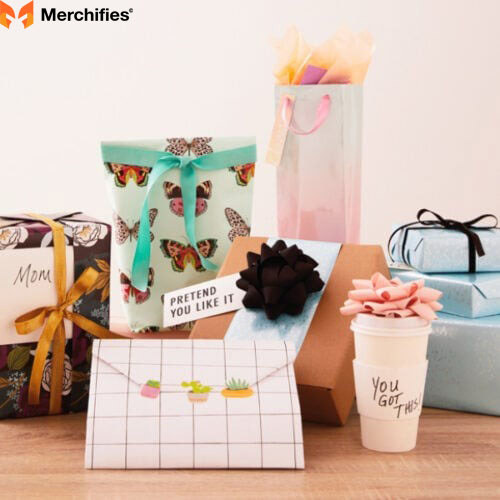
Thoughtful embellishments transform basic gift bags into memorable presentations that reflect gift wrapping mastery principles. Strategic decoration adds visual interest without overwhelming the overall design.
"Don't forget ribbons, tags, and maybe some little charms for that extra pop."
Ribbon Varieties: Satin ribbons provide elegant sheen, while grosgrain offers structured texture. Natural materials like jute or twine complement rustic themes, and wire-edge ribbons hold elaborate bow shapes.
Tag Systems: Custom tags allow personalized messages while serving practical identification purposes. Handwritten elements add intimate touches that demonstrate genuine care and attention.
Charm Integration: Small decorative elements like buttons, mini ornaments, or themed charms create focal points that reflect recipient interests or occasion significance.
Organized preparation ensures smooth construction processes and professional results. Gathering all materials before beginning prevents interruptions that can compromise quality or enthusiasm.
"Gather all your supplies and select a high-quality paper that complements the event and the person receiving it. Choose brightly colored wrapping paper or high-quality tissue, or recycle an ornamental scarf for a classier look."
Primary Materials: Rectangular or square wrapping paper sized appropriately for intended gifts, with extra material allowing for construction waste and design modifications.
Assembly Tools: Sharp scissors for precision cutting, hole punch for handle attachment, and various tape types including decorative washi tape options.
Finishing Elements: Ribbon in appropriate widths for punch holes, decorative accents matching theme or recipient preferences, and protective materials for delicate embellishments.
Quality Considerations: High-grade paper resists tearing during construction while accepting various decorative treatments. Color selection should complement both occasion and recipient personality for maximum impact.
Proper planning prevents construction problems and material waste. Accurate measurements ensure appropriate sizing while efficient material use maximizes value from quality papers.
"Measure your gift. It's key. You don't want a bag too big or too small. Cut your paper precisely. Clean lines are your goal here."
Gift Assessment: Measure all gift dimensions including height, width, and depth to determine required bag size. Add extra space for comfortable fit and closing mechanisms.
Paper Calculation: Allow additional material beyond gift dimensions for seam construction, base formation, and top closure. Generally, add 4-6 inches to each dimension for construction allowances.
Cutting Technique: Use rulers or straight edges to ensure precise cuts that create professional-looking seams. Clean, straight lines are fundamental to gift wrapping mastery success.
Strong bag foundations support gift weight while maintaining attractive appearance throughout handling and presentation. Proper base construction prevents embarrassing failures during gift-giving moments.
"Fold the paper to create the base, then the sides. Gussets? Those are the folds that make the bag wider. You'll want to get those right."
Base Formation: Creating sturdy foundations requires understanding paper grain direction and stress distribution. Fold lines should align with paper strength for maximum durability.
Gusset Creation: Side expansion folds allow bags to accommodate three-dimensional gifts while maintaining clean appearance. Proper gusset formation distinguishes amateur attempts from gift wrapping mastery.
Seam Security: Multiple attachment methods ensure structural integrity throughout handling and transportation. Strategic reinforcement prevents failure at critical stress points.
Professional gift wrapping mastery requires understanding which adhesive methods work best for different situations and stress levels. Proper securing techniques ensure bags survive handling while maintaining appearance.
"Next, secure the bag. Double-sided tape is your friend. Reinforce those seams with clear tape. Handles? Ribbons or twisted paper work great. Secure them tightly. Believe me, I've had handles rip right off before. Not fun."
Primary Attachment: Double-sided tape creates clean, invisible seams that enhance professional appearance while providing reliable holding power for normal use conditions.
Reinforcement Strategy: Clear tape adds structural strength at high-stress points without compromising visual appeal. Strategic placement prevents common failure modes during typical handling.
Handle Integration: Secure attachment methods prevent embarrassing handle failures during presentation. Multiple attachment points distribute stress while maintaining attractive appearance.
Professional presentations require attention to edge treatments that create polished appearances. This initial step establishes the quality standard for the entire construction process.
"The first step in making a gift bag is to arrange the wrapping paper in a landscape orientation with a flat, long edge. Fold the top border in half, about 1 to 2 inches (2.54 to 5.08 cm). Use your fingernail to create a more defined crease."
Orientation Setup: Landscape positioning provides optimal material utilization while establishing proper proportional relationships for standard gift sizes and shapes.
Fold Dimensions: One to two-inch folds create substantial edges that resist tearing while providing clean finish lines. Consistent fold width ensures professional symmetry throughout construction.
Crease Definition: Sharp, well-defined creases are hallmarks of gift wrapping mastery that distinguish amateur attempts from professional-quality results.
Accurate sizing prevents common problems like insufficient space or excessive material waste. Proper estimation techniques ensure optimal functionality while maximizing aesthetic appeal.
"Start by carefully unfolding the wrapping paper you've selected onto a large, level surface. Place your gift on top to determine the amount of paper needed. Don't forget to leave extra space for sealing and folding."
Surface Preparation: Large, flat working surfaces provide stability for accurate measurements while preventing paper damage during planning phases.
Spatial Planning: Direct gift placement allows visual assessment of required dimensions while accounting for construction requirements and closure mechanisms.
Allowance Calculation: Additional space beyond gift dimensions accommodates construction seams, base formation, and top closure without compromising functionality or appearance.
Strong seam construction forms the backbone of durable gift bags that survive handling while maintaining professional appearance throughout presentation and beyond.
"Lay the paper with its face facing downward on a level surface. Ensure sufficient overlap by bringing the left and right sides towards the center. Give it a little push to obtain a nice fold. Tape it down along the length of the seam using transparent or double-sided tape."
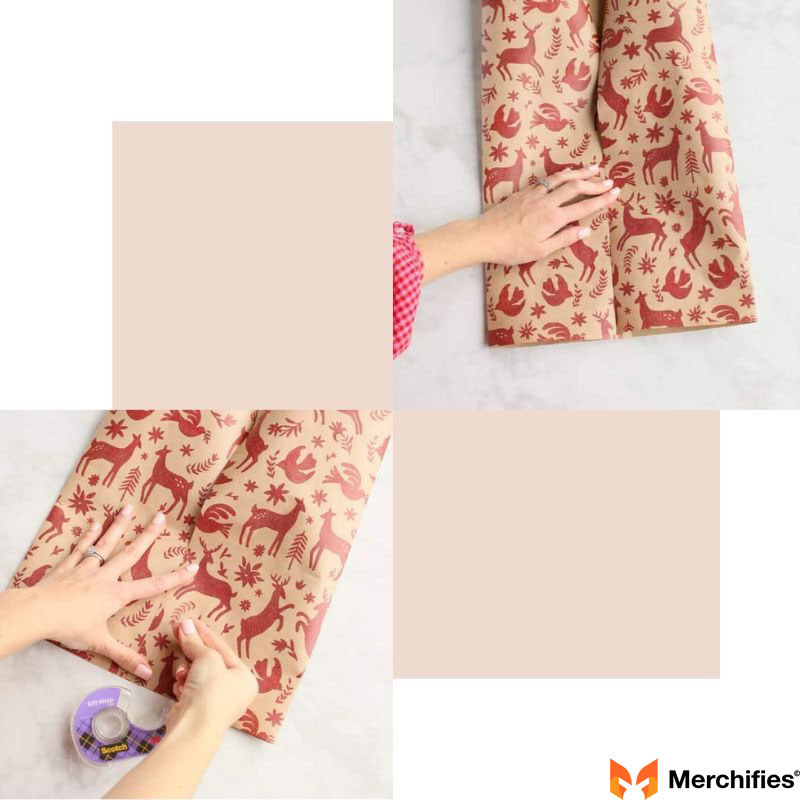
Positioning Strategy: Face-down placement protects decorative surfaces while providing clear visibility of construction lines and attachment points.
Overlap Management: Sufficient material overlap ensures secure seam formation while preventing gaps that compromise structural integrity or visual appeal.
Seam Securing: Professional taping techniques create durable attachments that withstand normal handling while maintaining clean, finished appearances throughout use.
Bag bottoms bear significant weight while maintaining shape integrity. Proper base construction techniques prevent sagging or failure that ruins presentation quality.
"We're about to start building the bag's foundation. Let's shape a strong foundation to hold your present by pulling the paper's bottom edge upwards. Carefully consider this base's width to ensure it can keep your present secure."
Foundation Planning: Base dimensions must accommodate gift requirements while providing adequate support for weight distribution and structural stability.
Construction Technique: Upward folding creates multi-layer foundations that distribute weight effectively while maintaining attractive external appearance.
Security Considerations: Proper base width prevents gift shifting during handling while ensuring adequate support for various gift types and sizes.
Geometric shaping techniques transform flat paper into three-dimensional containers capable of holding various gift types while maintaining attractive proportions and structural integrity.
"After you've folded up the bottom portion of the wrapping paper, unfold it so it resembles an open mouth. Then, fold it by pressing the corners down. A bottom in the shape of a triangle should be the final result."
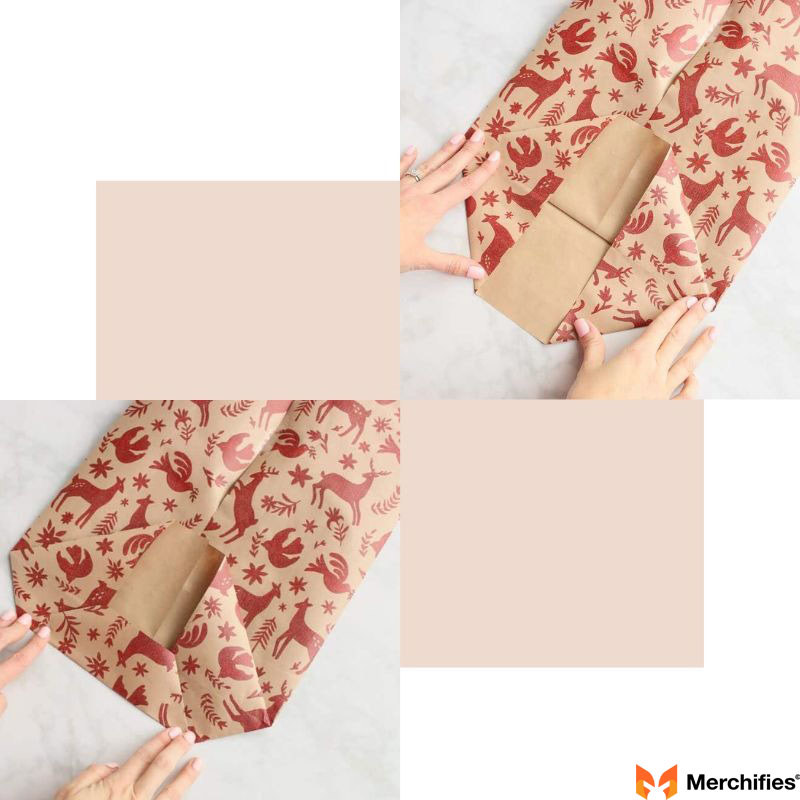
Shaping Process: Controlled unfolding creates working space for corner manipulation while maintaining structural relationships established in previous steps.
Corner Technique: Precise corner pressing creates clean geometric shapes that contribute to professional appearance while ensuring proper function.
Result Achievement: Triangle formations provide stable foundations while creating attractive external profiles that enhance overall presentation quality.
Final base attachment requires methods that ensure long-term durability while maintaining visual appeal. Professional securing techniques prevent common failure modes during handling and presentation.
"Grasp the upper and lower triangles' ends and fold them toward the center so that they overlap. Apply pressure to ensure clean, precise folds, and then use tape to fasten all seams."
Triangle Management: Controlled overlapping creates multiple-layer reinforcement while eliminating gaps that could compromise structural integrity or appearance.
Pressure Application: Even pressure distribution creates consistent fold lines while ensuring proper adhesion for maximum holding power.
Seam Fastening: Strategic tape placement secures critical attachment points while maintaining clean external appearance throughout normal handling.
Thoughtful gift arrangement within bags affects both functionality and presentation quality. Strategic placement techniques enhance visual appeal while ensuring protection during handling and transportation.
"Carefully arrange the items you're gifting inside the bag. Make sure they are neatly arranged and fit without seeming squished. Try stacking smaller things at the base and bigger ones on top for an eye-catching appearance."

Arrangement Strategy: Systematic placement creates attractive internal compositions while ensuring optimal space utilization and protection for delicate items.
Size Hierarchies: Strategic stacking places stable items as foundations while positioning delicate or attractive elements for maximum visual impact.
Visual Enhancement: Decorative filler materials like shredded paper or colored tissue add volume while creating attractive presentations that reflect gift wrapping mastery principles.
Top closure techniques affect both functionality and appearance. Professional sealing methods ensure security while creating attractive finishing details that enhance overall presentation quality.
"Be careful to fold the top of the bag neatly. Make a neat, sharp edge by running your fingertips down the fold to ensure it's smooth and even, which is an attractive touch."
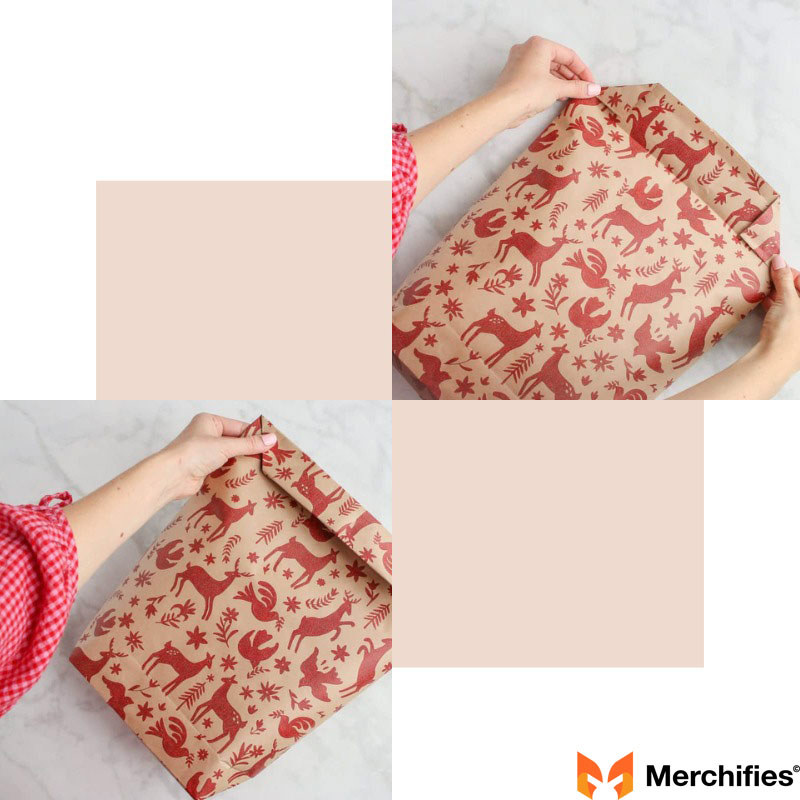
Folding Technique: Careful attention to top edge formation creates clean lines that reflect gift wrapping mastery standards while ensuring functional closure.
Edge Definition: Fingertip smoothing creates sharp, professional-looking creases that distinguish quality construction from amateur attempts.
Sealing Options: Multiple closure methods from simple glue application to decorative stickers allow customization while maintaining security and visual appeal.
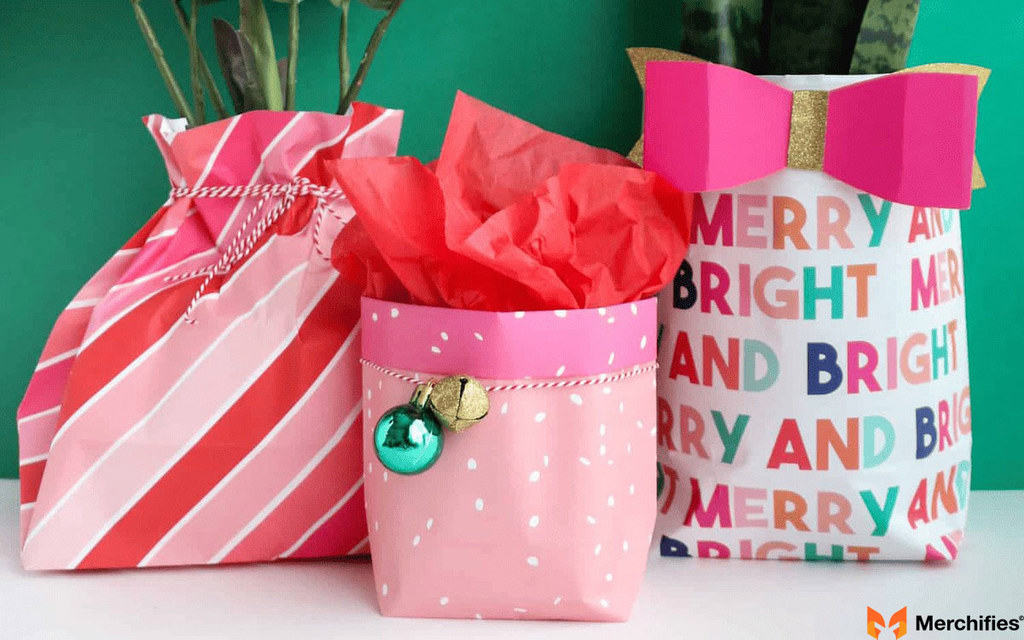
Customization transforms generic gift bags into meaningful presentations that reflect both giver and recipient personalities. Personal touches demonstrate thoughtfulness while creating memorable experiences.
"Personalization is the heart of gift-giving. It shows that you care about the interests and preferences of the receiver. Give it a more thoughtful touch by including handwritten letters, personalized tags, or ornamental touches that mirror their hobbies and personalities."
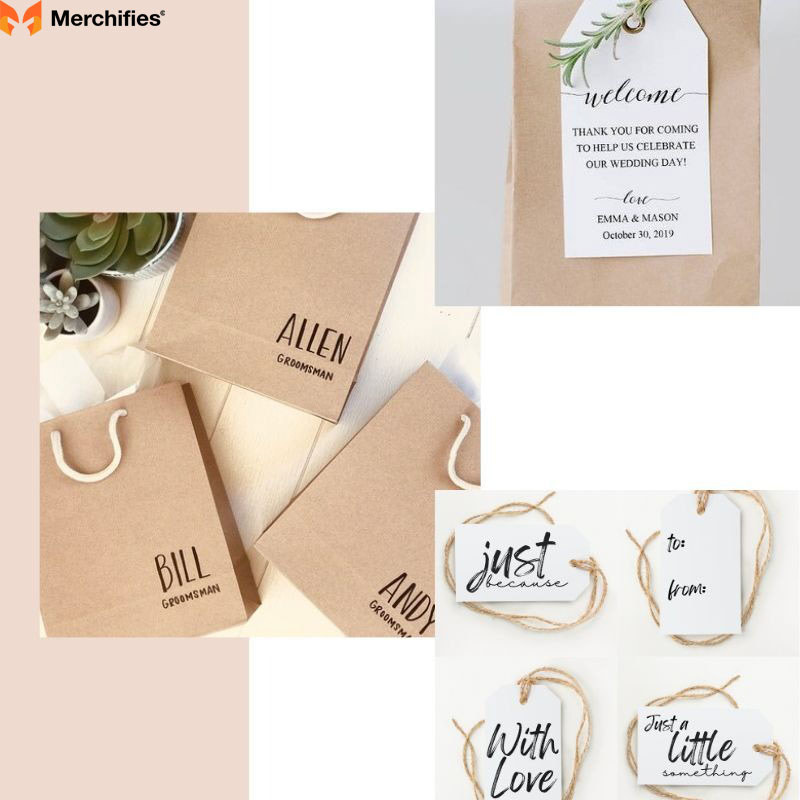
Personalization Philosophy: Meaningful customization communicates genuine care while creating emotional connections that extend beyond material gift value.
Implementation Options: Handwritten elements, custom tags, and themed decorations allow unlimited creative expression while reflecting recipient interests and personalities.
Impact Consideration: Thoughtful design choices create unique presentations that recipients remember long after gifts are opened and enjoyed.
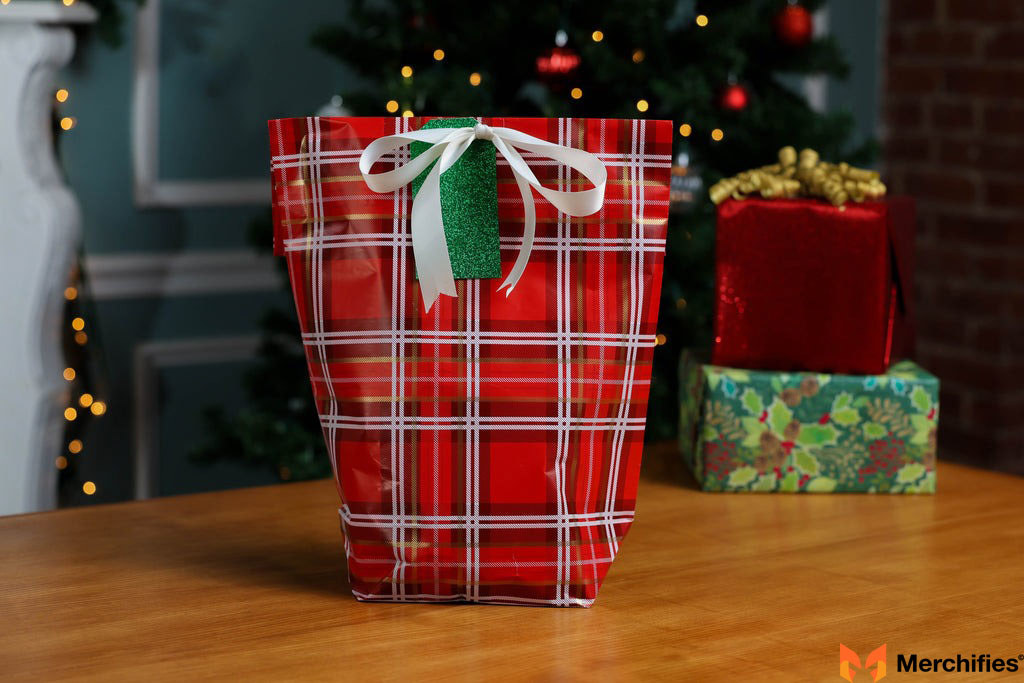
Strategic embellishment placement draws attention while enhancing overall design composition. Focal points create visual interest without overwhelming underlying presentations or competing with gift contents.
"An embellishment is the finishing touch that turns a gift bag into something truly memorable. Accessorize with ribbons, bows, and other trinkets that match the theme and add flair to the presentation."

Enhancement Strategy: Careful embellishment selection complements existing design elements while adding visual interest that reflects gift wrapping mastery principles.
Texture Integration: Layering different materials creates rich, complex appearances that engage multiple senses while maintaining cohesive design themes.
Creative Freedom: Personal expression through decorative choices allows unlimited customization while maintaining professional quality standards and appropriate occasion themes.
Professional presentations require thorough quality checks that ensure durability while maintaining attractive appearance throughout handling and presentation phases.
"The final step in making a gift bag is to ensure it is flawless before giving it to the recipient. Ensure the seams and handles are strong and secure by checking them twice."
Quality Standards: Comprehensive inspection prevents embarrassing failures while ensuring presentations meet gift wrapping mastery standards for durability and appearance.
Security Verification: Handle and seam testing confirms structural integrity while identifying potential problems before they compromise presentation quality.
Final Enhancement: Handwritten messages add personal touches that complete emotional connections while demonstrating genuine care and thoughtfulness.
Beyond basic rectangular bags, advanced gift wrapping mastery encompasses techniques for unusual gift shapes that require creative problem-solving and adaptation of standard methods.
"Let's level up. Cylindrical bags for bottles? Totally doable. Unique shapes? Go wild!"
Cylindrical Construction: Bottle bags require modified techniques that accommodate round profiles while maintaining structural integrity and attractive appearance.
Custom Shaping: Unusual gift dimensions challenge creativity while providing opportunities to demonstrate advanced gift wrapping mastery skills through innovative solutions.
Adaptation Principles: Understanding basic construction concepts allows modification for various shapes while maintaining quality and functionality standards.
Advanced customization techniques transform standard gift bags into unique artistic expressions that reflect individual creativity while demonstrating gift wrapping mastery expertise.
"Personalization is where it's at. Hand-drawn designs, calligraphy, stamped patterns – you name it. Add tags with little messages, or maybe a charm that means something to the person."
Artistic Integration: Hand-drawn elements, calligraphy, and stamped patterns create unique presentations that showcase artistic abilities while personalizing gifts.
Meaningful Additions: Custom tags and symbolic charms communicate personal connections while adding visual interest that reflects recipient relationships.
Theme Development: Coordinated design elements create cohesive presentations that demonstrate thoughtful planning and advanced gift wrapping mastery skills.
Advanced techniques include practical additions that increase functionality while maintaining attractive appearance and demonstrating comprehensive gift wrapping mastery understanding.
"Themed bags are always a hit. Holiday themes, birthdays, you get the idea. And pockets? Yes, pockets! Add them to the outside for small gifts like gift cards."
Theme Coordination: Seasonal and occasion-specific themes create appropriate presentations while allowing creative expression within established parameters.
Pocket Integration: External pockets provide additional storage for small gifts while adding functional complexity that demonstrates advanced construction skills.
Textural Elements: Pleating and other texture-creation techniques add visual interest while showcasing advanced gift wrapping mastery capabilities.
Modern gift wrapping mastery embraces environmental responsibility through material choices and construction methods that reduce waste while maintaining beautiful presentations.
"Look, we all know we need to be kinder to the planet. So, let's talk sustainable wrapping. Kraft paper is recyclable. Fabric scraps? Perfect. And those reusable fabric bags? Genius."
Material Selection: Eco-friendly options like kraft paper and fabric scraps provide attractive presentations while supporting environmental responsibility and sustainable practices.
Reuse Strategies: Fabric bags and durable construction methods create presentations that recipients can reuse, extending value while reducing environmental impact.
Creative Recycling: Repurposing materials like old maps and magazines creates unique presentations while demonstrating environmental consciousness and gift wrapping mastery creativity.
Efficient material usage and creative repurposing minimize environmental impact while maintaining quality presentations that reflect gift wrapping mastery standards.
"I've used old maps and magazine pages for wrapping; people love it! Think outside the box. It's not just about looking good; it's about doing good."
Resource Efficiency: Strategic material planning reduces waste while maximizing value from quality papers and decorative elements.
Creative Alternatives: Unconventional materials create conversation-starting presentations while demonstrating environmental awareness and creative problem-solving.
Dual Purpose: Sustainable gift wrapping mastery balances aesthetic appeal with environmental responsibility, creating presentations that satisfy multiple values.
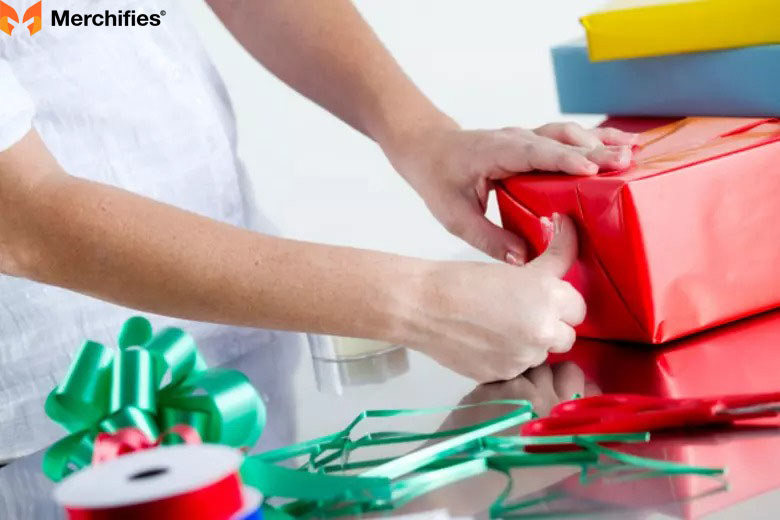
Professional-level gift wrapping mastery requires attention to details that distinguish amateur attempts from expert-quality presentations worthy of high-end retail environments.
"Here's the secret sauce to Make a Gift Bag Like a Pro. Neat folds, clean lines. That's how you get that pro look. Hide those tape lines. Double-sided tape is your best friend."
Technical Precision: Clean folds and straight lines create professional appearance while demonstrating mastery of fundamental construction techniques.
Seam Management: Hidden attachment methods maintain visual appeal while ensuring structural integrity throughout handling and presentation.
Quality Standards: Consistent attention to detail throughout construction creates cohesive presentations that reflect true gift wrapping mastery expertise.
Strategic decoration enhances presentation without overwhelming underlying construction quality. Balanced embellishment reflects advanced gift wrapping mastery understanding.
"Add thoughtful embellishments. A little ribbon goes a long way. And always, always make sure your gift is presentable before you bag it."
Proportion Awareness: Appropriate embellishment sizing creates visual harmony while avoiding overwhelming presentations or detracting from gift contents.
Preparation Importance: Gift presentation within bags affects overall quality, requiring comprehensive attention to detail throughout the entire process.
Learning Integration: Experience teaches valuable lessons that inform future projects while building gift wrapping mastery expertise over time.
Understanding common mistakes helps avoid problems that compromise presentation quality. Preventive measures ensure successful gift wrapping mastery results every time.
Handle Attachment: Secure attachment requires multiple anchor points and appropriate materials for expected loads. Reinforcement prevents embarrassing failures during presentation moments.
Seam Integrity: Quality adhesive application and proper overlap ensure durable construction that survives normal handling throughout gift-giving processes.
Size Miscalculations: Accurate measurement and adequate allowances prevent bags that are too small or wastefully oversized for intended gifts.
Professional gift wrapping mastery includes systematic quality checks that ensure presentations meet standards for durability, functionality, and visual appeal.
Structural Testing: Gentle stress testing reveals potential weak points before presentation, allowing corrective measures that prevent failures during actual use.
Appearance Standards: Consistent fold quality, clean seam lines, and appropriate embellishment placement create cohesive presentations worthy of professional recognition.
Functional Verification: Testing closure methods, handle strength, and gift fit ensures reliable performance throughout intended use scenarios.
Gift wrapping mastery develops through consistent practice and willingness to experiment with new techniques and materials. Progressive skill building creates lasting expertise.
Basic Proficiency: Master fundamental construction techniques before advancing to complex shapes or specialized decorative methods.
Creative Expansion: Experiment with different materials, themes, and personalization methods to develop individual style and advanced capabilities.
Teaching Others: Sharing knowledge reinforces learning while helping others discover the satisfaction of gift wrapping mastery achievement.
Professional development requires ongoing learning and adaptation to new materials, techniques, and presentation standards within gift wrapping mastery.
Technique Refinement: Regular practice maintains skill levels while providing opportunities to develop more efficient and effective methods.
Material Exploration: Testing new papers, adhesives, and decorative elements expands creative possibilities while building material knowledge.
Feedback Integration: Recipient reactions and personal observations inform future projects while building understanding of successful presentation elements.
Gift wrapping mastery transforms ordinary gift-giving into meaningful experiences that create lasting memories and strengthen relationships. Through proper technique, quality materials, and thoughtful personalization, anyone can create professional-quality presentations that rival expensive boutique standards.
"So, there you have it. You're now a gift bag pro! Remember, it's all about experimenting. Try different papers, different techniques. And most importantly, have fun with it."
The journey toward gift wrapping mastery begins with understanding fundamental principles and develops through consistent practice and creative experimentation. Each project provides opportunities to refine skills while creating unique presentations that reflect personal style and genuine care.
Remember that true gift wrapping mastery balances technical proficiency with creative expression, environmental consciousness, and meaningful personalization. The effort invested in beautiful presentations communicates care that extends far beyond material gift value.
"A beautifully wrapped gift shows you put in the effort, and that's what really matters." Start with basic techniques, embrace sustainable practices, and gradually develop advanced skills that transform gift-giving into memorable experiences that recipients treasure long after contents are revealed.
Your gift wrapping mastery journey begins now—gather your materials, choose your first project, and discover the satisfaction of creating beautiful presentations that demonstrate genuine thoughtfulness and care.
-d4c38c342cdf20ca.jpeg)


-b555fcc6b204c456.jpeg)


