How To Hang Canvas Art Perfectly: Step-by-Step Guide 2024 - A Flawless Display
You've got that gorgeous canvas art, the perfect piece to transform your space. However, the moment arrives when you face the challenge: how to hang canvas art perfectly without creating wall damage or crooked displays that ruin your room's aesthetic appeal.
Blog Post Contents
Learning how to hang canvas art perfectly eliminates common mistakes like uneven placement, inadequate support, and wall damage that plague amateur installations. After two decades helping homeowners create gallery-worthy displays, I've discovered that perfect canvas hanging combines proper planning, appropriate tools, and systematic execution.
"But then comes the hesitation: how do you hang it without making a mess of your walls? How do you get it straight, level, and looking like it belongs in a gallery? It's a common worry, but trust me, achieving a perfectly hung canvas is totally doable."
The secret to professional results lies in understanding wall types, selecting appropriate hardware, and following proven installation techniques that ensure your artwork hangs securely and beautifully for years to come.
Why Learning How To Hang Canvas Art Perfectly Matters for Your Home
Proper canvas installation affects everything from room aesthetics to artwork longevity. During my years as an interior design consultant, I've witnessed countless installation disasters that could have been prevented with basic knowledge and proper technique.
Structural Safety: Incorrectly hung canvas art creates safety hazards through falling artwork that can cause injury or property damage. Professional installation techniques ensure secure mounting that withstands normal household conditions and accidental bumps.
Wall Preservation: How to hang canvas art perfectly includes methods that minimize wall damage while providing maximum support. Proper techniques prevent unnecessary holes, cracked plaster, or damaged drywall that require costly repairs.
Aesthetic Impact: Crooked or poorly positioned artwork undermines room design while perfectly hung pieces create focal points that enhance overall interior aesthetics. Professional placement elevates any space from ordinary to extraordinary.
Investment Protection: Quality artwork represents significant financial investment that deserves proper display and protection. Correct installation prevents damage from falls, improper weight distribution, or environmental factors.
Essential Planning and Measurement for Perfect Canvas Placement
Strategic Planning Foundations
Successful canvas installation begins long before drilling the first hole. Understanding how to hang canvas art perfectly requires comprehensive planning that considers multiple factors affecting final results.
"How To Hang Canvas Art Perfectly? First things first, let's plan. Measure your canvas and the wall where you want to hang it. Figure out where you want the center of the canvas to be."
Canvas Measurement: Record exact dimensions including height, width, and depth to determine space requirements and hardware needs. These measurements guide wall space assessment and hardware selection for optimal support.
Wall Assessment: Evaluate available wall space, architectural features, and surrounding furniture that affect placement decisions. Consider lighting sources, room traffic patterns, and viewing angles from different positions.
Center Point Calculation: Determine optimal canvas center position based on room proportions, furniture relationships, and viewing comfort. This calculation guides all subsequent measurement and installation decisions.
Eye Level Positioning Guidelines
Professional placement follows established standards that ensure comfortable viewing for most people. These guidelines represent fundamental principles in how to hang canvas art perfectly.
"A good rule of thumb is to hang art at eye level, so consider the average height of people in your home."
Standard Height Formula: Position artwork centers 57-60 inches from floor level to accommodate average adult eye height. Adjust slightly based on household member heights and primary viewing positions.
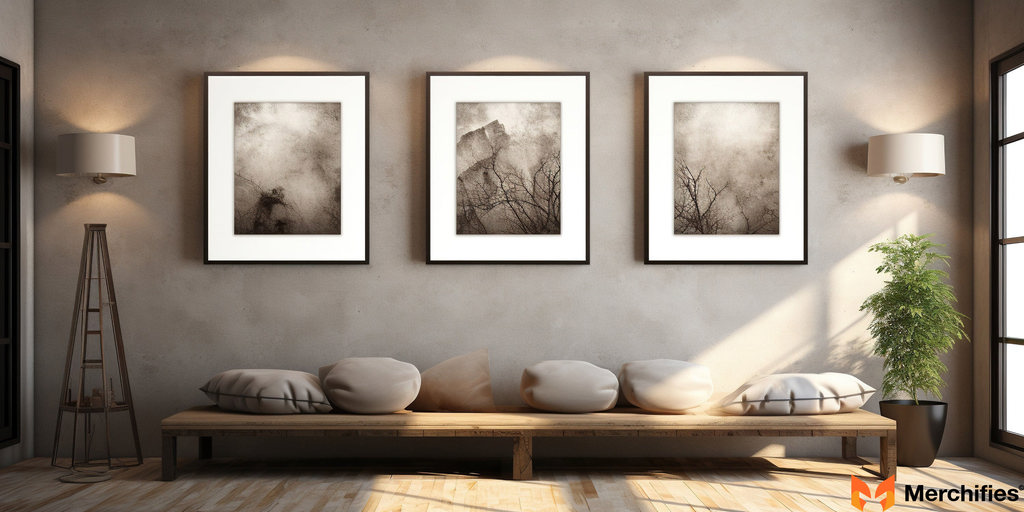
Furniture Relationships: Maintain 6-12 inch spacing above furniture tops while preserving eye-level viewing angles. This balance ensures visual connection without overwhelming furniture pieces.
Room Function Consideration: Adjust hanging height based on typical room usage—standing conversation areas versus seated dining spaces require different positioning strategies.
Gallery Wall Planning Techniques
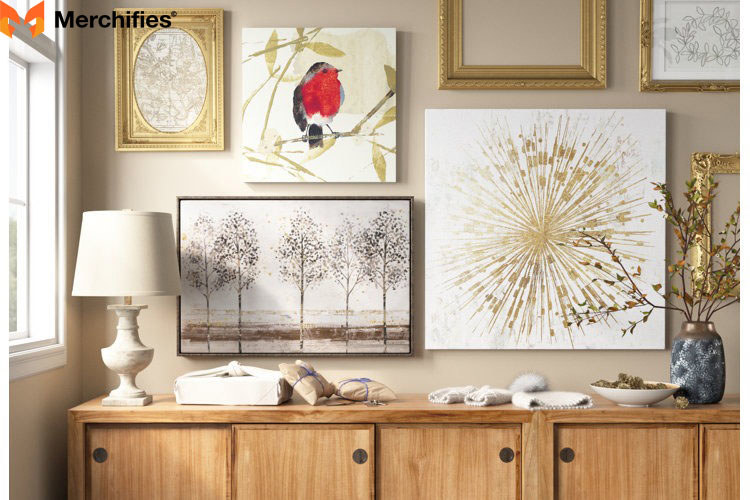
Multiple canvas arrangements require systematic planning that ensures cohesive appearance and balanced composition. These advanced techniques demonstrate mastery of how to hang canvas art perfectly.
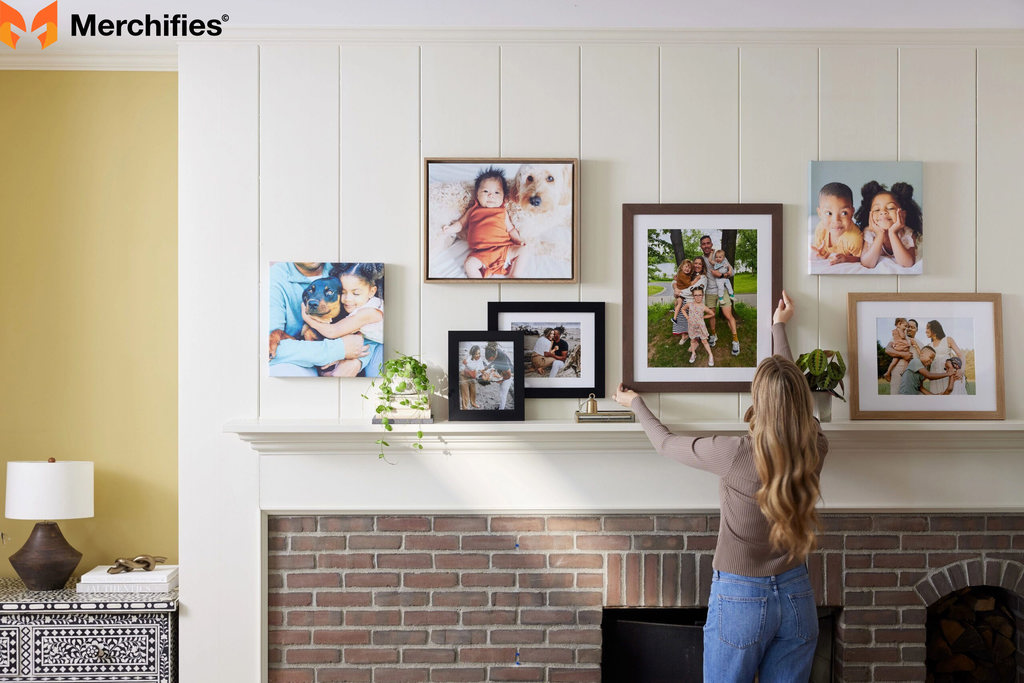
"If you're creating a gallery wall, sketch out your layout on paper. Planning saves you from making unnecessary holes."
Paper Template Method: Create paper templates matching canvas dimensions to test arrangements before installation. This visualization prevents mistakes while allowing creative experimentation without wall damage.
Spacing Standardization: Maintain consistent 2-3 inch spacing between pieces for unified appearance. Measure and mark all positions before beginning installation to ensure professional results.
Visual Weight Distribution: Balance large and small pieces throughout arrangements to prevent visual clustering or empty areas that compromise overall composition.
Understanding Wall Types and Hardware Selection
Drywall Installation Challenges
Modern construction predominantly uses drywall, which presents unique challenges for secure canvas mounting. Mastering how to hang canvas art perfectly on drywall requires understanding its structural limitations and appropriate solutions.
"Drywall is the most common, but it's also the trickiest. Use anchors that can handle the weight of your canvas."
Weight Distribution: Drywall cannot support significant weight without proper anchoring systems that distribute loads across larger surface areas. Toggle bolts, molly bolts, and wall anchors provide necessary support for canvas artwork.
Stud Location Benefits: Mounting into wall studs provides maximum support for heavy pieces while eliminating anchor requirements. Use electronic stud finders to locate framing members accurately.
Anchor Selection: Choose anchors rated for canvas weight plus safety margin. Plastic anchors work for lightweight pieces while metal toggle bolts handle heavier artwork securely.
Plaster Wall Considerations
Older homes often feature plaster walls that require specialized approaches to prevent damage during installation. Understanding these materials is crucial for how to hang canvas art perfectly in historic or vintage properties.
"Plaster can crumble easily, so use picture hangers designed for plaster."
Material Fragility: Plaster's brittle nature requires gentle handling and specialized hardware designed specifically for these surfaces. Avoid excessive force that can crack or chip decorative plaster finishes.
Hardware Adaptation: Picture hangers with thin, sharp points penetrate plaster cleanly while distributing weight across larger surface areas. Avoid large screws or nails that can cause extensive damage.
Pre-drilling Techniques: Small pilot holes prevent cracking while guiding hardware placement accurately. Use masonry bits at slow speeds to maintain control and prevent damage.
Masonry Surface Installation
Brick and concrete walls provide excellent support but require specialized tools and techniques. These installations represent advanced applications of how to hang canvas art perfectly on challenging surfaces.
"Brick and concrete require a masonry drill and heavy-duty anchors."
Equipment Requirements: Masonry drilling demands hammer drills with appropriate bits designed for concrete or brick penetration. Standard drills lack sufficient power for effective masonry work.
Anchor Specifications: Heavy-duty masonry anchors provide secure mounting in dense materials while resisting pullout forces from artwork weight. Choose anchors rated for specific masonry types.
Installation Precision: Mark positions carefully since masonry holes cannot be easily relocated or repaired. Measure twice and drill once to ensure accurate placement.
Alternative Damage-Free Methods
Modern adhesive technologies offer how to hang canvas art perfectly solutions without permanent wall alterations. These methods appeal to renters or those preferring reversible installations.
"For light canvases on smooth surfaces, adhesive strips can work, but be cautious."
Weight Limitations: Adhesive systems typically support 8-16 pounds maximum, making them suitable only for lightweight canvas pieces. Exceeding weight ratings risks adhesive failure and artwork damage.
Surface Requirements: Smooth, clean surfaces provide optimal adhesion while textured walls reduce holding power significantly. Test small areas before full installation.
Removal Considerations: Quality adhesive strips remove cleanly when proper techniques are followed, while inferior products may leave residue or damage paint finishes.
Complete Tool and Supply Requirements
Essential Hardware Components
Professional canvas installation requires specific tools that ensure accuracy, safety, and quality results. Understanding these requirements is fundamental to how to hang canvas art perfectly.
"Now, let's get the right gear. Wall type matters. Drywall? You'll need anchors. Plaster? You might need masonry nails. Brick or concrete? A masonry drill and heavy-duty anchors are essential."
Measurement Tools: Quality measuring tape, level, and pencil ensure accurate positioning and straight installation. Digital levels provide enhanced precision for critical alignments.
Drilling Equipment: Cordless drill with appropriate bits, hammer for manual fastening, and screwdriver for hardware attachment. Backup manual tools prevent project delays from power tool failures.
Safety Gear: Safety glasses protect eyes from debris while work gloves improve grip and prevent hand injuries during installation processes.
Specialized Hardware: Picture hanging systems vary by installation method—sawtooth hangers for lightweight pieces, D-rings and wire for heavier canvas art, and various anchor types for different wall materials.
Hardware Selection by Canvas Weight
Matching hardware to canvas weight prevents installation failures while ensuring long-term security. This knowledge represents critical aspects of how to hang canvas art perfectly.
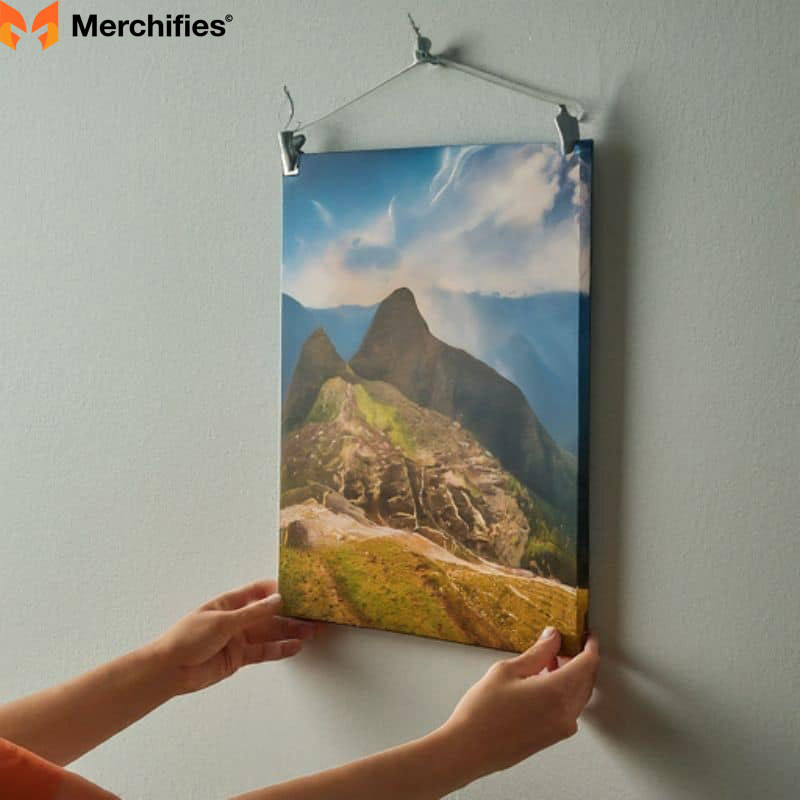
"Grab a measuring tape, level, drill, hammer, and picture hangers. Sawtooth brackets are great for light canvases, while eye hooks and wire are better for heavier ones."
Lightweight Canvas Options: Pieces under 10 pounds work well with sawtooth hangers, adhesive strips, or small picture hanging hooks that require minimal wall penetration.
Medium Weight Solutions: 10-20 pound canvases benefit from wire hanging systems with D-rings that distribute weight across multiple attachment points for enhanced security.
Heavy Canvas Requirements: Large pieces exceeding 20 pounds demand robust hardware including heavy-duty anchors, multiple hanging points, or direct stud mounting for maximum support.
Professional Tool Checklist
Comprehensive preparation prevents project delays and ensures professional results. This systematic approach demonstrates expertise in how to hang canvas art perfectly.
Primary Tools: Screwdriver, pencil for marking, hammer for manual fastening, measuring tape for accurate positioning, and level for straight alignment verification.
Precision Equipment: Digital level provides enhanced accuracy while laser levels assist with multiple piece alignment in gallery wall installations.
Protection Materials: Wall protection pads prevent damage during installation while drop cloths protect floors from debris and tools.
Hardware Variety: D-rings and wire sets for heavy pieces, sawtooth hangers and nails for lightweight installation, various anchor types for different wall materials.
Professional Installation Methods and Techniques
Sawtooth Hanger Installation Process
Sawtooth hangers provide simple, effective mounting for lightweight to medium canvas pieces. This method represents a fundamental technique in how to hang canvas art perfectly for most household applications.
"Sawtooth brackets are a suitable option for small to medium-sized canvases since they provide great balance. When you use a sawtooth hanger, mounting wall art is a breeze."
Weight Limitations: Sawtooth systems effectively support canvases up to 20 pounds when properly installed with appropriate wall anchors and quality hardware components.
Hardware Variety: Multiple sawtooth sizes accommodate different canvas dimensions while maintaining proportional support and balanced hanging characteristics.
Installation Advantages: Simple mounting process requires minimal tools while providing secure attachment that's easily adjustable for minor positioning corrections.
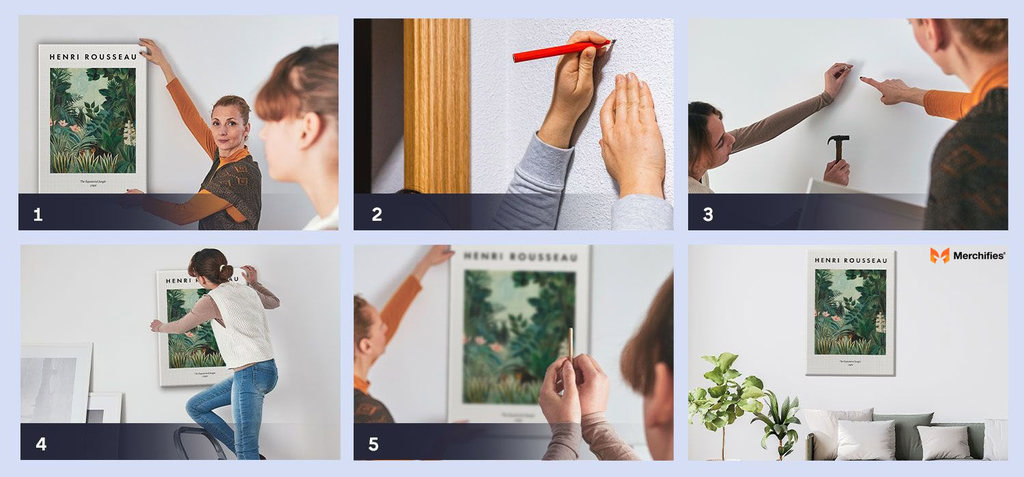
Step-by-Step Sawtooth Installation
- Step 1: Measure and Mark the Wall: "Mark the two sawtooth hanger holes on the wall through the corresponding holes in the hanger with a pencil. Remember that the sawtooth hanger's width should be larger than the space between these markings."
Positioning Strategy: Accurate wall marking ensures proper sawtooth engagement while preventing installation errors that compromise security or appearance.
Width Considerations: Sawtooth hanger dimensions must exceed nail spacing to ensure central notch engagement and balanced weight distribution.
- Step 2: Hammer the Nails on the Wall: "Carefully drive each nail into the designated holes while holding it at an angle of about 45 degrees to the wall. Ensure the nails are firmly driven in without sticking out from the wall."
Angle Technique: 45-degree nail positioning creates upward support that prevents sawtooth slippage while maintaining secure engagement under canvas weight.
Depth Control: Proper nail penetration ensures adequate holding power without excessive protrusion that interferes with canvas positioning.
- Step 3: Secure Sawtooth Hanger on Canvas: "Mark the middle of the canvas's upper wooden panel. This is where you will attach the sawtooth hanger to the canvas. After that, use screws or nails to attach the sawtooth hanger to the canvas print."
Center Positioning: Precise sawtooth placement ensures balanced hanging while preventing canvas tilting that compromises appearance and stability.
Attachment Methods: Screw or nail fastening provides secure sawtooth mounting while accommodating different canvas frame constructions and materials.
D-Ring and Wire Installation Method
Heavy canvas pieces require robust hanging systems that distribute weight effectively while providing adjustment flexibility. This advanced technique demonstrates professional expertise in how to hang canvas art perfectly.
"When weight support is your priority, D-rings and wire are the best options for hanging canvas artwork. This way of hanging is ideal for heavy or big canvases, since sawtooth hangers may not be sturdy enough."
Weight Distribution: Wire systems spread canvas weight across entire frame width while reducing stress concentration at individual mounting points.
Longevity Benefits: "Your artwork will hang steadily for many years to come since the wire uniformly distributes the weight over the canvas' back, lessening the strain on the frame."
Professional Standard: Wire hanging represents gallery-standard mounting that accommodates various canvas sizes and weights while maintaining security and adjustability.
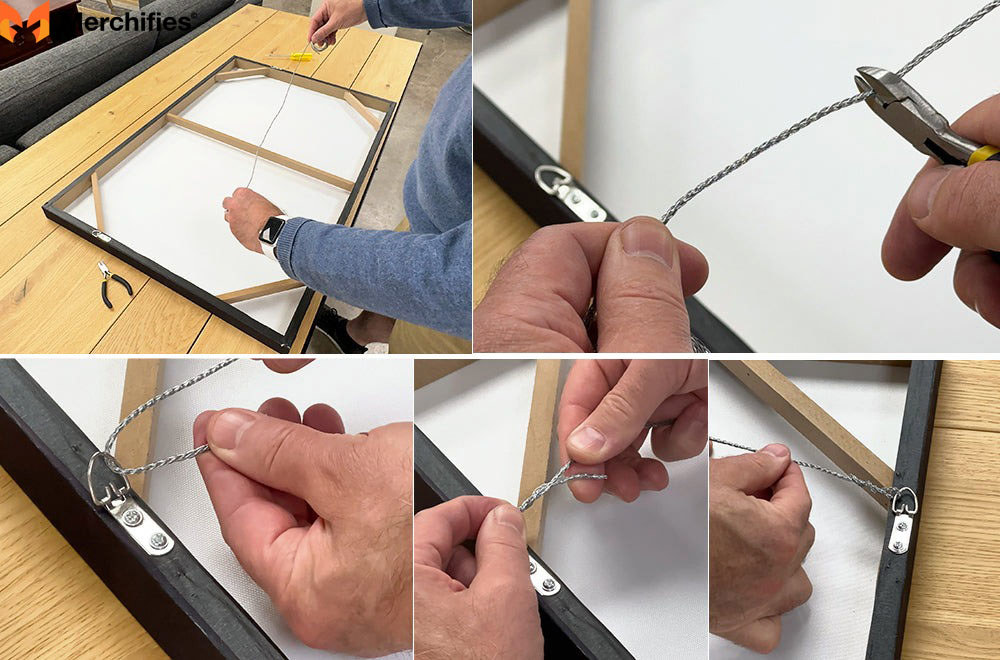
Detailed Wire Installation Process
- Step 1: Prepare the Canvas: "If your D-rings aren't already attached, locate their specific locations on the reverse side of the canvas print (often about a third of the way down from the top)."
Positioning Guidelines: D-ring placement one-third down from canvas top provides optimal balance while preventing forward tilting that compromises appearance.
Installation Security: Screw attachment into solid frame materials ensures D-ring stability under canvas weight and handling stresses.
- Step 2: Attach the Hanging Wire: "First, take a precise measurement of your canvas's breadth. With a little more room for adjustability, cut the hanging wire twice as long."
Wire Length Calculation: Double canvas width plus adjustment allowance ensures adequate wire length for secure attachment and positioning flexibility.
Attachment Technique: Loop wire through D-rings multiple times before securing to prevent slippage while maintaining adjustment capability.
- Step 3: Measure and Mark for Hooks on the Wall: "Mark the location of the middle of the two D-rings on the hanging wire with a pencil on the back of the canvas."
Center Point Determination: Accurate center marking ensures level canvas hanging while providing reference for wall hook positioning.
Transfer Method: Moving canvas center mark to wall position ensures proper hook placement for balanced support.
Nail-Free Installation Alternatives
Adhesive Strip Systems
Modern mounting solutions provide how to hang canvas art perfectly without permanent wall alterations. These systems appeal to renters and those preferring damage-free installations.
"Are you unwilling to use nails to damage your walls? A great option is to use picture hanging strips and glue. They are simple to install, suitable for most standard-sized canvases, and robust enough to support up to 16 pounds."
Weight Capacity: Quality adhesive systems support substantial canvas weights while maintaining secure attachment through advanced polymer adhesives designed specifically for artwork mounting.
Installation Benefits: "The best part? They may be removed entirely, leaving no damage, wall fissures, or sticky residue in their wake."
Application Versatility: Adhesive systems work on various surface types while accommodating different canvas sizes and weights within manufacturer specifications.
Adhesive Installation Process
- Step 1: Quantity Planning: "Four pieces of adhesive tape per canvas corner is a good rule of thumb. Nevertheless, additional items may be added to increase endurance."
Distribution Strategy: Corner placement provides balanced support while additional strips accommodate heavier pieces or enhanced security requirements.
- Step 2: Measurement and Marking: "Use a pencil to measure and mark the 'sticking' area on the wall and the canvas frame."
Precision Positioning: Accurate marking ensures proper alignment while preventing installation errors that compromise appearance or security.
- Step 3: Final Installation: "The final step is to cover the canvas board with glue and attach it to the wall."
Application Technique: Following manufacturer instructions ensures optimal adhesion while preventing premature failure or removal difficulties.
Achieving Perfect Leveling and Alignment
Professional Straightness Standards
Canvas alignment affects overall room aesthetics more than most people realize. Understanding how to hang canvas art perfectly includes mastering leveling techniques that create gallery-quality results.
"A crooked canvas can drive you crazy. Use your level to make sure it's perfectly straight."
Visual Impact: Even slight canvas tilting creates noticeable aesthetic problems that detract from artwork beauty and room harmony. Professional installation eliminates these distracting elements.
Tool Requirements: Quality levels provide accuracy necessary for perfect alignment while laser levels assist with multiple piece coordination in complex installations.
Adjustment Techniques: Minor positioning corrections through gentle manipulation ensure perfect alignment without requiring reinstallation or additional hardware.
Gallery Wall Alignment Strategies
Multiple canvas arrangements demand systematic approaches that ensure cohesive appearance across entire wall displays. These techniques represent advanced applications of how to hang canvas art perfectly.
"For gallery walls, use a measuring tape and level to align multiple canvases."
Spacing Consistency: Uniform distances between pieces create professional appearance while preventing visual chaos that undermines overall design impact.
Baseline Establishment: Creating consistent reference lines ensures proper alignment across multiple pieces regardless of individual canvas dimensions or orientations.
Progressive Installation: Sequential mounting with continuous verification prevents cumulative errors that compromise entire gallery wall appearance.
Fine-Tuning Adjustment Methods
Minor Correction Techniques: "If you notice it's slightly off, gently nudge it until it's right. Sometimes you can use small bits of felt on the back bottom corners to adjust very minor leveling issues."
Gentle Adjustment: Small positioning corrections prevent hardware stress while achieving perfect alignment through patient fine-tuning processes.
Felt Padding Solutions: Micro-adjustments through strategic padding placement correct minor leveling issues without requiring hardware modifications or reinstallation.
Visual Verification: Step-back assessment from multiple viewing angles ensures alignment quality meets professional standards throughout room usage scenarios.
Aesthetic Placement and Room Integration
Strategic Positioning for Maximum Impact
Understanding how to hang canvas art perfectly extends beyond technical installation to include aesthetic placement that enhances overall room design and functionality.
"Think about your room's layout and furniture. A large canvas can be a focal point, while smaller ones can add interest to a bare wall."
Focal Point Creation: Large canvas pieces anchoring seating areas or accent walls create visual centers that organize room design while drawing attention to artwork quality.
Proportional Relationships: Canvas sizing must complement wall dimensions and surrounding furniture to maintain visual balance without overwhelming or underwhelming space proportions.
Traffic Flow Consideration: Artwork placement should enhance room navigation while ensuring comfortable viewing from primary seating and standing positions.
Color and Style Harmony
Design Integration: "Consider the colors and style of your art and how they complement your decor. A well-placed canvas can transform a room."
Color Coordination: Artwork colors should enhance existing palette while providing visual interest through complementary or contrasting hues that energize space design.
Style Consistency: Canvas style should align with room aesthetics while reflecting personal taste and lifestyle preferences for authentic home environment creation.
Transformative Potential: Strategic canvas placement can dramatically alter room perception, creating sophistication, warmth, or energy that enhances daily living experiences.
Lighting and Environmental Factors
Natural Light Interaction: Window placement, seasonal changes, and daily light patterns affect artwork visibility and color perception throughout different times and weather conditions.
Artificial Lighting: Room lighting systems should complement canvas placement while avoiding glare or shadows that interfere with artwork appreciation and viewing comfort.
Environmental Protection: Avoid placement near heat sources, high humidity areas, or direct sunlight that can damage canvas materials over time.
Safety Precautions and Risk Management
Personal Safety Protocols
Professional installation prioritizes safety throughout all processes. Understanding how to hang canvas art perfectly includes comprehensive risk management that protects both installer and property.
"Safety first! Wear safety glasses when drilling. Use a stud finder to avoid electrical wires or pipes."
Eye Protection: Drilling operations create debris that poses serious injury risks to unprotected eyes. Quality safety glasses provide essential protection during all power tool operations.
Utility Detection: Electronic stud finders include wire detection capabilities that prevent accidental contact with electrical systems or plumbing that could cause injury or property damage.
Lifting Assistance: "If your canvas is heavy, get a friend to help you lift it. And always double-check your hardware to make sure it can handle the weight."
Team Approach: Large canvas installation benefits from multiple people who can handle positioning, leveling, and securing simultaneously while preventing drops or injuries.
Property Protection Measures
Wall Integrity: Proper installation techniques prevent unnecessary damage to wall surfaces while ensuring secure mounting that won't compromise structural elements.
Hardware Verification: Weight capacity confirmation prevents hardware failure that could damage artwork, walls, or surrounding property while ensuring long-term security.
Installation Quality: Professional techniques prevent common problems like loose mounting, inadequate support, or improper positioning that lead to future failures.
Emergency Preparedness
Tool Safety: Proper handling of drills, hammers, and sharp hardware prevents injuries while maintaining project efficiency and quality results.
First Aid Readiness: Keep basic first aid supplies available during installation projects to address minor cuts, scrapes, or other common workshop injuries promptly.
Workspace Organization: Maintain clean, organized work areas that prevent trips, falls, or tool-related accidents during complex installation processes.
Frequently Asked Questions About Canvas Art Installation
What is the best method for hanging heavy canvas art?
For heavy canvas pieces over 20 pounds, use D-ring and wire systems that distribute weight across the entire frame width. Install into wall studs when possible, or use heavy-duty anchors rated for twice the canvas weight. This method provides maximum security while preventing hardware failure that could damage artwork or walls.
How high should I hang canvas art above furniture?
Maintain 6-12 inches of space between furniture tops and canvas bottoms while keeping artwork centers at eye level (57-60 inches from floor). This creates visual connection without overwhelming furniture pieces while ensuring comfortable viewing from typical seating positions.
Can I hang canvas art without making holes in the wall?
Yes, adhesive hanging strips support canvas pieces up to 16 pounds without nail holes. These systems work best on smooth, clean surfaces and remove cleanly when proper techniques are followed. For heavier pieces, consider leaning against walls or using easel displays as alternatives.
What tools do I need to hang canvas art professionally?
Essential tools include measuring tape, level, drill with appropriate bits, hammer, screwdriver, pencil for marking, and safety glasses. Hardware requirements vary by installation method—sawtooth hangers for lightweight pieces or D-rings with wire for heavier canvas art.
How do I ensure my canvas hangs perfectly straight?
Use a quality level during installation and check alignment from multiple viewing angles. For minor adjustments, gently reposition the canvas or add small felt pads to bottom corners for micro-leveling. Mark reference points before installation to ensure accurate positioning.
What's the difference between sawtooth and wire hanging methods?
Sawtooth hangers work best for lightweight canvas pieces under 20 pounds, providing simple installation and easy adjustment. Wire systems handle heavier artwork by distributing weight across the entire frame, offering superior security and longevity for valuable pieces.
How do I hang canvas art on different wall types?
Drywall requires appropriate anchors for canvas weight, plaster needs specialized picture hangers to prevent cracking, and masonry surfaces demand hammer drills with heavy-duty anchors. Always match hardware to wall material and canvas weight for secure installation.
Advanced Techniques for Complex Installations
Gallery Wall Coordination
Creating cohesive multiple-canvas displays requires systematic planning that ensures professional results. These advanced applications of how to hang canvas art perfectly demonstrate expertise in complex room design.
Template Systems: Paper templates allow arrangement testing without wall damage while ensuring optimal spacing and alignment across multiple pieces of varying dimensions.
Baseline Coordination: Establishing consistent reference lines creates unity across different canvas sizes while maintaining individual piece prominence within overall composition.
Progressive Installation: Sequential mounting with continuous measurement verification prevents cumulative errors that compromise entire gallery wall appearance and balance.
Large Format Canvas Challenges
Oversized artwork presents unique installation challenges that require specialized techniques and equipment for successful completion while ensuring long-term security and stability.
Structural Support: Large canvases demand multiple mounting points, stud attachment, or specialized hardware that distributes weight effectively across wall structures.
Team Installation: Multiple installers provide necessary handling capability while ensuring accurate positioning and secure attachment during complex mounting procedures.
Environmental Considerations: Large pieces affect room air circulation and may require modified lighting or furniture arrangements to optimize viewing and preservation.
Professional Finishing Techniques
Hardware Concealment: Advanced installation methods hide mounting hardware completely while maintaining adjustment capability and security for premium aesthetic results.
Precision Alignment: Laser levels and digital measuring tools ensure gallery-standard accuracy that distinguishes professional installation from amateur attempts.
Quality Verification: Systematic inspection processes confirm installation security, alignment accuracy, and aesthetic quality before project completion.
Long-Term Maintenance and Care
Installation Monitoring
Regular inspection ensures continued security while preventing problems that could compromise artwork safety or wall integrity over time.
Hardware Inspection: Periodic checking of mounting hardware identifies loosening, corrosion, or wear that requires attention before failures occur.
Alignment Verification: Seasonal settling or environmental changes may affect canvas positioning, requiring minor adjustments to maintain perfect appearance.
Wall Assessment: Monitor wall conditions around installations for cracks, discoloration, or other changes that might indicate structural issues requiring professional attention.
Preventive Maintenance
Cleaning Protocols: Appropriate cleaning methods for both canvas and mounting hardware prevent deterioration while maintaining appearance quality.
Environmental Control: Managing humidity, temperature, and lighting conditions protects canvas materials while preserving installation hardware integrity.
Professional Assessment: Annual evaluation by qualified installers ensures continued security while identifying potential improvements or necessary updates.
Conclusion: Mastering Professional Canvas Installation
How to hang canvas art perfectly combines technical expertise with aesthetic understanding, creating installations that enhance both artwork beauty and room design. Through proper planning, appropriate tool selection, and systematic execution, anyone can achieve gallery-quality results that protect valuable artwork while creating stunning visual displays.
"How To Hang Canvas Art Perfectly might seem daunting, but with a little planning and the right techniques, you can achieve professional results. Remember to measure, use the right tools, and consider your wall type. And don't forget the aesthetic impact!"
The key to successful canvas installation lies in understanding that each element—from initial planning through final adjustment—contributes to overall success. Wall type assessment, hardware selection, installation technique, and aesthetic placement all work together to create secure, beautiful displays that enhance living spaces while protecting valuable artwork investments.
Professional results require patience, attention to detail, and willingness to invest time in proper preparation and execution. However, the satisfaction of perfectly hung canvas art that transforms ordinary rooms into sophisticated spaces makes the effort worthwhile for any homeowner who values beauty and quality.
"Now go forth and display your art with confidence. You've got this!" Start with simple installations to build confidence and skills, then gradually tackle more complex projects as expertise develops. Remember that **how tohow to hang canvas art perfectly is a learnable skill that improves with practice and attention to proven techniques.
Your canvas art deserves professional-quality installation that showcases its beauty while ensuring long-term security and enjoyment. By following these comprehensive guidelines and maintaining focus on quality throughout every step, you'll create stunning displays that reflect both artistic appreciation and technical competence in your home environment.