-da0801079a650a2e.jpeg)
17 Year Anniversary Quotes: 110+ Funny, Romantic & Furniture Wishes (2026)
Mar, 12 2026
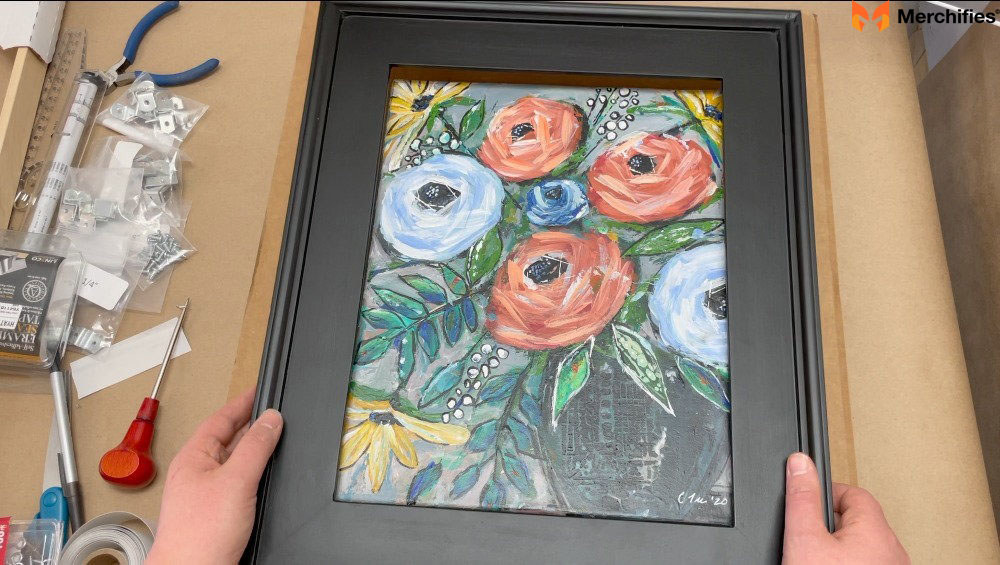
Ever walked into a gallery and wondered why those canvases look so darn good? It's the framing, folks. A well-framed canvas adds that touch of class, protects your art from dust and damage, and just makes it look finished. Whether you're a DIY whiz or prefer to leave it to the pros, let's get you sorted.
-d003abdd7905aa71.jpeg)
After spending over seventeen years helping artists, collectors, and homeowners transform their artwork through professional framing techniques, I've learned that knowing How To Frame Canvas Art properly can elevate any piece from amateur to gallery-quality presentation. The difference between a well-framed canvas and an unframed one is like comparing a rough diamond to a polished gem.
How to Frame Canvas Art? First, let's talk canvas types. You've got stretched canvases, canvas prints, and canvas panels. Each has its own needs when it comes to framing. Then, why frame? Protection, plain and simple. Dust, humidity, even just bumping it, can damage your art. And let's face it, a good frame makes it look way better. Before you start, take a good look at your canvas. Size, depth, those edges – they all matter.
Canvas art fundamentals require understanding the different types of canvas artwork before selecting appropriate framing methods and materials. Stretched canvases come pre-mounted on wooden frames and need different framing approaches than canvas prints or loose canvas panels. Moreover, professional canvas framing knowledge involves recognizing how each canvas type responds to different mounting techniques, environmental conditions, and long-term display requirements.
Canvas protection through framing serves multiple essential functions beyond mere aesthetic enhancement, including safeguarding artwork from environmental damage, physical contact, and deterioration over time. Unframed canvases accumulate dust, suffer from humidity fluctuations, and remain vulnerable to accidental damage that can permanently harm valuable artwork. Additionally, proper canvas preservation methods through strategic framing help maintain color integrity, prevent warping, and extend the lifespan of both original paintings and high-quality prints.
Canvas assessment for framing involves careful examination of dimensions, edge conditions, surface texture, and overall structural integrity to determine the most appropriate framing approach. Canvas depth affects frame selection, while edge quality determines whether additional preparation or trimming is necessary before installation. Furthermore, canvas condition evaluation helps identify potential issues like loose corners, surface damage, or mounting problems that should be addressed during the framing process.
What's the difference between framing stretched canvas versus canvas prints? Stretched canvas framing typically requires floater frames or deep rabbet frames to accommodate the existing wooden stretcher bars. Canvas print framing offers more flexibility since prints can be mounted on backing boards or stretched onto new frames. Consider the canvas thickness and mounting method when selecting appropriate frame styles and depths.
Okay, you're the hands-on type? Awesome. You'll need some tools. Frames, of course, maybe some stretching bars, canvas pliers, and staples. And don't forget measuring and cutting tools. First, get your canvas ready. If it's unstretched, you'll need to stretch it. And make sure it's clean. No dust bunnies allowed! Now, framing techniques. You can make a flush mount frame, a mitered frame, or even a floater frame. Each has its own look. I've done all of these, and trust me, a good mitered frame is a game-changer. Just make sure you measure twice, cut once. And safety first! Wear gloves and eye protection.
DIY canvas framing equipment includes essential tools and materials that enable home framers to achieve professional-quality results through proper preparation, precise measurements, and careful assembly techniques. Basic frame construction requires measuring tools, cutting equipment, joining hardware, and finishing supplies that work together to create secure, attractive frames. Moreover, home canvas framing supplies should include safety equipment and quality materials that ensure both user protection and long-lasting frame construction.
Canvas preparation for DIY framing involves cleaning, stretching if necessary, and ensuring optimal surface conditions before beginning frame construction or installation. Unstretched canvases require mounting on stretcher bars using canvas pliers and proper tensioning techniques to create smooth, taut surfaces. Additionally, canvas cleaning and preparation methods include dust removal, surface inspection, and minor repair procedures that improve final frame appearance and artwork preservation.
DIY framing techniques comparison reveals that different methods suit various skill levels, aesthetic preferences, and canvas types, with each approach offering distinct advantages and challenges. Flush mount frames provide simple, clean appearances, while mitered frames offer traditional elegance through precise corner joints. Furthermore, floater frame construction creates contemporary gallery-style presentations by allowing space between canvas edges and frame sides, emphasizing the artwork's three-dimensional qualities.
Essential safety measures for canvas framing protect both the framer and the artwork through proper tool handling, workspace preparation, and protective equipment usage throughout the construction process. Sharp cutting tools, power equipment, and chemical finishes all present potential hazards that require appropriate precautions. Moreover, canvas framing safety protocols include proper ventilation, eye protection, and careful handling techniques that prevent both personal injury and artwork damage during the framing process.
What tools do I absolutely need for DIY canvas framing? Essential canvas framing tools include a miter saw or miter box, measuring tape, square, clamps, sandpaper, and appropriate fasteners. Basic DIY framing supplies also require wood glue, finishing materials, and safety equipment like gloves and eye protection. Quality tools produce better results and safer working conditions.
Frames aren't one-size-fits-all. You've got floater frames, traditional frames, modern minimalist frames. And materials? Wood, metal, even composites. Pick a How to Frame Canvas Art that complements your art. A rustic painting? A wood frame. A modern print? Maybe a sleek metal frame. And think about your room's décor. You want it to match, not clash. Also, if it is a valuable piece of art, consider archival quality materials.
Canvas frame style selection requires understanding how different frame types interact with various art styles, room décor, and viewing environments to create harmonious, visually appealing displays. Frame style dramatically affects how artwork appears and feels within its surroundings, influencing everything from perceived value to aesthetic impact. Moreover, strategic frame style choices can enhance artwork's strengths, minimize weaknesses, and create desired emotional responses from viewers while supporting overall design objectives.
Frame material characteristics offer distinct advantages and limitations that affect appearance, durability, cost, and maintenance requirements throughout the frame's lifespan. Wood frames provide warmth, texture, and traditional appeal while offering excellent durability and refinishing possibilities. Meanwhile, metal frame benefits include sleek modern aesthetics, precise construction, superior strength-to-weight ratios, and resistance to warping or humidity damage.
Artwork and frame compatibility involves analyzing artistic style, color palette, subject matter, and emotional tone to select frames that enhance rather than compete with the canvas content. Rustic paintings benefit from natural wood frames that echo organic themes, while contemporary art often pairs well with clean metal or minimalist wood frames. Additionally, frame and décor coordination ensures that framed artwork integrates seamlessly with existing interior design elements while maintaining focus on the artistic content.
Archival framing considerations become essential for valuable artwork, original paintings, or pieces with significant monetary or sentimental value that require long-term preservation. Archival materials resist acidification, chemical degradation, and environmental damage that can permanently harm artwork over time. Furthermore, museum-quality framing standards include acid-free backing materials, UV-protective glazing, and conservation-grade adhesives that maintain artwork integrity for decades or centuries.
How do I match frame styles to different art types? Traditional artwork framing typically uses classic wood frames with ornate or simple profiles depending on the piece's formality. Contemporary art framing often employs clean-lined metal frames or minimalist wood styles that don't compete with bold artistic statements. Photography canvas framing works well with modern materials that emphasize the image rather than the frame itself.
Not a DIY person? No problem. Pros have the expertise and tools to do it right. They've got access to a wider range of materials and styles, too. And they know how to preserve your art. Finding a good framer? Ask around, check reviews. And don't be afraid to ask questions and get quotes. The process is simple. You'll have a consultation, pick your frame, and they'll do the rest.
Professional framing advantages include specialized expertise, premium materials access, advanced equipment, and conservation knowledge that ensures optimal artwork protection and presentation quality. Experienced framers understand complex technical requirements, material compatibility issues, and preservation standards that amateur framers often overlook. Moreover, expert canvas framing services provide warranties, insurance coverage, and quality guarantees that protect both artwork and investment value throughout the framing process.
Professional framer selection involves researching credentials, examining portfolio examples, reading customer reviews, and evaluating communication skills to identify framers who understand your specific needs and aesthetic preferences. Qualified framers demonstrate knowledge of conservation principles, material science, and design aesthetics through their work examples and customer interactions. Additionally, reputable framing shop characteristics include proper insurance, established business history, transparent pricing, and willingness to discuss techniques and material options in detail.
Professional framing consultation process typically begins with artwork evaluation, continues through style and material selection, and concludes with timeline and pricing discussions that establish clear expectations. During consultations, framers assess canvas condition, discuss preservation requirements, and recommend appropriate techniques based on artwork value and intended use. Furthermore, comprehensive framing service workflow includes design mockups, progress updates, and quality control checks that ensure satisfactory results and customer satisfaction.
Professional framing cost considerations reflect the value of expertise, premium materials, specialized equipment, and time investment required to produce museum-quality results. While professional services cost more than DIY approaches, they often provide superior longevity, appearance, and protection that justify the investment for valuable artwork. Moreover, framing service value assessment should consider long-term benefits, warranty coverage, and potential artwork damage costs when comparing professional and amateur approaches.
What should I look for when choosing a professional framer? Look for qualified professional framers with industry certifications, extensive portfolios, and positive customer reviews. Reputable framing services should offer consultations, show material samples, explain preservation techniques, and provide clear pricing. Ask about their experience with your specific type of canvas art and request references from previous customers.
Alright, your canvas is framed. Now, how to hang it? First, get your hanging hardware. Wire, D-rings, whatever works. And protect the back of the frame. You don't want it scratching your wall. Location matters. Eye level is usually best. And use the right hardware for your wall type. You don't want that masterpiece crashing down. And get creative with your display. A gallery wall with multiple canvases? Awesome. Or mix and match with other décor.
Canvas hanging hardware selection depends on artwork weight, frame construction, wall type, and desired adjustability to ensure secure mounting and easy repositioning when needed. Heavy canvases require robust hanging systems with multiple attachment points, while lighter pieces may need only simple wire or D-ring systems. Moreover, professional hanging hardware options include museum-quality systems that provide superior security, adjustability, and artwork protection during installation and long-term display.
Wall protection during hanging prevents damage to both walls and artwork through proper backing materials, protective pads, and appropriate fastener selection based on wall construction and surface materials. Frame backs can scratch painted walls, while improper anchoring can cause both artwork and wall damage during installation or removal. Additionally, protective hanging techniques include using felt pads, proper anchor sizing, and careful positioning that maintains walls while ensuring artwork security.
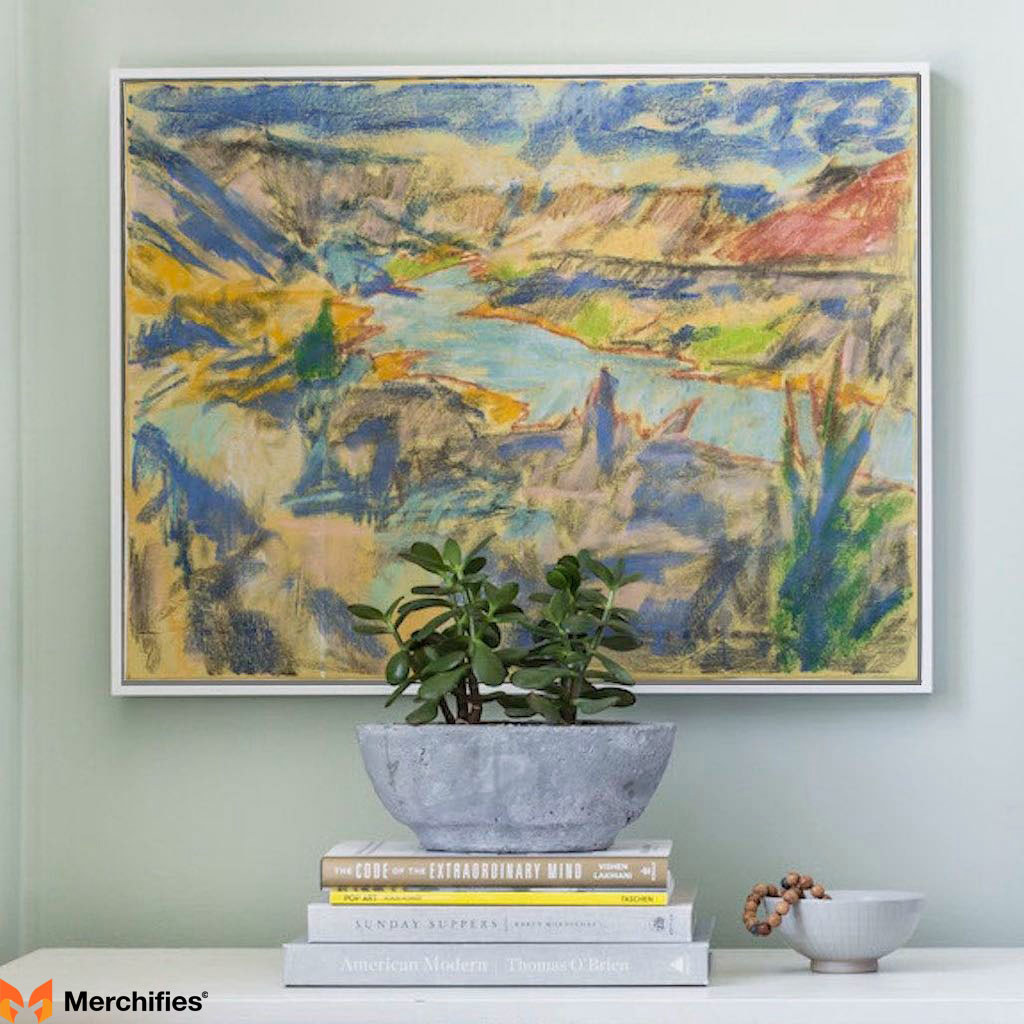
Optimal artwork positioning follows established guidelines for height, lighting, and viewing angles while considering room function, furniture placement, and traffic patterns that affect how artwork is experienced. Standard eye-level placement works for most situations, but specific circumstances may require adjustments for optimal viewing and aesthetic integration. Furthermore, strategic canvas placement principles account for natural and artificial lighting conditions that enhance color reproduction and minimize glare or shadows.
Creative display arrangements transform single artworks into comprehensive design elements through thoughtful grouping, spacing, and coordination with other decorative elements throughout the room. Gallery walls allow multiple canvases to work together, creating visual narratives or aesthetic themes that enhance overall interior design. Moreover, innovative canvas display ideas include rotating exhibitions, seasonal arrangements, and integrated lighting systems that highlight artwork while contributing to room ambiance.
What's the proper height for hanging canvas art? Standard canvas hanging height places the artwork's center 57-60 inches from the floor, which aligns with average eye level for most viewers. Proper art placement guidelines may require adjustments based on ceiling height, furniture placement, and room function. Consider the primary viewing position when determining optimal height for your specific space.
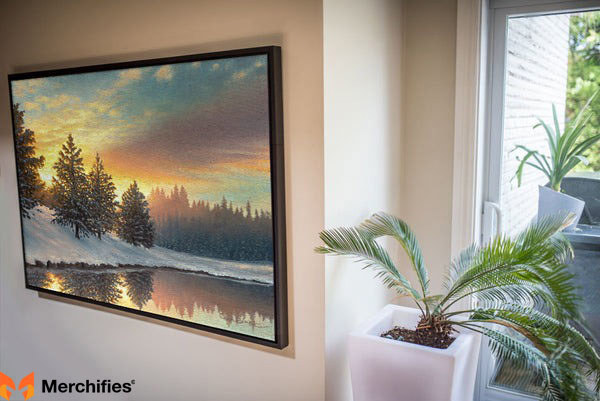
You want that Canvas Art to last, right? Keep it out of direct sunlight, and away from humidity. And clean it gently. A soft cloth is your friend. Also, UV-protective sprays or varnishes can help prevent fading.
Long-term canvas preservation requires understanding environmental factors, cleaning procedures, and protective treatments that maintain artwork integrity and appearance throughout decades of display and enjoyment. Environmental damage occurs gradually through exposure to light, humidity fluctuations, temperature extremes, and airborne pollutants that degrade both canvas and frame materials. Moreover, comprehensive artwork protection strategies include preventive measures, regular maintenance schedules, and professional conservation services that address issues before they cause permanent damage.
Environmental protection for framed canvas involves controlling light exposure, maintaining stable humidity levels, ensuring adequate air circulation, and minimizing contact with harmful substances that cause gradual deterioration. Direct sunlight causes rapid fading and canvas degradation, while humidity extremes lead to warping, mold growth, and adhesive failure. Additionally, climate control for artwork includes positioning away from heat sources, air conditioning vents, and areas with significant temperature fluctuations that stress both canvas and frame materials.
Proper canvas cleaning techniques use gentle methods and appropriate materials that remove dust and surface contaminants without damaging delicate canvas textures or protective coatings. Regular dusting with soft, lint-free cloths prevents accumulation of particles that can scratch surfaces or attract moisture and pollutants. Furthermore, safe artwork maintenance procedures avoid harsh chemicals, excessive moisture, or abrasive materials that can permanently damage canvas fibers, paint layers, or protective treatments.
Protective treatment options include UV-filtering glazing, protective sprays, and conservation varnishes that shield artwork from light damage, atmospheric pollutants, and physical contact while maintaining visual clarity. These treatments require careful selection and professional application to ensure compatibility with existing materials and long-term effectiveness. Moreover, advanced canvas protection methods may include museum-quality framing systems with sealed environments that provide superior protection for valuable or irreplaceable artwork.
All You Need Before Framing Canvas Painting
– Wood: The lengths you require are solely based on the dimensions of your frame. For assistance calculating how much wood you require, consider step 1 below.
– Hardware: Finishing Nails for Wood; Hardware for Hanging (optional)
– Paint, or wood stain (the colors you want)
– Wood Filler (optional)
– Tools: Measurement tape; Toolbox and Saw
– Basic Clamps
– Sandpaper, a band clamp sanding block, or a sander

Complete canvas framing preparation requires gathering all necessary materials, tools, and supplies before beginning construction to ensure smooth workflow and professional results. Proper preparation prevents project delays, reduces errors, and helps maintain focus on quality craftsmanship throughout the framing process. Moreover, organized framing project setup includes workspace preparation, safety equipment arrangement, and material organization that supports efficient, safe construction procedures.
We'll get into the fundamentals of framing your canvas after you've gathered the supplies you'll need.
Systematic canvas framing methodology follows proven procedures that ensure consistent, professional results while minimizing common mistakes and material waste. Each step builds upon previous work, creating a logical progression from initial measurements through final installation and quality control. Additionally, structured framing workflow helps both beginners and experienced framers maintain quality standards while developing skills and confidence in canvas framing techniques.
Calculating your frame measurements is the first and most difficult part of the entire project (at least it was for me!). This is due to the fact that in addition to the mitered joints (diagonal junctions), you also need to take the depth of the frame into consideration. Calculate the correct width and height dimensions for your specific canvas size AND framing preferences using the diagram below as a guide.
Accurate dimension calculation forms the foundation of successful canvas framing, requiring precise measurements, mathematical calculations, and careful consideration of all frame components and joining methods. Frame dimensions must account for canvas size, rabbet depth, miter joint angles, and any desired reveal or overlap between canvas and frame edges. Moreover, professional measurement techniques include multiple verification steps, allowances for wood expansion, and systematic documentation that prevents costly errors during cutting and assembly.
It's more probable that you'll need to conduct touch-ups if you paint before assembly, as the finish is vulnerable to scratches. After assembly, painting or staining will give you a better finish, but it may involve a lot of taping, masking, and waiting for coats to dry (especially for a two-toned look). We advise priming the wood with paint or stain (and doing touch-ups as needed after assembly). As a result, before (yes, before) you cut your wood pieces apart, begin by painting or staining each piece in your desired colors.
-61f6baa2547ce487.jpeg)
Wood finishing strategy involves timing considerations, application techniques, and quality expectations that affect both appearance and durability of the completed frame. Pre-assembly finishing allows better access to all surfaces but may require touch-ups after construction, while post-assembly finishing provides superior final appearance but complicates application procedures. Furthermore, optimal finishing workflow balances efficiency, quality, and practicality based on project requirements, skill level, and available time and workspace.
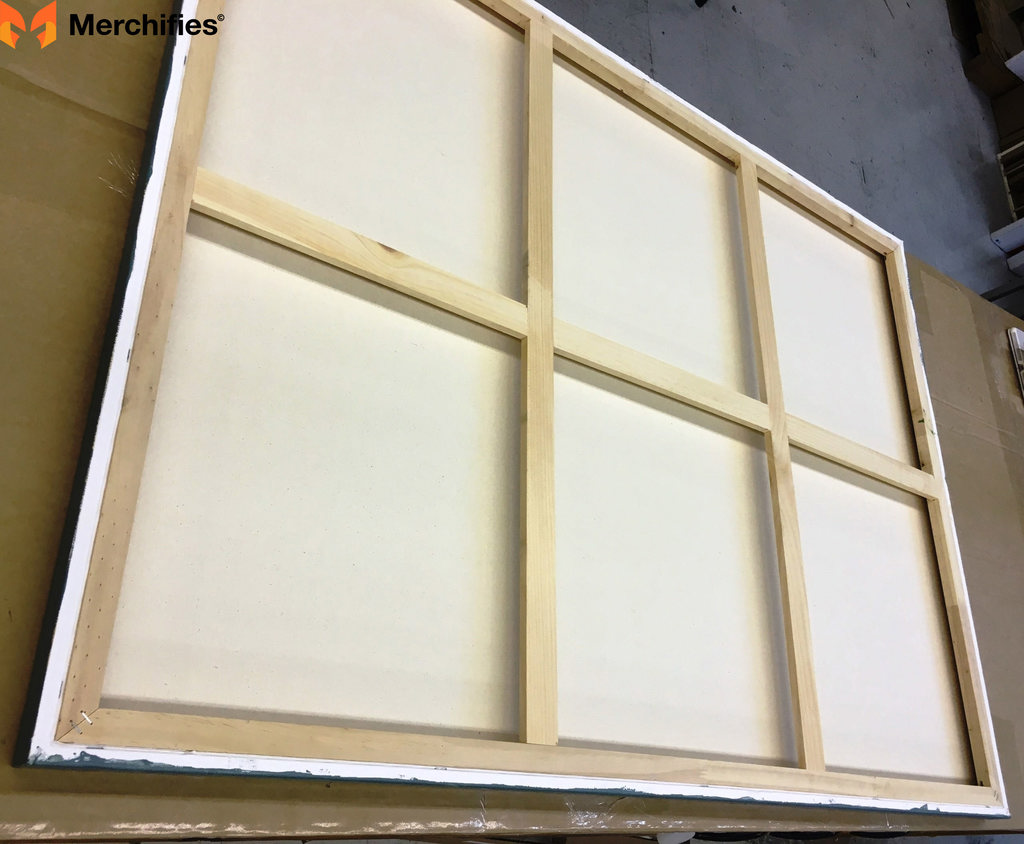
Cutting multiple pieces of wood to the same lengths can be exceedingly challenging if you are new to DIY and/or don't have really accurate power tools. Therefore, we advise adhering the inlay pieces to the outside frame parts first (before you trim them down to the right size). By doing this, you can make sure the two layers are tightly coiled around the frame. To the inside bottom border of the white 1x2s, glue the gold trim using gorilla wood glue. Use clamps to keep everything firmly together while the glue cures once it has been bonded and placed.
Laminated frame construction simplifies cutting procedures while ensuring perfect alignment between decorative elements and structural frame components throughout the assembly process. This technique reduces precision cutting requirements while maintaining professional appearance standards that would otherwise require advanced woodworking skills. Moreover, efficient assembly sequencing minimizes errors, reduces material waste, and improves final quality through logical construction progression that builds complexity gradually.
Next, reduce each length of the frame (the combined white and gold pieces) to the precise dimensions noted in Step 1 using a miter box and saw. Make sure the white frame piece is longer than the gold by 45 degrees when you cut the 45-degree angle ends. After cutting, use a sanding block to sand the freshly cut edges to make them as flat and smooth as possible on both sides.
TIP: Getting your lengths absolutely correct around your frame can be challenging if you are new to cutting mitered corners (or if you're not excellent at arithmetic like me). In order to fit each side to your canvas as you go, I advise cutting each length a little bit longer than you need. Even though you might need to repeatedly go back and make new cuts, doing so will guarantee that your frame components match up and hug your canvas just properly in the end (versus being too big or too small).
Precision cutting techniques for mitered frame corners require understanding angle geometry, cutting tool capabilities, and measurement verification methods that ensure perfect joints and proper canvas fit. Miter cuts demand exact 45-degree angles and consistent length measurements to create tight, gap-free corners that maintain structural integrity. Additionally, professional cutting strategies include test cuts, incremental fitting procedures, and systematic verification methods that prevent irreversible errors during frame construction.
Place wood glue at each corner junction and then tighten the complete frame with a band clamp after trimming each side of the frame to precisely fit the canvas (not shown). Make sure to brush away any adhesive that leaks before drying once more. Fixing the frame as a whole. Once the wood has dried, you might be tempted to use flat L-brackets around the back of the frame as corner bracing or lightly tap finishing nails into the corners. Although you can, I don't believe it is required. At first, we had serious doubts about whether the wood glue would hold the frame together securely. But it unquestionably was. This frame hung flawlessly on our walls for more than two years without the need for additional nails at the corners, and it was moved twice without suffering any harm.
Structural frame assembly relies on proper adhesive selection, clamping techniques, and curing procedures that create permanent, durable joints capable of supporting canvas weight and handling stress over many years. Modern wood adhesives provide exceptional strength when applied correctly, often exceeding the strength of the wood itself when fully cured. Moreover, professional assembly quality control includes excess adhesive removal, joint alignment verification, and systematic curing procedures that ensure maximum bond strength and appearance quality.
If the mitered corner seams around the front of the frame bother you, you can fill them in with wood filler, sand them smooth, then touch up the paint to make them less obvious. We opted not to bother filling the seams, and after the canvas frame was put on the wall, it was hardly evident.
Aesthetic refinement techniques address visible imperfections through filling, sanding, and touch-up procedures that create seamless, professional appearances worthy of gallery display. Corner seam visibility depends on wood selection, cutting precision, assembly technique, and viewing distance considerations. Furthermore, finish quality optimization balances time investment with visual impact, allowing framers to choose appropriate quality levels based on artwork value, display location, and personal standards.
The canvas's frame needs to be attached to it in the last stage. Two strategies exist for doing this:
From the exterior: Finishing nails from the outside of the frame can be softly tapped into the canvas. However, doing so will expose the nails on the outside of the frame, which you will need to sink, then fill in with wood filler and paint over.
From the inside: As an alternative, you can turn the entire frame and canvas combination over and hammer nails into the sides of the frame from the inside canvas. If you decide to use this technique, be careful to hammer the nails into the rear of the frame (the edge that will rest against the wall) so they are hidden from view.

Canvas attachment methodology determines both security and appearance quality through fastener selection, placement strategy, and visibility considerations that affect long-term performance and aesthetic appeal. Interior attachment methods provide cleaner appearances but require careful positioning to ensure adequate holding power without damaging canvas or frame materials. Moreover, professional mounting techniques balance security requirements with preservation standards that protect valuable artwork while ensuring stable, long-term display capability.
If necessary, add some hanging hardware as the last step. The canvas we used was large and light enough to rest conveniently on a few nails on the wall. You can attach certain picture hangers or D-rings to the top, sides, or back of a shallow or hefty frame, though.
Hanging hardware installation considers artwork weight, frame construction, wall type, and desired adjustability to ensure secure mounting and easy repositioning throughout the artwork's display life. Hardware selection affects both security and convenience, with different systems offering various advantages for specific applications and user preferences. Additionally, professional hanging system design includes redundant attachment points, load distribution strategies, and adjustment mechanisms that accommodate changing display requirements over time.
So, there you have How to Frame Canvas Art. Framing canvas art, it's not rocket science. Whether you're a DIY pro or prefer to hire a professional, the right frame can make a world of difference. Don't be afraid to experiment and find what works for you. Your art deserves to shine!
After years of helping people transform their artwork through proper framing techniques, I've learned that successful canvas framing combines technical knowledge with creative vision and attention to detail throughout the entire process. The most impressive framed canvases result from careful planning, quality materials, proper construction techniques, and thoughtful presentation that honors both the artwork and the viewing environment.
Mastering canvas framing skills opens up endless possibilities for enhancing artwork, creating professional displays, and preserving valuable pieces for future generations. Whether you choose DIY approaches or professional services, understanding framing principles helps you make informed decisions that produce results you'll enjoy for years to come.
Remember that professional canvas presentation reflects both artistic appreciation and technical competence, demonstrating respect for the artwork while enhancing its visual impact and longevity. The time and effort invested in proper framing techniques pay dividends through improved appearance, better preservation, and increased enjoyment of your canvas art collection. Your walls are indeed about to become much more interesting with properly framed canvas artwork that showcases your pieces at their absolute best.
-d4c38c342cdf20ca.jpeg)


-b555fcc6b204c456.jpeg)


